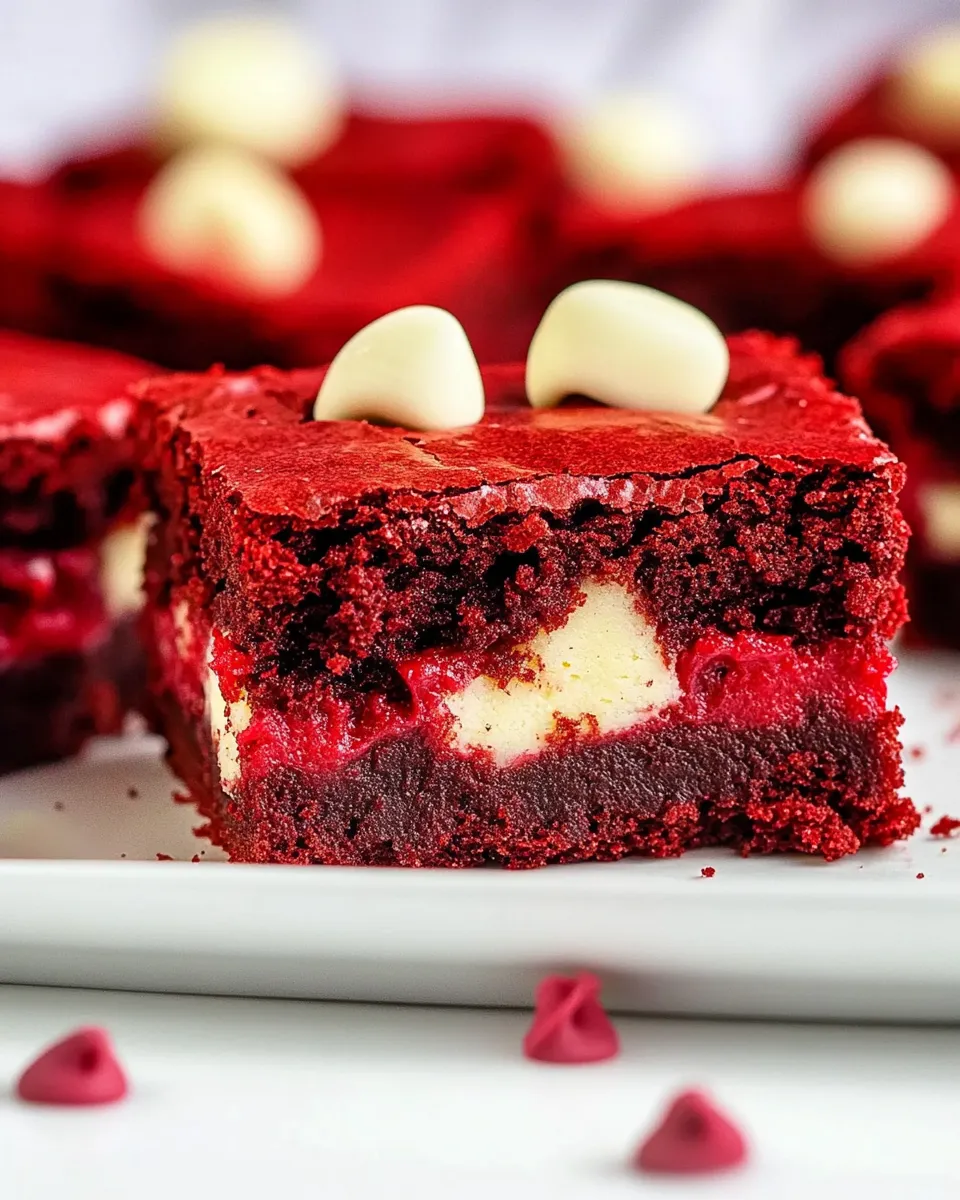
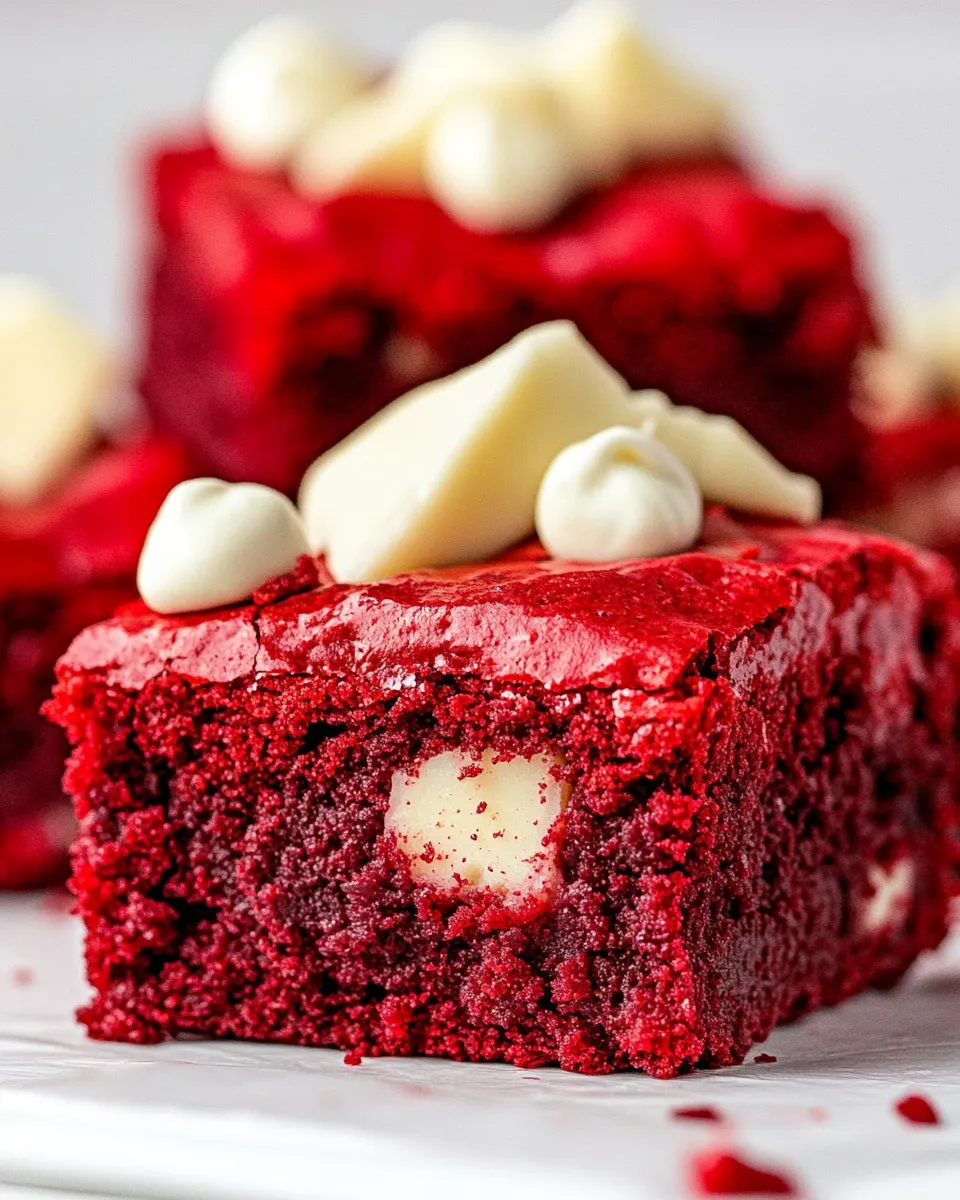
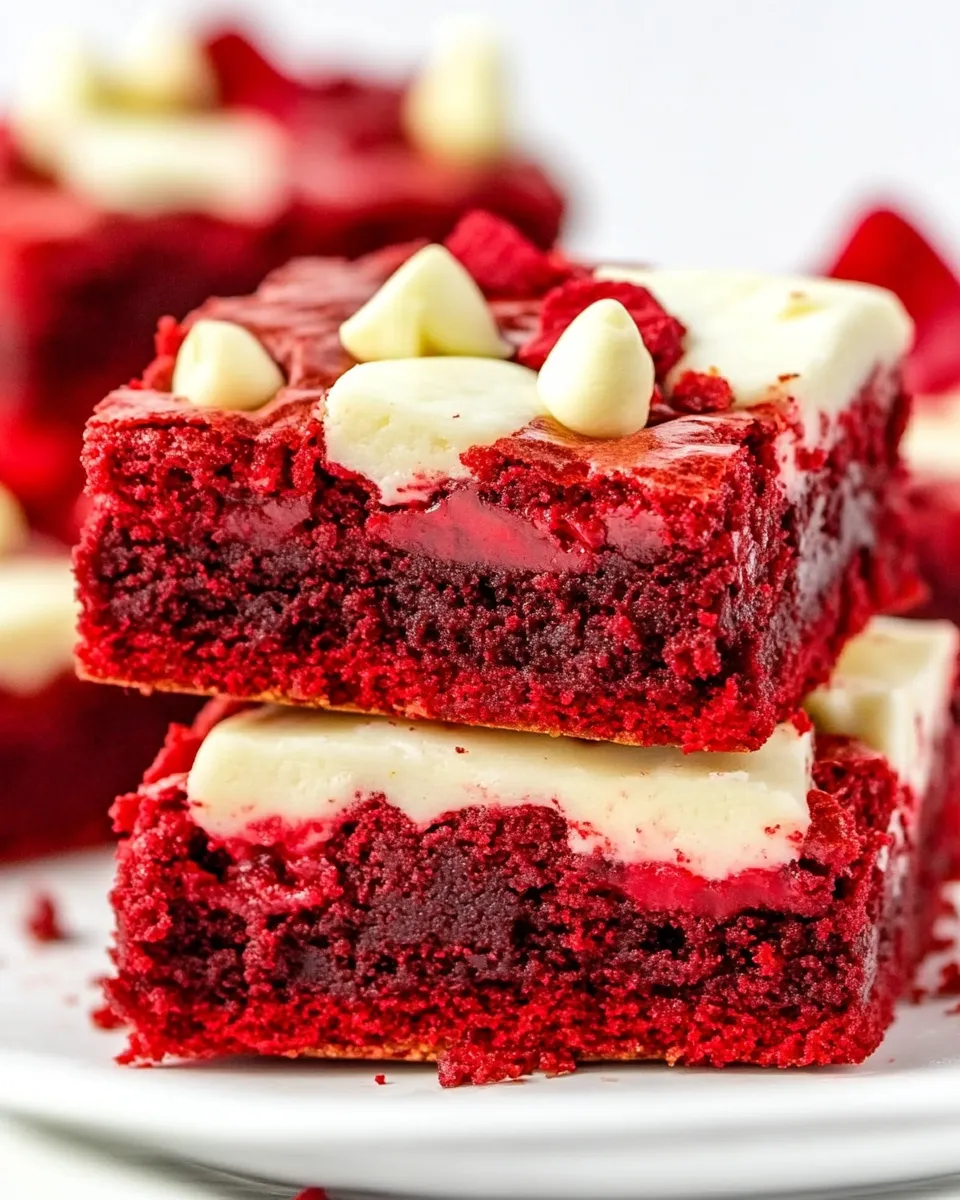
Red Velvet Brownies
There’s something undeniably enchanting about the vibrant hue and velvety texture of red velvet desserts. When it comes to satisfying your sweet tooth, these Red Velvet Brownies take center stage, offering a decadent twist on a classic favorite. With their rich flavor profile and stunning visual appeal, they’re perfect for any occasion, from casual get-togethers to special celebrations. Let’s dive into why these brownies are such a hit and how you can whip up your very own batch!
Why It’s Crowd-Pleasing
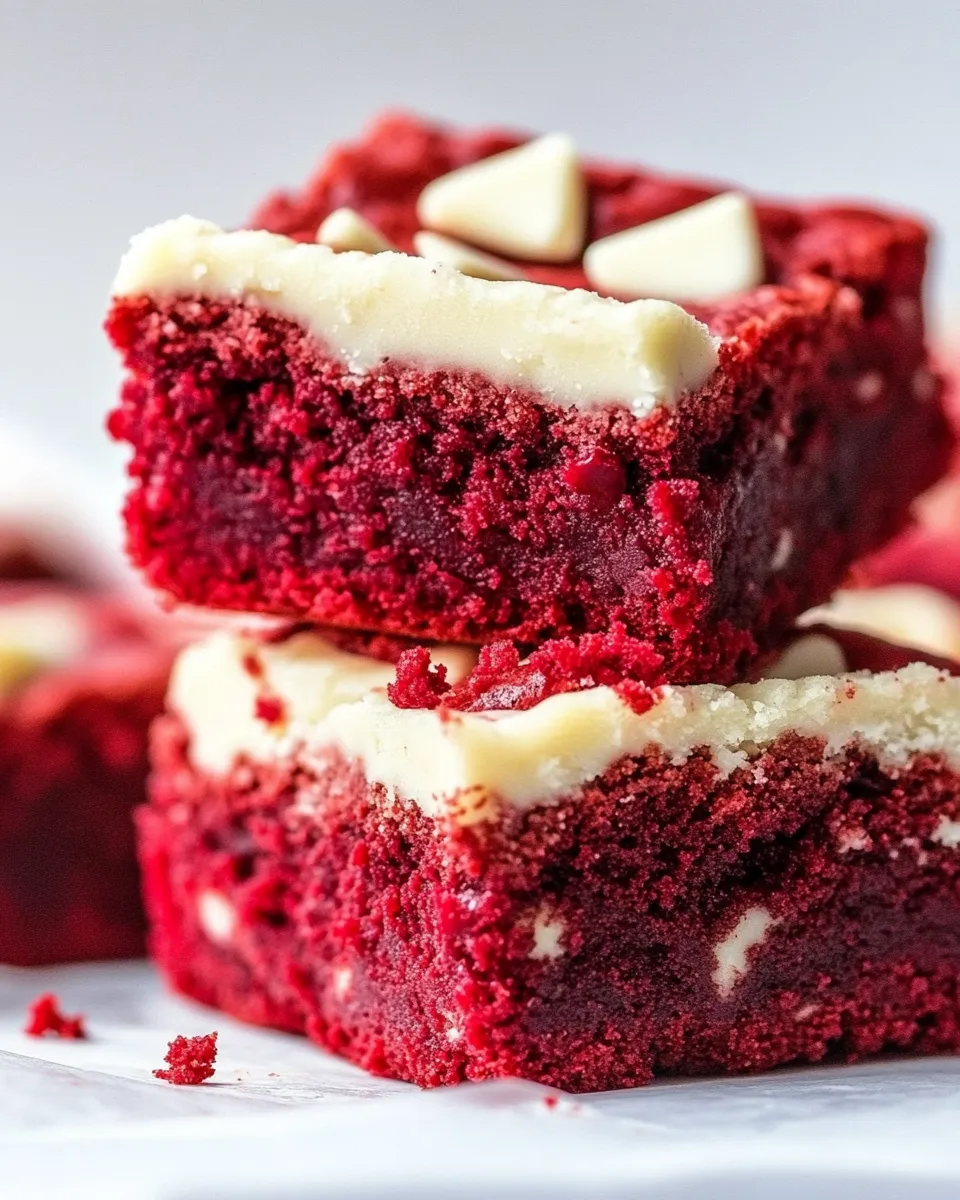
What makes Red Velvet Brownies so beloved? It’s not just their eye-catching color; it’s the delightful combination of flavors and textures. The soft, fudgy base is complemented by the sweetness of white chocolate chips, creating a harmonious blend that pleases every palate. Additionally, their striking appearance makes them a showstopper at parties, ensuring that they’ll be the first dessert to disappear. Serve them warm with a scoop of ice cream for an extra special treat that will leave your guests craving more!
What Goes Into Red Velvet Brownies
Creating these delicious Red Velvet Brownies requires a few essential ingredients. Here’s what you’ll need:
- 1 cup (113g) unsalted butter (softened): This adds richness and moisture.
- 2 cups (400g) packed brown sugar: For sweetness and a chewy texture.
- 2 large eggs: These bind the ingredients together.
- 1 teaspoon vanilla extract: For a hint of aromatic flavor.
- 1 tablespoon (5g) unsweetened cocoa powder: Enhances the chocolate flavor.
- 1 teaspoon baking powder: For leavening and a light texture.
- 1 teaspoon salt: Balances the sweetness.
- 2 cups (258g) all-purpose flour: The main structure of the brownies.
- 1 teaspoon white or distilled vinegar: Activates the baking soda and adds tang.
- 2 tablespoons red food coloring: Gives the brownies their signature color.
- 1 1/2 cups (10 ounces or 284g) white chocolate chips: For creamy sweetness and a delightful bite.
Essential Tools for Success
Before diving into the baking process, gather the following tools to ensure your Red Velvet Brownies come out perfectly:
- Mixing bowl: For combining your wet and dry ingredients.
- Whisk: To blend the ingredients smoothly.
- Spatula: For folding in the chocolate chips.
- Baking pan (9×13 inch): The perfect size for even baking.
- Parchment paper: For easy removal of the brownies.
- Oven thermometer: To ensure your oven is at the right temperature.
From Start to Finish: Red Velvet Brownies
Follow this step-by-step guide to create your own scrumptious Red Velvet Brownies:
Step 1: Preheat the Oven
Preheat your oven to 350°F (175°C). This ensures the brownies bake evenly.
Step 2: Prepare Your Baking Pan
Line a 9×13 inch baking pan with parchment paper, allowing some overhang on the sides for easy removal later. This makes it simple to lift out the brownies once they’re baked.
Step 3: Mix the Wet Ingredients
In a large mixing bowl, combine the softened butter and brown sugar. Use a whisk to mix until well combined. Add the eggs, vanilla extract, and vinegar, whisking until the mixture is smooth.
Step 4: Combine the Dry Ingredients
In a separate bowl, whisk together the flour, cocoa powder, baking powder, and salt. This will ensure even distribution of the leavening agents.
Step 5: Combine the Mixtures
Gradually add the dry ingredients to the wet mixture, folding gently until just combined. Be careful not to overmix, as this can lead to tough brownies.
Step 6: Add the Food Coloring
Pour in the red food coloring and mix until you achieve a vibrant red color throughout the batter.
Step 7: Fold in the White Chocolate Chips
Gently fold in the white chocolate chips, ensuring they are evenly distributed in the batter.
Step 8: Bake
Spread the batter evenly in the prepared baking pan. Bake in the preheated oven for 25-30 minutes or until a toothpick inserted into the center comes out with a few moist crumbs.
Step 9: Cool and Serve
Allow the brownies to cool in the pan for about 10 minutes, then use the parchment paper to lift them out. Let them cool completely on a wire rack before slicing into squares.
Make It Year-Round
Though they are often associated with special occasions, Red Velvet Brownies can be enjoyed all year long. Here are a few ideas to adapt this recipe for different seasons:
- Valentine’s Day: Add heart-shaped sprinkles on top for a romantic touch.
- Summer: Serve with fresh berries and whipped cream for a refreshing dessert.
- Fall: Incorporate spices like cinnamon and nutmeg for a seasonal twist.
- Winter: Drizzle with melted chocolate and sprinkle with peppermint for a festive flair.
Pro Perspective
For the best results with your Red Velvet Brownies, consider these expert tips:
- Use quality ingredients, especially the cocoa powder and food coloring, for richer flavor and color.
- Don’t skip the vinegar – it reacts with the baking powder to create a wonderfully light texture.
- For a gourmet touch, experiment with different types of chocolate chips, such as dark or semi-sweet.
- Allow the brownies to cool completely before cutting; this helps them set and makes for cleaner slices.
Storing, Freezing & Reheating
These Red Velvet Brownies are best enjoyed fresh, but they can be stored for later indulgence:
- Storing: Keep them in an airtight container at room temperature for up to 3 days or in the fridge for up to a week.
- Freezing: Wrap individual brownies in plastic wrap and place them in a freezer-safe bag for up to 3 months.
- Reheating: Warm them in the microwave for about 10-15 seconds for a gooey, fresh-out-of-the-oven experience.
Quick Questions
Can I substitute the white chocolate chips?
Absolutely! If you prefer dark chocolate, feel free to use dark or semi-sweet chocolate chips for a richer flavor.
What can I serve with these brownies?
These brownies pair wonderfully with a scoop of vanilla ice cream, whipped cream, or even a drizzle of chocolate sauce for an over-the-top dessert.
Can I make them gluten-free?
Yes! Substitute the all-purpose flour with a 1:1 gluten-free flour blend for a delicious gluten-free version of Red Velvet Brownies.
How do I achieve a more intense red color?
To enhance the red color, you can increase the amount of food coloring slightly or use a gel-based food coloring for a more vibrant hue.
One Pan, More Ideas
If you love these Red Velvet Brownies, you might also enjoy trying out these delightful recipes:
- Red Velvet Cheesecake Brownies – A luscious combination of cheesecake and brownie goodness.
- Dulce De Leche Brown Butter Chocolate Chip Cookie Bars – A rich and indulgent treat that’s perfect for cookie lovers.
Final Thoughts
There’s no denying the allure of Red Velvet Brownies. With their gorgeous color, rich flavor, and chewy texture, they are the perfect addition to any dessert table. Whether you’re celebrating a special occasion or just indulging in a sweet craving, these brownies are sure to impress. So gather your ingredients, preheat that oven, and get ready to enjoy a delightful treat that will have everyone coming back for seconds!
Red Velvet Brownies
Ingredients
Equipment
Method
- Preheat your oven to 350°F (175°C). This ensures the brownies bake evenly.
- Line a 9x13 inch baking pan with parchment paper, allowing some overhang on the sides for easy removal later.
- In a large mixing bowl, combine the softened butter and brown sugar. Use a whisk to mix until well combined. Add the eggs, vanilla extract, and vinegar, whisking until the mixture is smooth.
- In a separate bowl, whisk together the flour, cocoa powder, baking powder, and salt.
- Gradually add the dry ingredients to the wet mixture, folding gently until just combined.
- Pour in the red food coloring and mix until you achieve a vibrant red color throughout the batter.
- Gently fold in the white chocolate chips, ensuring they are evenly distributed in the batter.
- Spread the batter evenly in the prepared baking pan. Bake in the preheated oven for 25-30 minutes or until a toothpick inserted into the center comes out with a few moist crumbs.
- Allow the brownies to cool in the pan for about 10 minutes, then use the parchment paper to lift them out. Let them cool completely on a wire rack before slicing into squares.
Notes
- Use quality ingredients for richer flavor and color.
- Don't skip the vinegar for a light texture.
- Experiment with different types of chocolate chips for a gourmet touch.