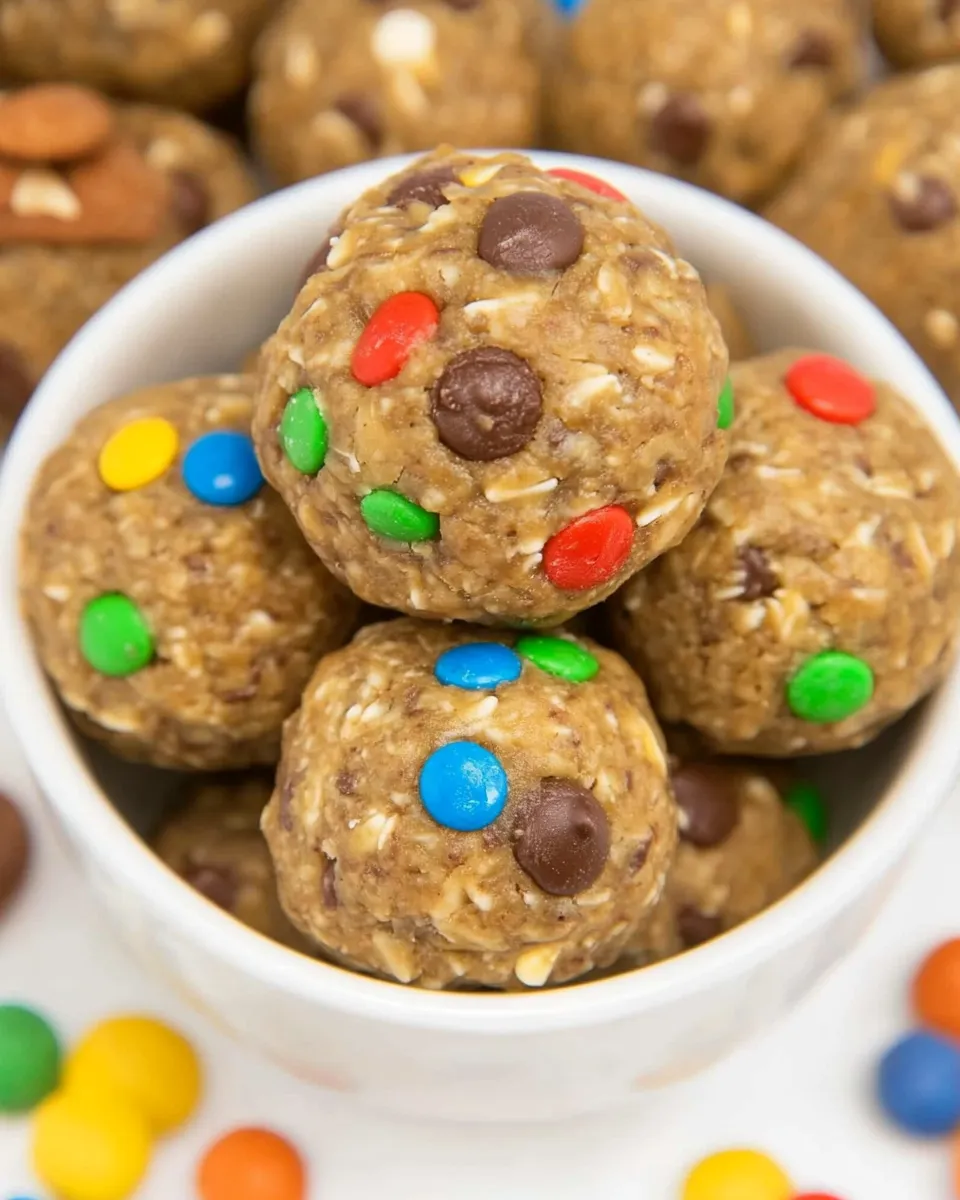
Monster Cookie Energy Balls (No Bake!)
If you’re looking for a delicious and nutritious snack that’s perfect for on-the-go munching, look no further! These Monster Cookie Energy Balls are a delightful blend of flavors and textures, packed with wholesome ingredients that will keep your energy levels high. The best part? They require absolutely no baking! Just mix, roll, and enjoy. Perfect for busy mornings, after-school snacks, or a post-workout treat, these energy balls are sure to become a household favorite.
What Makes This Recipe Special

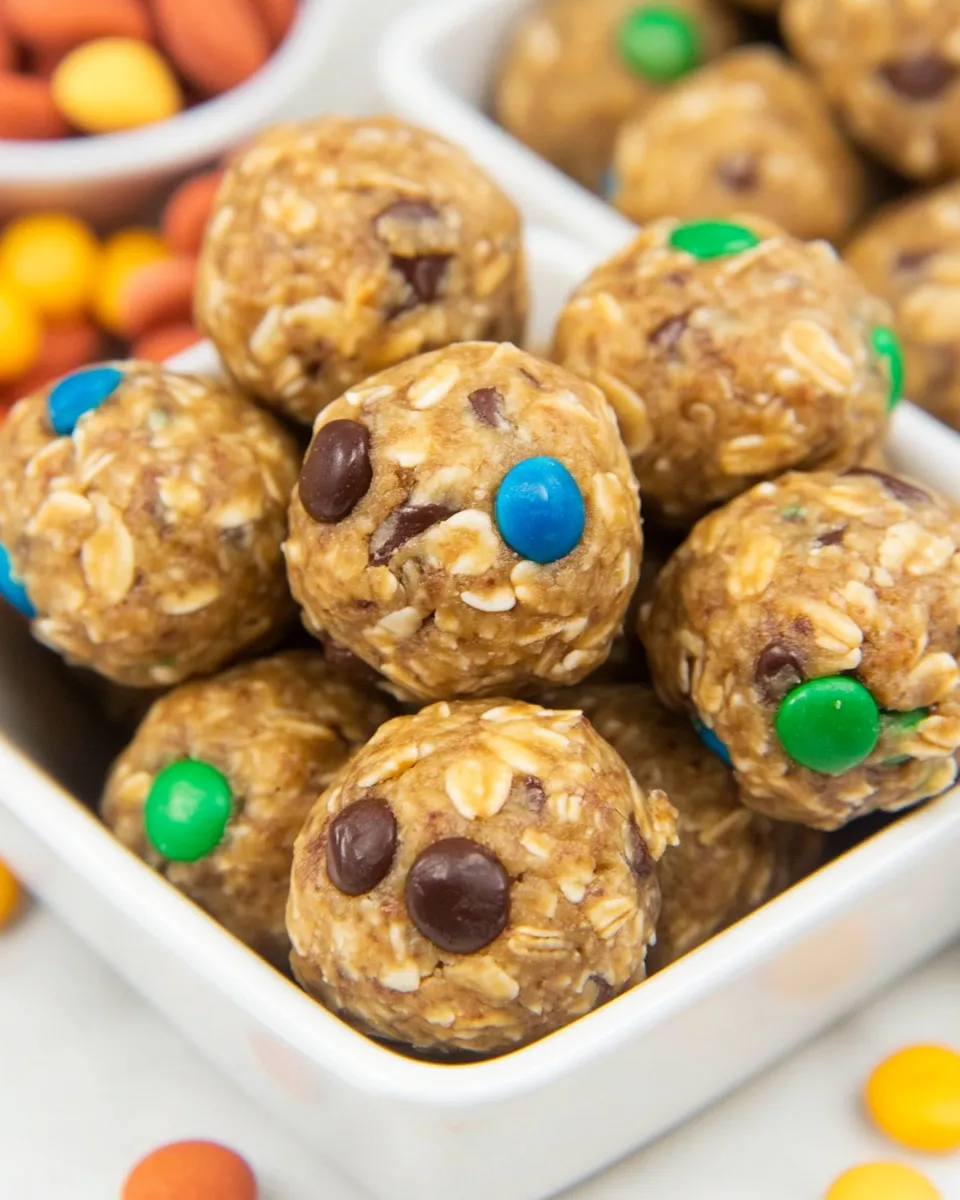
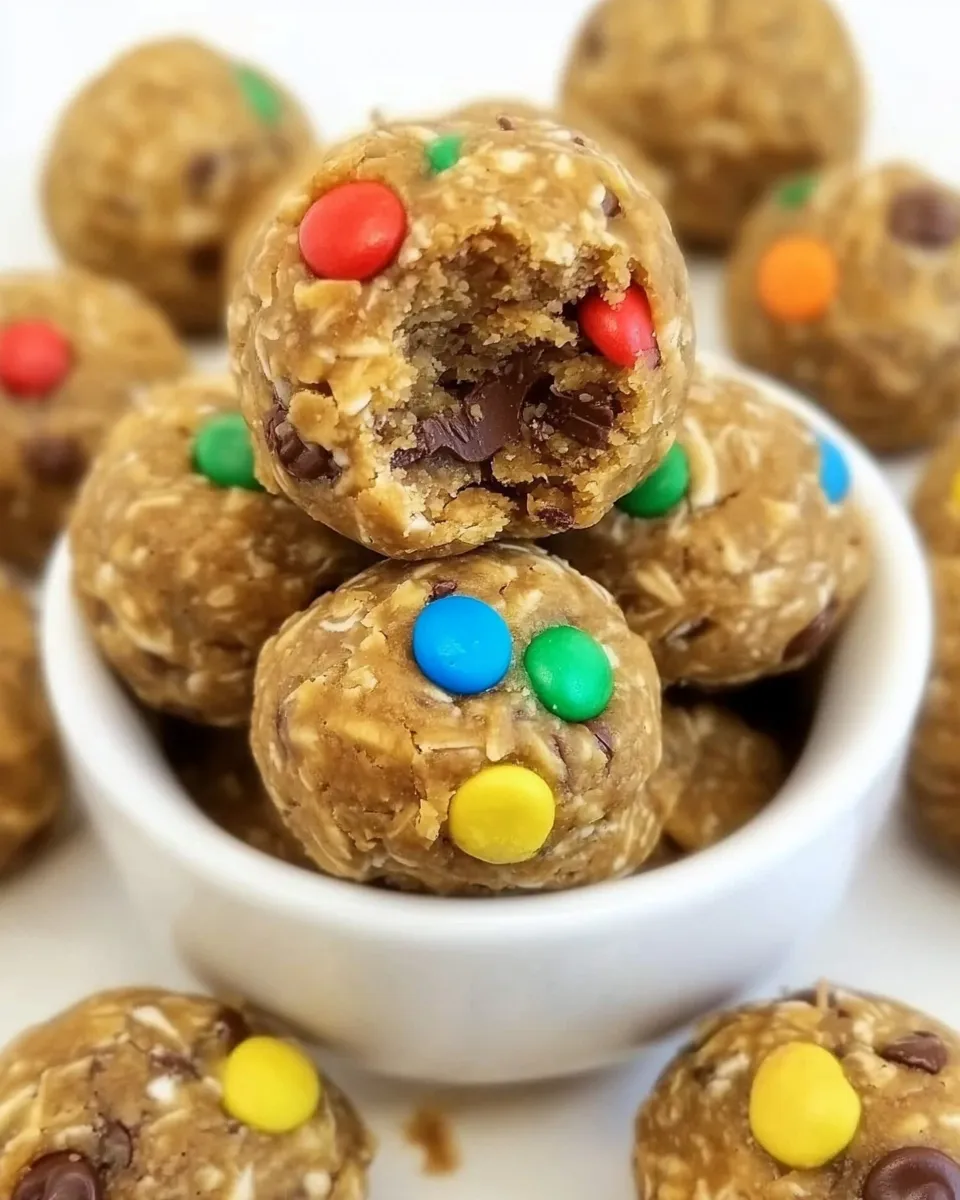
Monster Cookie Energy Balls are not just another snack—they are a celebration of flavors! Combining the classic tastes of monster cookies with the convenience of energy balls, this recipe is ideal for anyone who loves a good treat without the fuss of baking. The creamy peanut butter provides healthy fats and protein, while the oats deliver fiber to keep you full. The addition of chocolate chips and M&Ms offers a sweet crunch that makes these energy balls feel indulgent. Plus, they are incredibly easy to customize, making them a versatile option for everyone.
Your Shopping Guide
To make these Monster Cookie Energy Balls, you’ll need the following ingredients:
- 2 cups quick cooking oats – The base of our energy balls, providing texture and fiber.
- 1 cup creamy peanut butter – Adds richness and healthy fats.
- 3 tablespoons maple syrup – A natural sweetener to bring all the flavors together.
- 1/2 cup vanilla protein powder (optional) – Boosts the protein content for a more filling snack.
- 1/2 cup mini semi-sweet chocolate chips – For that classic chocolatey goodness.
- 1/2 cup mini M&Ms – Adds a fun, colorful crunch.
Make sure to grab these ingredients during your next grocery run!
Equipment at a Glance
- Mixing bowl – To combine all the ingredients.
- Spatula or wooden spoon – For mixing the dough thoroughly.
- Measuring cups and spoons – To ensure accurate ingredient amounts.
- Baking sheet or plate – For placing the rolled energy balls.
Having the right equipment on hand makes the process smooth and hassle-free.
Monster Cookie Energy Balls (No Bake!) — Do This Next
Step 1: Gather Your Ingredients
Start by assembling all the ingredients mentioned above. This will make the mixing process seamless and fun!
Step 2: Mix the Dry Ingredients
In a large mixing bowl, combine the quick cooking oats, vanilla protein powder (if using), mini semi-sweet chocolate chips, and mini M&Ms. Stir until all the dry ingredients are evenly distributed.
Step 3: Add the Wet Ingredients
Next, add the creamy peanut butter and maple syrup to the dry mixture. Use a spatula or wooden spoon to mix everything together until it forms a sticky, cohesive dough. If the mixture seems too dry, you can add a touch more maple syrup or peanut butter.
Step 4: Roll into Balls
Once your mixture is well combined, use your hands to roll small portions of the dough into balls, about the size of a tablespoon. Place them on a baking sheet or plate lined with parchment paper.
Step 5: Chill and Serve
For the best texture, refrigerate the energy balls for at least 30 minutes. This helps them firm up and makes them easier to eat. Once chilled, they are ready to enjoy!
Holiday-Friendly Variations
Want to switch things up? Here are some fun variations to try:
- Add dried fruits like cranberries or raisins for a chewy texture.
- Use almond butter instead of peanut butter for a different nutty flavor.
- Incorporate shredded coconut for a tropical twist.
- Experiment with different types of protein powder, such as chocolate or unflavored.
Feel free to get creative and make these energy balls your own!
Chef’s Notes
- For an extra crunch, consider adding chopped nuts such as almonds or walnuts.
- If you prefer a sweeter taste, increase the amount of maple syrup to your liking.
- These energy balls are perfect for meal prep! Store them in an airtight container in the fridge for a quick snack throughout the week.
- For a fun twist, roll the balls in crushed nuts or coconut flakes before chilling.
These notes will help you customize the recipe to suit your taste and lifestyle.
Shelf Life & Storage
Monster Cookie Energy Balls can be stored in an airtight container in the refrigerator for up to one week. They also freeze well! Just place them in a freezer-safe container, and they can last for up to three months. When you’re ready to enjoy, simply thaw in the fridge overnight or let sit at room temperature for a short time.
Reader Q&A
Can I use old-fashioned oats instead of quick cooking oats?
Yes, you can use old-fashioned oats, but the texture will be chewier. Quick cooking oats provide a softer bite in these energy balls.
Is it necessary to include protein powder?
No, the protein powder is optional. If you want a higher protein snack, go ahead and add it. If not, the energy balls will still be delicious!
Can I substitute the peanut butter?
Absolutely! You can use any nut or seed butter, such as almond butter or sunflower seed butter, if you prefer.
What can I do if the mixture is too dry?
If your mixture feels dry and crumbly, add a little more maple syrup or peanut butter to help it hold together better.
What to Make After This
- Mini Peanut Butter Cookies – Another delightful treat that’s sure to please!
- Whole Wheat Chocolate Chip Cookies – A healthier twist on a classic favorite!
Let’s Eat
Now that you have your Monster Cookie Energy Balls ready to go, it’s time to dig in! These little bites of joy are perfect for satisfying your sweet tooth while keeping you energized throughout the day. Whether you enjoy them as a quick breakfast, a post-workout snack, or an afternoon pick-me-up, they won’t disappoint.
With their delightful combination of flavors and textures, Monster Cookie Energy Balls (No Bake!) are an excellent addition to your snack repertoire. So gather your ingredients, roll up your sleeves, and get ready to enjoy a treat that’s as fun to make as it is to eat!
Monster Cookie Energy Balls (No Bake!)
Ingredients
Equipment
Method
- Step 1: Gather Your Ingredients - Start by assembling all the ingredients mentioned above. This will make the mixing process seamless and fun!
- Step 2: Mix the Dry Ingredients - In a large mixing bowl, combine the quick cooking oats, vanilla protein powder (if using), mini semi-sweet chocolate chips, and mini M&Ms. Stir until all the dry ingredients are evenly distributed.
- Step 3: Add the Wet Ingredients - Next, add the creamy peanut butter and maple syrup to the dry mixture. Use a spatula or wooden spoon to mix everything together until it forms a sticky, cohesive dough. If the mixture seems too dry, you can add a touch more maple syrup or peanut butter.
- Step 4: Roll into Balls - Once your mixture is well combined, use your hands to roll small portions of the dough into balls, about the size of a tablespoon. Place them on a baking sheet or plate lined with parchment paper.
- Step 5: Chill and Serve - For the best texture, refrigerate the energy balls for at least 30 minutes. This helps them firm up and makes them easier to eat. Once chilled, they are ready to enjoy!
Notes
- For an extra crunch, consider adding chopped nuts such as almonds or walnuts.
- If you prefer a sweeter taste, increase the amount of maple syrup to your liking.
- These energy balls are perfect for meal prep! Store them in an airtight container in the fridge for a quick snack throughout the week.