Grilled Cheese Roll Ups
When it comes to comfort food, few dishes can compete with the classic grilled cheese sandwich. The gooey cheese, crispy bread, and warm, inviting aroma evoke feelings of nostalgia that many of us cherish. But what if I told you there’s a fun twist on this beloved classic? Enter the Grilled Cheese Roll Ups! These delightful bites take everything you love about grilled cheese and turn it into a fun, dippable treat. Perfect for kids or a nostalgic snack for adults, these roll-ups are simple, satisfying, and oh-so-delicious. Let’s dive into why you should whip up this recipe today!
Why Grilled Cheese Roll Ups is Worth Your Time
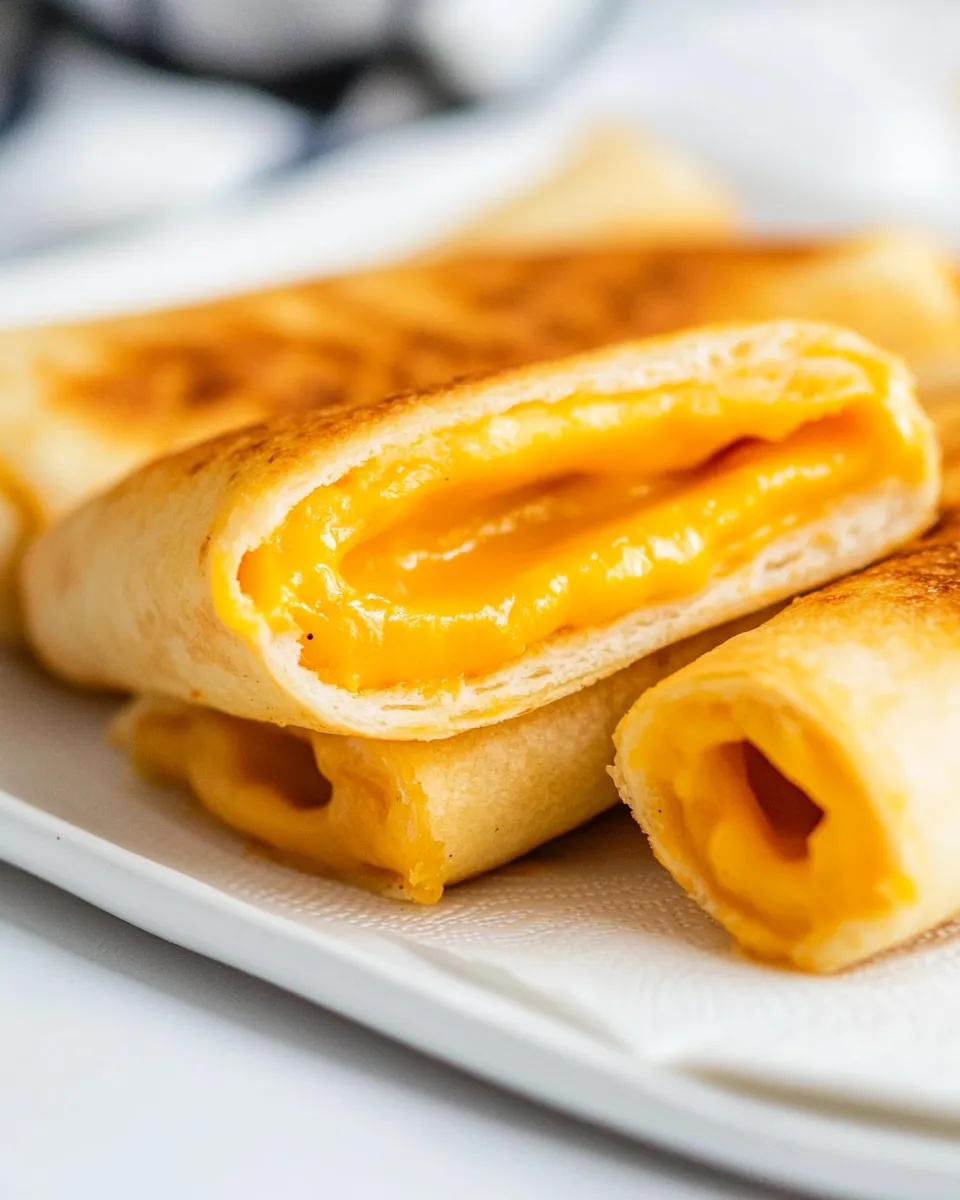
Grilled Cheese Roll Ups are not just a meal; they’re an experience! Imagine biting into a roll filled with melted cheese that oozes out with each bite. They’re quick to prepare, making them an excellent option for busy weeknights or unexpected guests. Plus, they can be customized easily, so everyone can enjoy them exactly how they like. With just a few ingredients and minimal prep time, you’ll have a cheesy delight that will impress anyone at your table.
The Ingredient Lineup
To make the perfect Grilled Cheese Roll Ups, you will need the following ingredients:
- 8 thick slices of soft white bread – Choose a nice, fresh loaf for the best texture.
- 8 slices of cheese – You can use your favorite cheese; cheddar, mozzarella, or even a blend work wonderfully.
- 3 tablespoons of butter, melted (or as needed) – Butter gives the roll-ups that beautiful golden color and crispy texture.
These ingredients come together to create a delightful dish that’s sure to satisfy your cravings.
Tools & Equipment Needed
To make your Grilled Cheese Roll Ups, gather the following tools:
- Rolling pin – To flatten the bread, making it easier to roll.
- Skillet or griddle – For cooking the roll-ups to perfection.
- Spatula – To flip the roll-ups without making a mess.
- Baking sheet (optional) – If you want to keep them warm in the oven while cooking in batches.
Having these tools on hand will ensure a smooth cooking experience.
Cooking Grilled Cheese Roll Ups: The Process
Now, let’s get cooking! Follow these simple steps to create your Grilled Cheese Roll Ups.
Step 1: Prep Your Bread
Start by using a rolling pin to flatten each slice of bread. Aim for about a ¼-inch thickness. This step is crucial for rolling them up easily.
Step 2: Add Cheese
Place a slice of cheese on each flattened piece of bread. You can layer more than one type of cheese if you’re feeling adventurous!
Step 3: Roll It Up
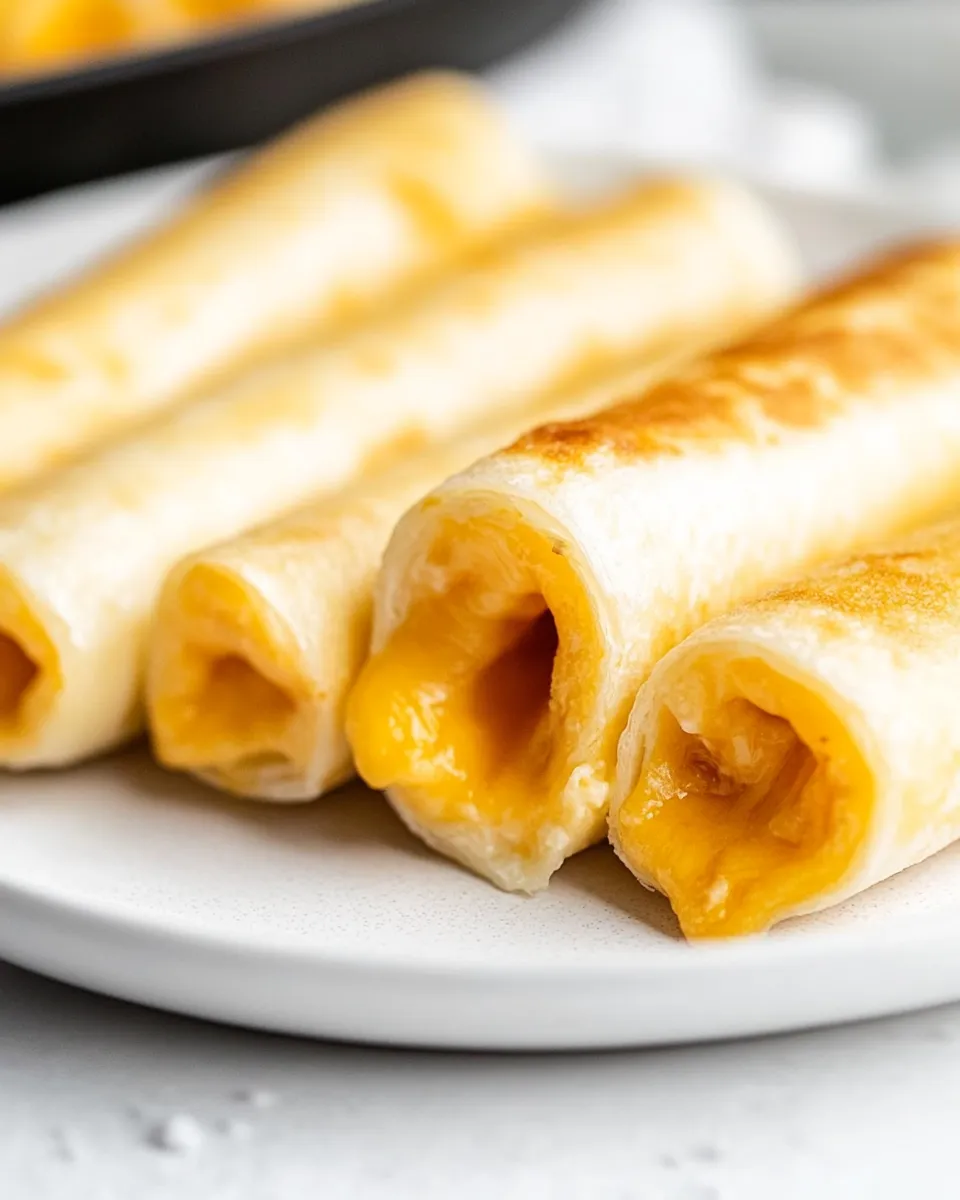
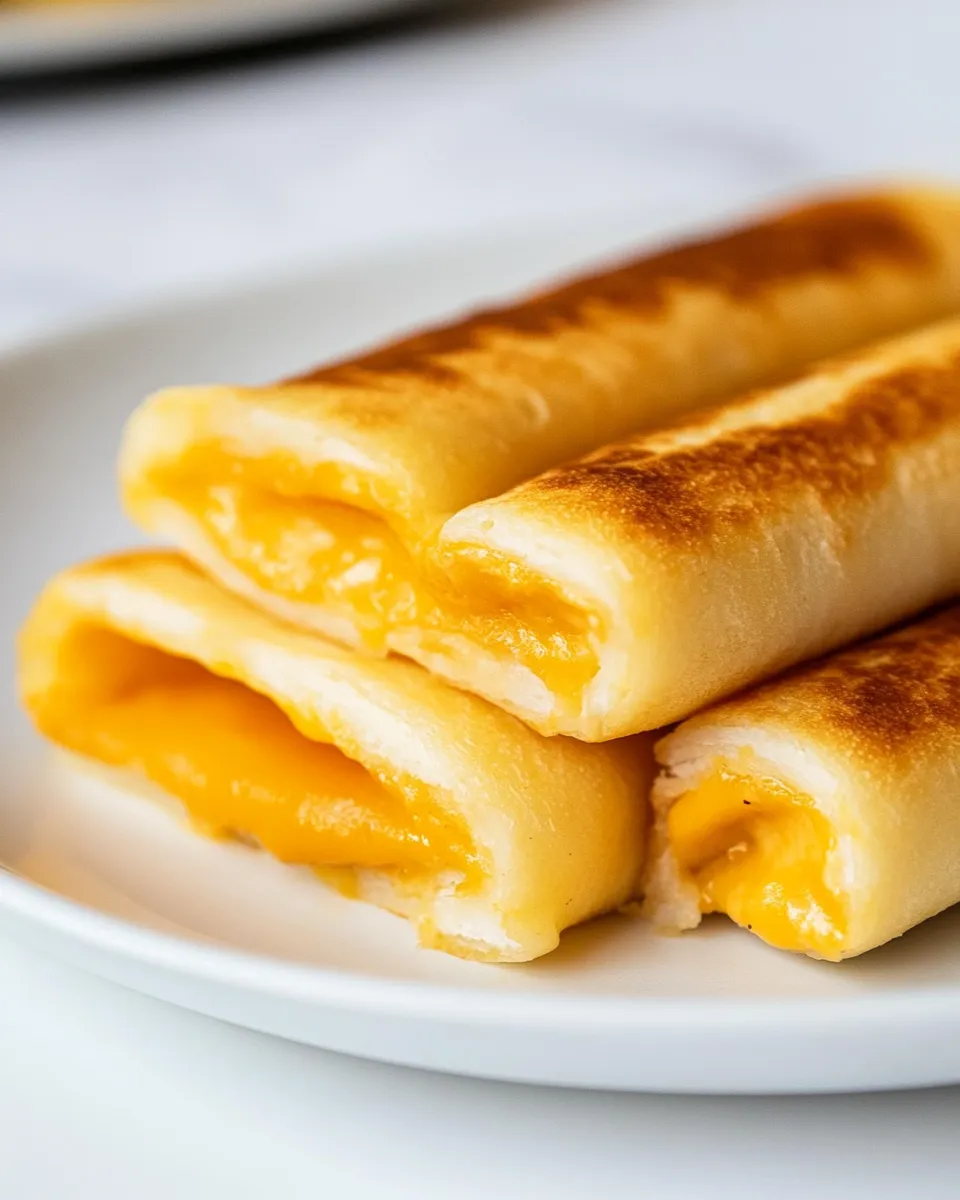
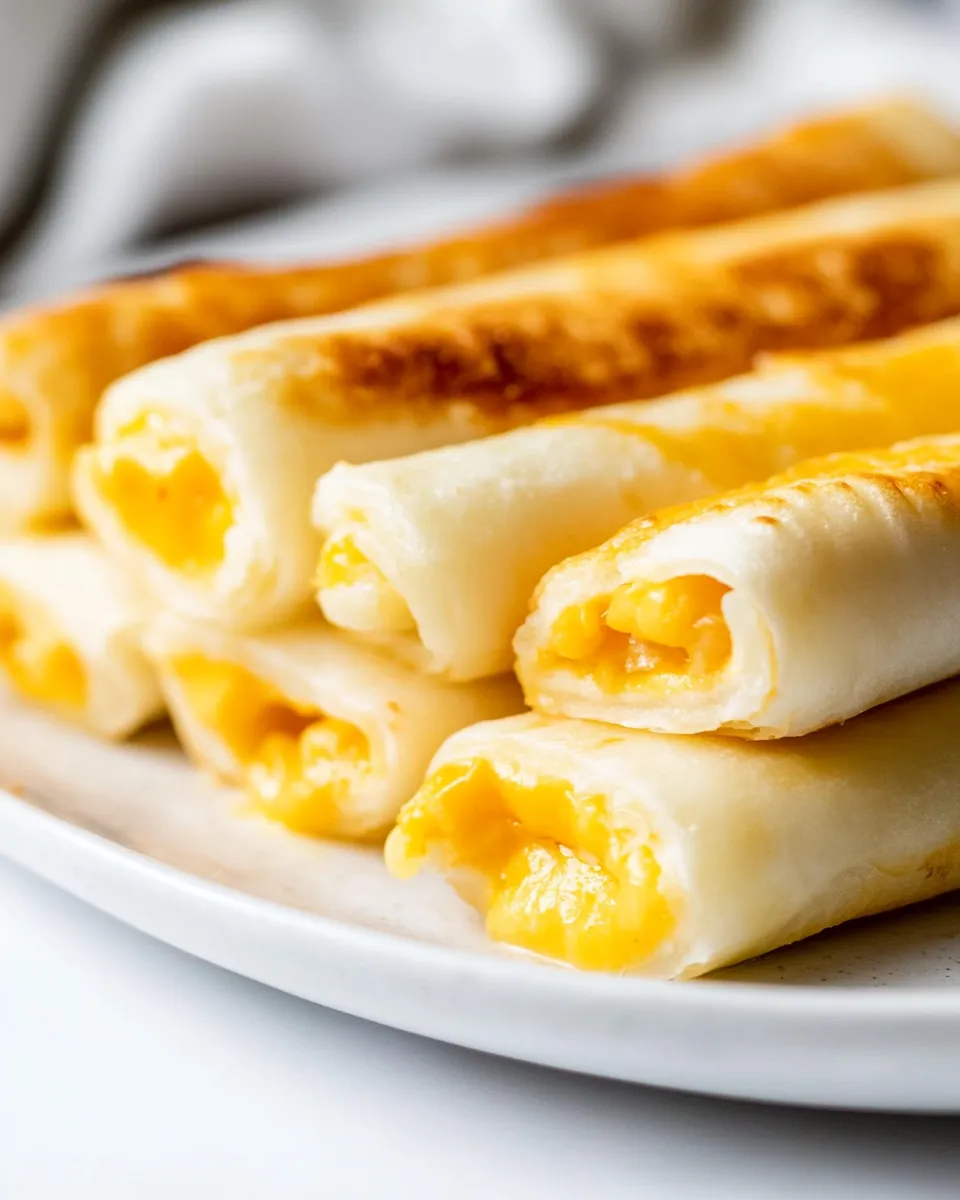
Carefully roll the bread around the cheese, starting from one end and rolling tightly to create a snug roll-up. Make sure the cheese is completely enclosed.
Step 4: Brush with Butter
Melt the butter and brush it generously over each roll. This will help achieve that golden-brown crust that everyone loves.
Step 5: Cook the Roll-Ups
Heat a skillet over medium heat. Place the roll-ups seam side down in the skillet. Cook for about 2-3 minutes on each side, or until they turn golden brown and the cheese is melted.
Step 6: Serve and Enjoy!
Once cooked, remove them from the skillet and let them cool for a minute. Slice them into bite-sized pieces and serve with your favorite dipping sauce, like marinara or ranch!
Ingredient Swaps & Substitutions
Feel free to get creative with your Grilled Cheese Roll Ups! Here are some ideas for swaps:
- Bread – Use whole grain or gluten-free bread for a different twist.
- Cheese – Try pepper jack for a spicy kick or goat cheese for a tangy flavor.
- Butter – Substitute with olive oil or dairy-free butter for a lighter option.
- Add-ins – Consider adding cooked bacon, spinach, or roasted red peppers for extra flavor.
Each variation can bring a new taste sensation to your Grilled Cheese Roll Ups!
Chef’s Notes
- If you have kids, involve them in the rolling process! It’s a fun activity that can help them develop their cooking skills.
- Be careful not to overfill your roll-ups with cheese, as they might burst open while cooking.
- Experiment with different dipping sauces. A spicy ketchup or creamy ranch can elevate the flavor even more.
Storing, Freezing & Reheating
To keep your Grilled Cheese Roll Ups fresh, store any leftovers in an airtight container in the refrigerator for up to 3 days. If you want to prepare them ahead of time, you can freeze them before cooking. Simply wrap each roll tightly in plastic wrap and place them in a freezer-safe container. They can be frozen for up to a month.
When you’re ready to eat, thaw them in the refrigerator overnight, then cook as directed. For reheating, you can place them back in the skillet over low heat until warmed through, or pop them in the air fryer for a crispy finish. You might also enjoy Air Fryer Grilled Cheese for a quick alternative!
Quick Q&A
Can I make Grilled Cheese Roll Ups ahead of time?
Yes! You can prepare them in advance and store them in the refrigerator or freezer until you’re ready to cook them.
What type of cheese works best?
While cheddar is a classic choice, feel free to experiment with mozzarella, gouda, or even a blend of cheeses for added flavor.
Are Grilled Cheese Roll Ups a good snack for parties?
Absolutely! They are bite-sized and easy to serve, making them perfect for parties or gatherings.
Can I bake these instead of pan-frying?
Yes! If you prefer a healthier method, you can bake them in a preheated oven at 375°F for about 15-20 minutes until golden brown.
Cook This Next
If you love Grilled Cheese Roll Ups, you might also enjoy these delicious recipes:
- Easy Yeast Rolls – Fluffy and perfect for any meal.
- Cheesy Cheeseburger Stuffed Shells – A fun twist on classic stuffed pasta.
That’s a Wrap
Grilled Cheese Roll Ups are a delightful and easy dish that can be enjoyed by the whole family. With just a few ingredients and a little creativity, you can transform a classic favorite into a fun, dippable snack. Whether you’re serving them as an appetizer or a main dish, they’re sure to become a hit. So grab your ingredients, fire up that skillet, and get ready to indulge in the cheesy goodness of Grilled Cheese Roll Ups!
Grilled Cheese Roll Ups
Ingredients
Equipment
Method
- Step 1: Prep Your Bread - Start by using a rolling pin to flatten each slice of bread to about a ¼-inch thickness.
- Step 2: Add Cheese - Place a slice of cheese on each flattened piece of bread.
- Step 3: Roll It Up - Carefully roll the bread around the cheese tightly to create a snug roll-up.
- Step 4: Brush with Butter - Brush melted butter generously over each roll.
- Step 5: Cook the Roll-Ups - Heat a skillet over medium heat and cook the roll-ups seam side down for about 2-3 minutes on each side until golden brown.
- Step 6: Serve and Enjoy! - Slice into bite-sized pieces and serve with your favorite dipping sauce.
Notes
- Get kids involved in the rolling process for a fun activity.
- Don't overfill with cheese to prevent bursting.
- Experiment with different dipping sauces for variety.