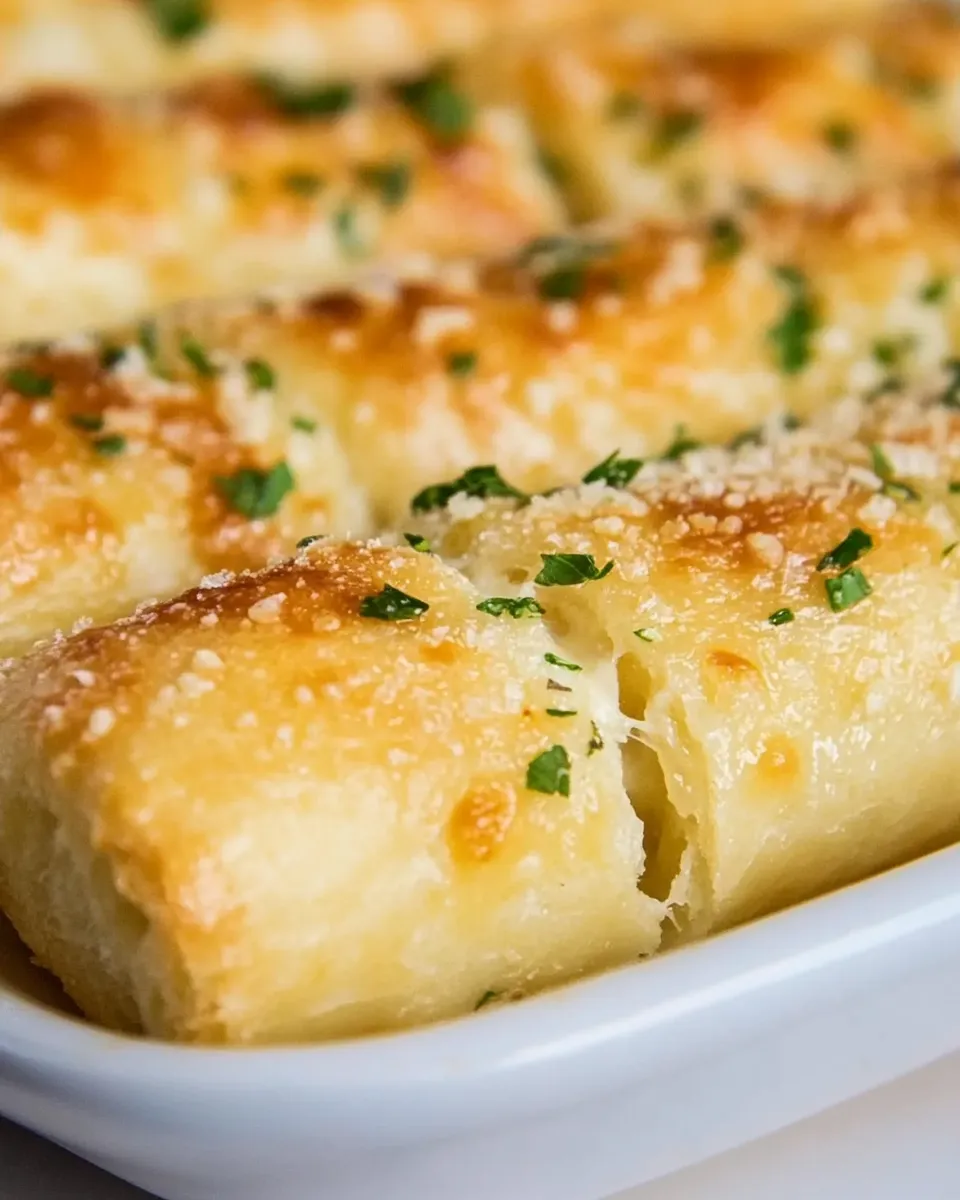
Garlic Cheese Breadsticks
There’s something irresistibly comforting about warm, cheesy breadsticks fresh from the oven, especially when they are infused with the savory goodness of garlic. These Garlic Cheese Breadsticks are perfect as a side for pasta, pizza nights, or simply as a standalone snack. The buttery, cheesy filling paired with the fragrant aroma of garlic and herbs creates an experience that’s hard to resist. Trust me, once you make these, they’ll become a staple in your kitchen.
The Upside of Garlic Cheese Breadsticks
These Garlic Cheese Breadsticks are not just delicious; they are also incredibly versatile. You can serve them with marinara sauce for dipping, or enjoy them alongside your favorite Italian dishes. The best part? They are straightforward to make, even for novice bakers. Plus, they allow for customization; feel free to experiment with different cheeses or spices to suit your taste. Whether you’re hosting a gathering or simply treating yourself, these breadsticks will surely impress.
Shopping List
- 2.5 cups bread flour
- 1 teaspoon salt
- 3 tablespoons olive oil
- 1 cup warm water
- 2 teaspoons minced garlic
- 1.5 teaspoons dried oregano
- 1 teaspoon active dry yeast
- 2 teaspoons honey
- 2 tablespoons salted butter, melted
- 1 cup shredded mozzarella cheese
- 2-3 tablespoons grated parmesan cheese
- Garlic salt, to sprinkle
Tools & Equipment Needed
- Mixing bowls – for combining ingredients.
- Measuring cups and spoons – for accuracy in measuring ingredients.
- Wooden spoon or dough hook – for mixing the dough.
- Baking sheet – to bake your breadsticks.
- Parchment paper – for easy cleanup and to prevent sticking.
- Oven – for baking your Garlic Cheese Breadsticks to perfection.
From Start to Finish: Garlic Cheese Breadsticks

Step 1: Prepare the Dough
In a large mixing bowl, combine 2.5 cups of bread flour and 1 teaspoon of salt. In a separate bowl, mix 1 cup of warm water, 2 teaspoons of minced garlic, 1 teaspoon of active dry yeast, and 2 teaspoons of honey. Let it sit for about 5 to 10 minutes until it becomes frothy.
Step 2: Combine and Knead
Add the yeast mixture to the flour mixture, along with 3 tablespoons of olive oil and 1.5 teaspoons of dried oregano. Mix until a dough starts to form. Transfer the dough to a floured surface and knead for about 5-7 minutes until it is smooth and elastic.
Step 3: First Rise
Place the dough in a lightly greased bowl, cover it with a kitchen towel, and let it rise in a warm environment for about 1 hour, or until it has doubled in size.
Step 4: Shape the Breadsticks
Once the dough has risen, punch it down to release the air. Turn it out onto a floured surface and divide it into 8 equal pieces. Roll each piece into a long, thin strip, about 1 inch wide.
Step 5: Add the Filling
Brush each strip with the melted 2 tablespoons of salted butter. Sprinkle each strip generously with shredded mozzarella cheese and grated parmesan cheese.
Step 6: Second Rise
Carefully place the filled dough strips onto a baking sheet lined with parchment paper. Cover them again and let them rise for another 30 minutes.
Step 7: Bake
Preheat your oven to 400°F (200°C). Once preheated, bake the breadsticks for about 15-20 minutes, or until they are golden brown and the cheese is bubbly.
Step 8: Finishing Touches
Remove the breadsticks from the oven and immediately sprinkle them with garlic salt for an extra punch of flavor. Allow them to cool slightly before serving.
Low-Carb/Keto Alternatives
If you’re looking for low-carb or keto-friendly alternatives to traditional breadsticks, consider the following options:
- Almond flour or coconut flour can be used to make a low-carb dough.
- Use mozzarella dough (a blend of mozzarella cheese and almond flour) as a base.
- Replace the honey with a sugar substitute like erythritol.
- Experiment with cheese options like cheddar or cream cheese for added flavor.
What I Learned Testing
- The type of flour you use really affects the texture; bread flour gives the best chew.
- Letting the dough rise adequately is crucial for achieving fluffy breadsticks.
- Using fresh garlic instead of powdered makes a significant difference in flavor.
- Don’t skip the garlic salt; it adds a delightful finishing touch.
Freezer-Friendly Notes
You can prepare these Garlic Cheese Breadsticks in advance. After shaping and filling, freeze them on the baking sheet until solid. Once frozen, transfer them to a zip-top bag and store them for up to 3 months. When you’re ready to bake, no need to thaw; just add a few extra minutes to the baking time.
Ask the Chef
Can I use all-purpose flour instead of bread flour?
Yes, you can use all-purpose flour, but the texture may be slightly different. Bread flour has a higher protein content, which gives the breadsticks a chewier texture.
What can I serve with these breadsticks?
These Garlic Cheese Breadsticks pair perfectly with marinara sauce, garlic butter, or even a simple salad. They’re also great alongside pasta dishes or soups.
How do I store leftover breadsticks?
Store any leftover breadsticks in an airtight container at room temperature for up to 2 days. For longer storage, refrigerate them or freeze them as mentioned above.
Can I add herbs to the filling?
Absolutely! Feel free to mix in fresh herbs like basil or parsley for added flavor in the cheese filling.
Don’t Miss These
- Easy Yeast Rolls – A delightful bread recipe perfect for any meal.
- Air Fryer Grilled Cheese – A quick and easy twist on a classic sandwich.
Time to Try It
Now that you have the recipe and all the tips you need, it’s time to roll up your sleeves and get baking! Whether you’re whipping these up for a party or a cozy night in, these Garlic Cheese Breadsticks are sure to be a hit. Enjoy the process and most importantly, enjoy the delicious results!
Garlic Cheese Breadsticks
Ingredients
Equipment
Method
- In a large mixing bowl, combine 2.5 cups of bread flour and 1 teaspoon of salt. In a separate bowl, mix 1 cup of warm water, 2 teaspoons of minced garlic, 1 teaspoon of active dry yeast, and 2 teaspoons of honey. Let it sit for about 5 to 10 minutes until it becomes frothy.
- Add the yeast mixture to the flour mixture, along with 3 tablespoons of olive oil and 1.5 teaspoons of dried oregano. Mix until a dough starts to form. Transfer the dough to a floured surface and knead for about 5-7 minutes until it is smooth and elastic.
- Place the dough in a lightly greased bowl, cover it with a kitchen towel, and let it rise in a warm environment for about 1 hour, or until it has doubled in size.
- Once the dough has risen, punch it down to release the air. Turn it out onto a floured surface and divide it into 8 equal pieces. Roll each piece into a long, thin strip, about 1 inch wide.
- Brush each strip with the melted 2 tablespoons of salted butter. Sprinkle each strip generously with shredded mozzarella cheese and grated parmesan cheese.
- Carefully place the filled dough strips onto a baking sheet lined with parchment paper. Cover them again and let them rise for another 30 minutes.
- Preheat your oven to 400°F (200°C). Once preheated, bake the breadsticks for about 15-20 minutes, or until they are golden brown and the cheese is bubbly.
- Remove the breadsticks from the oven and immediately sprinkle them with garlic salt for an extra punch of flavor. Allow them to cool slightly before serving.
Notes
- For a different flavor, experiment with various cheeses in the filling.
- These breadsticks are freezer-friendly; store them for up to 3 months.
- Serve with marinara sauce or garlic butter for dipping.