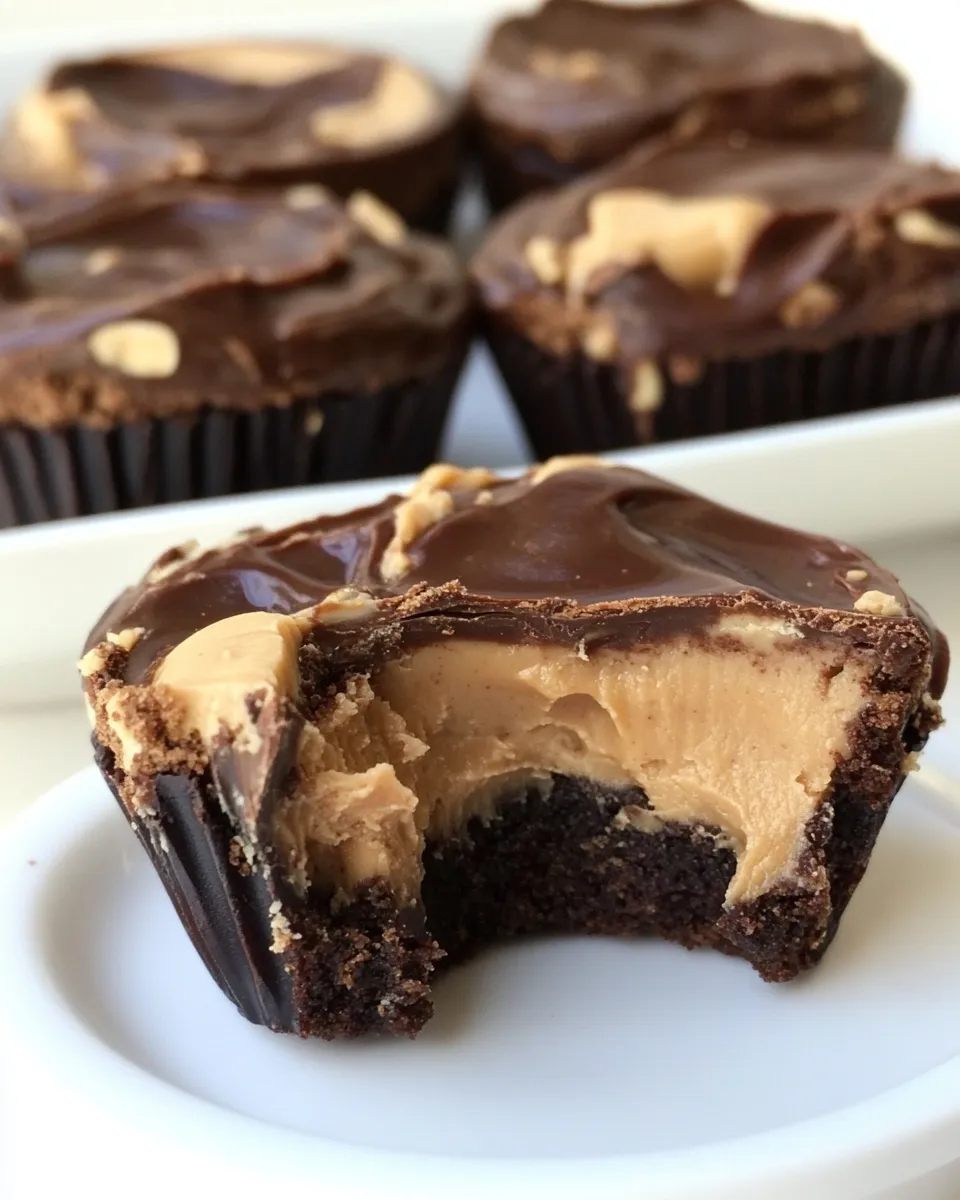
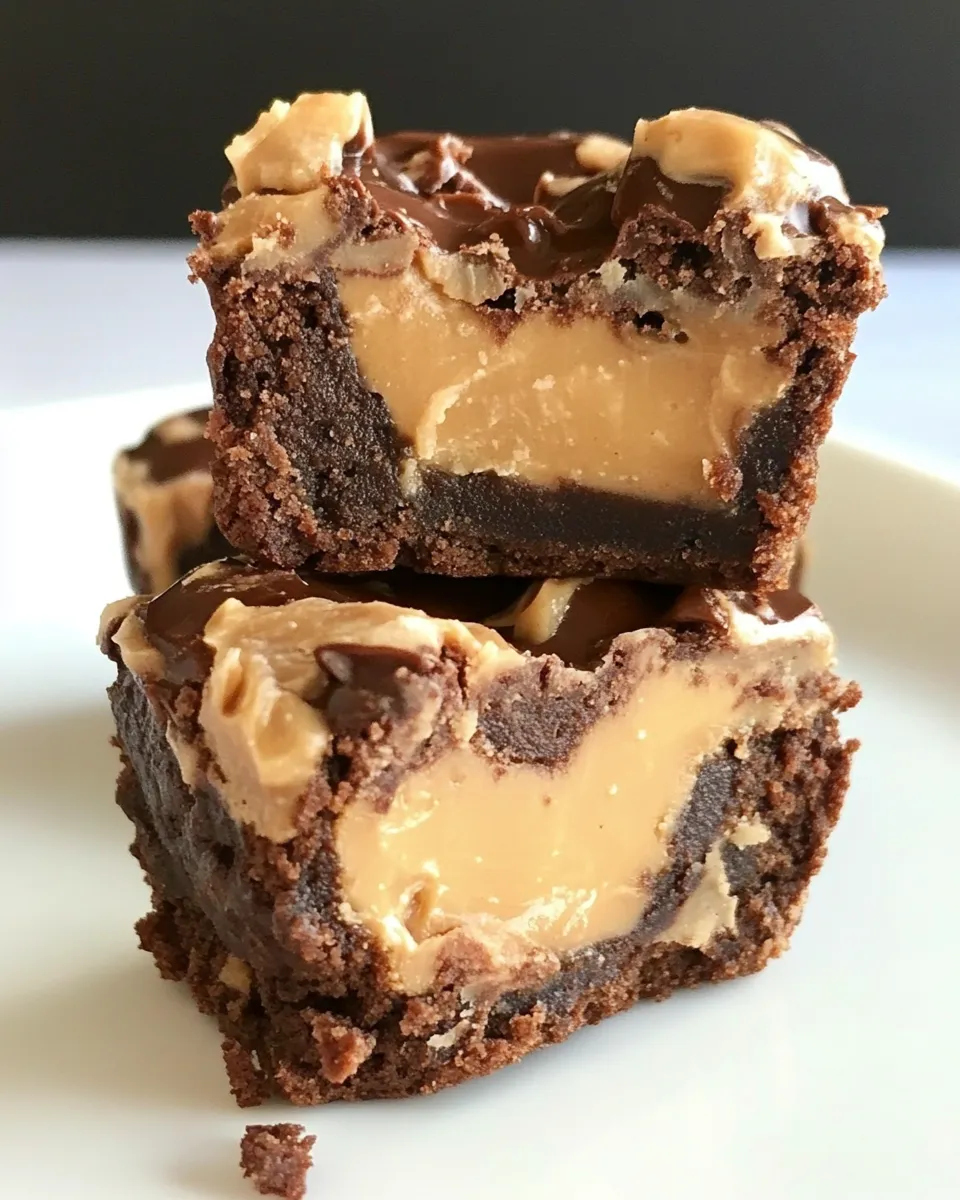
Brownie Peanut Butter Cups
Indulging in the rich and decadent world of desserts often leads us to a delightful fusion of flavors. Today, we are diving into the luscious realm of Brownie Peanut Butter Cups. These little bites of heaven combine the fudgy goodness of brownies with the creamy, nutty richness of peanut butter. Imagine sinking your teeth into a soft brownie shell, only to discover a smooth, peanut butter center waiting to melt in your mouth.
Whether you’re hosting a party or simply craving a sweet treat, these Brownie Peanut Butter Cups are sure to impress. With a few simple ingredients and steps, you’ll have a dessert that’s not only delicious but also incredibly satisfying.
Why It’s Crowd-Pleasing
There’s something universally appealing about the combination of chocolate and peanut butter. The flavor pairing has a way of making everyone feel nostalgic, reminiscent of childhood favorites. Here are a few reasons why these Brownie Peanut Butter Cups are a hit:
- Dual Flavor Delight: The rich brownie layer perfectly complements the creamy peanut butter filling.
- Perfect Portions: These cups are easy to share, making them great for gatherings or parties.
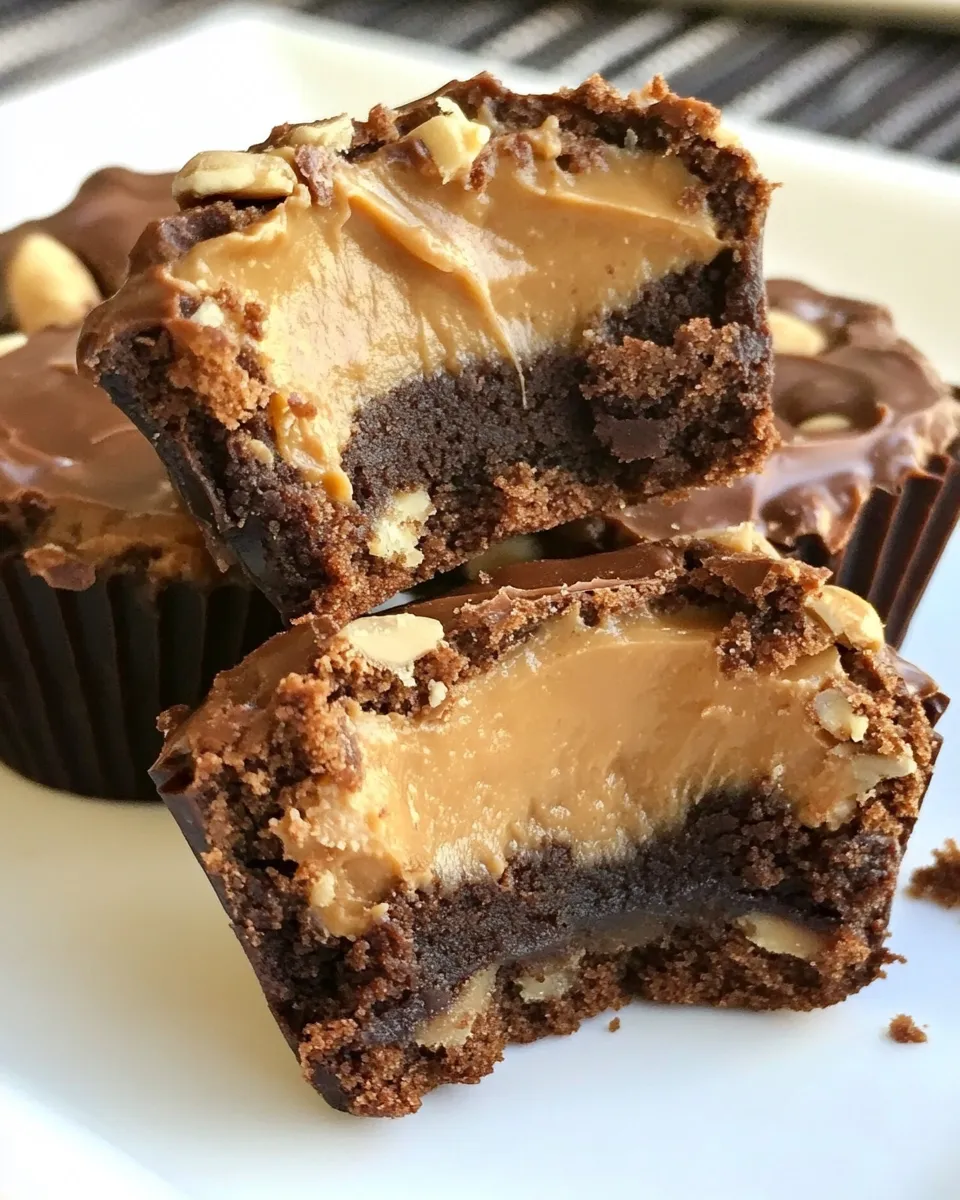
- Visual Appeal: Their layered look is not only tempting but also makes for stunning presentation.
- Easy to Make: This recipe is straightforward, making it accessible even for novice bakers.
What We’re Using
To create these delightful Brownie Peanut Butter Cups, we’ll be utilizing a handful of simple ingredients:
- 3/4 cup granulated sugar: Adds sweetness to balance the rich chocolate.
- 1/4 cup unsalted butter, softened: Provides moisture and richness.
- 1 tablespoon water: Helps to create a smooth batter.
- 3/4 cup semi-sweet chocolate chips: Gives a deep chocolate flavor.
- 1 large egg: Acts as a binding agent.
- 1/2 teaspoon vanilla extract: Enhances the overall flavor.
- 1 cup all-purpose flour: Forms the structure of the brownie.
- 1/4 teaspoon baking soda: Helps the brownies rise.
- 1/2 cup peanut butter chips: Adds bursts of peanut butter flavor.
- 1/2 cup semi-sweet chocolate chips: Extra chocolate for the top layer.
- 3/4 cup creamy peanut butter: The star of the filling!
Equipment & Tools
To whip up these delicious treats, you’ll need some basic kitchen tools:
- Muffin tin: To hold the brownie cups.
- Mixing bowls: For combining ingredients.
- Whisk: To beat the egg and mix the batter.
- Spoon or spatula: For filling the cups.
- Microwave-safe bowl: For melting chocolate.
- Measuring cups and spoons: Precision in baking is key!
Brownie Peanut Butter Cups Made Stepwise
Now, let’s get into the fun part—making these Brownie Peanut Butter Cups!
Step 1: Preheat Your Oven
Start by preheating your oven to 350°F (175°C). This step is crucial as it ensures even baking of your brownie cups.
Step 2: Prepare the Muffin Tin
Grease a muffin tin or line it with cupcake liners. This will help in easy removal of the brownie cups after baking.
Step 3: Melt Chocolate and Butter
In a microwave-safe bowl, combine the 3/4 cup semi-sweet chocolate chips and the 1/4 cup softened unsalted butter. Microwave in 30-second intervals, stirring in between, until melted and smooth.
Step 4: Mix in Sugar and Egg
Once melted, whisk in the 3/4 cup granulated sugar until well combined. Then, add in the large egg and 1/2 teaspoon vanilla extract, mixing until smooth.
Step 5: Add Dry Ingredients
In a separate bowl, whisk together the 1 cup all-purpose flour and 1/4 teaspoon baking soda. Gradually mix this into your chocolate mixture until just combined.
Step 6: Fold in Peanut Butter Chips
Gently fold in the 1/2 cup peanut butter chips. This will create pockets of peanut butter flavor throughout your brownies.
Step 7: Fill the Muffin Tin
Spoon the brownie batter into each muffin tin cavity, filling them about halfway.
Step 8: Prepare the Peanut Butter Filling
In another bowl, mix the 3/4 cup creamy peanut butter with a little bit of the leftover melted chocolate. This will create a delicious filling.
Step 9: Add the Peanut Butter Filling
Spoon a dollop of the peanut butter mixture on top of the brownie batter in each muffin cup.
Step 10: Top with More Brownie Batter
Cover the peanut butter filling with a bit more brownie batter, making sure to seal it well.
Step 11: Bake
Bake in the preheated oven for about 20-25 minutes, or until a toothpick inserted into the brownie comes out mostly clean.
Step 12: Cool and Garnish
Once baked, let the brownie cups cool in the tin for a few minutes before transferring to a wire rack. Garnish with the extra peanut butter chips and semi-sweet chocolate chips for an extra touch of decadence.
Holiday & Seasonal Touches
These Brownie Peanut Butter Cups can be dressed up for various occasions:
- Sprinkles: Add festive sprinkles for birthdays or holidays.
- Chocolate Drizzle: A drizzle of melted chocolate on top can elevate the presentation.
- Seasonal Flavors: Incorporate peppermint extract for a wintery touch.
- Nuts: Chopped peanuts or walnuts can add crunch and flavor.
Pitfalls & How to Prevent Them
Even the best bakers can encounter challenges. Here are some common pitfalls and how to avoid them:
Overbaking: Keep a close eye on your brownie cups. They should be fudgy in the center, so check for doneness a few minutes before the timer goes off.
Sticky Batter: If the batter is too sticky, it might be due to overmixing or incorrect measurements. Always measure accurately and mix just until combined.
- Peanut Butter Overflow: Ensure you seal the peanut butter filling well with brownie batter to prevent it from overflowing.
- Cooling Time: Letting them cool too long in the pan can lead to sticking. Transfer them to a wire rack after a few minutes.
Prep Ahead & Store
These Brownie Peanut Butter Cups can be made in advance, making them a perfect treat for busy days.
Store them in an airtight container at room temperature for up to 3 days, or refrigerate for up to a week. If you want to keep them longer, they freeze beautifully. Just wrap each cup individually and place them in a freezer-safe bag. Thaw in the refrigerator before serving.
Quick Questions
Can I use natural peanut butter?
Yes, but natural peanut butter can have a different texture and may cause the filling to be less creamy. It’s best to stick with creamy peanut butter for a smooth filling.
What can I substitute for all-purpose flour?
You can use a gluten-free flour blend if you need a gluten-free option. Just ensure it’s a 1:1 substitute.
Can I make these ahead of time for a party?
Absolutely! These Brownie Peanut Butter Cups can be made a day or two in advance. Just store them properly to keep them fresh.
How do I know when they are done baking?
The tops should look set and a toothpick inserted into the brownie (avoiding the peanut butter center) should come out mostly clean.
Next Up in Your Queue
- Mini Peanut Butter Cookies – Another delightful treat to satisfy your sweet tooth!
- Buckeye Fudge – A perfect addition to your dessert table.
The Last Word
These Brownie Peanut Butter Cups are a delightful way to celebrate your love for chocolate and peanut butter. With their rich flavors and impressive appearance, they’re sure to become a favorite in your recipe collection. So gather your ingredients, roll up your sleeves, and get ready to indulge in these sweet treats that are perfect for any occasion!
Brownie Peanut Butter Cups
Ingredients
Equipment
Method
- Step 1: Preheat your oven to 350°F (175°C).
- Step 2: Grease a muffin tin or line it with cupcake liners.
- Step 3: In a microwave-safe bowl, combine the semi-sweet chocolate chips and softened unsalted butter. Microwave in 30-second intervals until melted and smooth.
- Step 4: Whisk in the granulated sugar, then add the egg and vanilla extract, mixing until smooth.
- Step 5: In a separate bowl, whisk together the flour and baking soda. Gradually mix this into the chocolate mixture until just combined.
- Step 6: Fold in the peanut butter chips.
- Step 7: Spoon the brownie batter into each muffin tin cavity, filling them about halfway.
- Step 8: In another bowl, mix the creamy peanut butter with a little bit of the leftover melted chocolate.
- Step 9: Spoon a dollop of the peanut butter mixture on top of the brownie batter in each muffin cup.
- Step 10: Cover the peanut butter filling with more brownie batter.
- Step 11: Bake for about 20-25 minutes, or until a toothpick comes out mostly clean.
- Step 12: Let cool for a few minutes before transferring to a wire rack. Garnish with extra peanut butter chips and semi-sweet chocolate chips.
Notes
- For a festive touch, add sprinkles on top.
- Use natural peanut butter for a different flavor, but ensure it’s creamy.
- Store in an airtight container for up to a week.