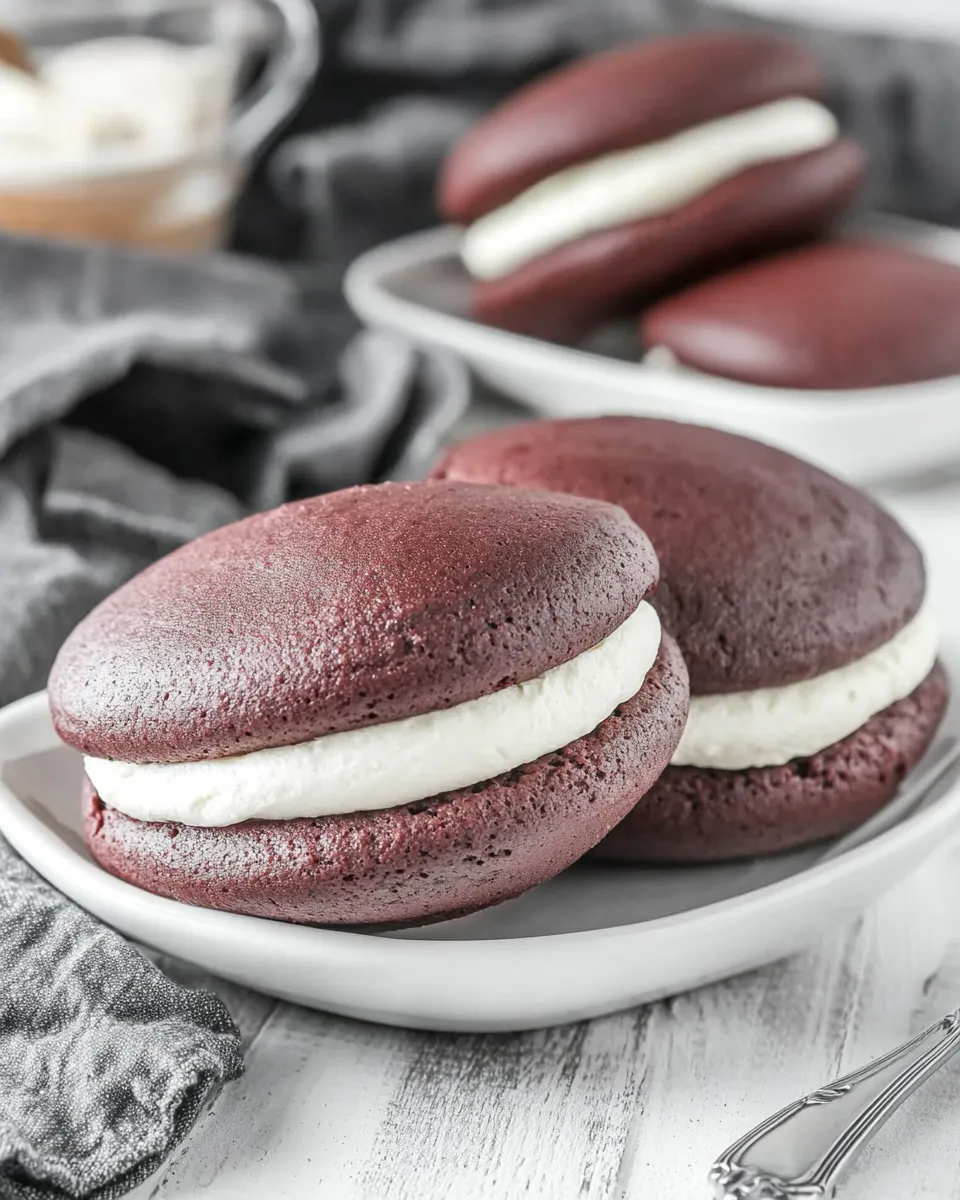
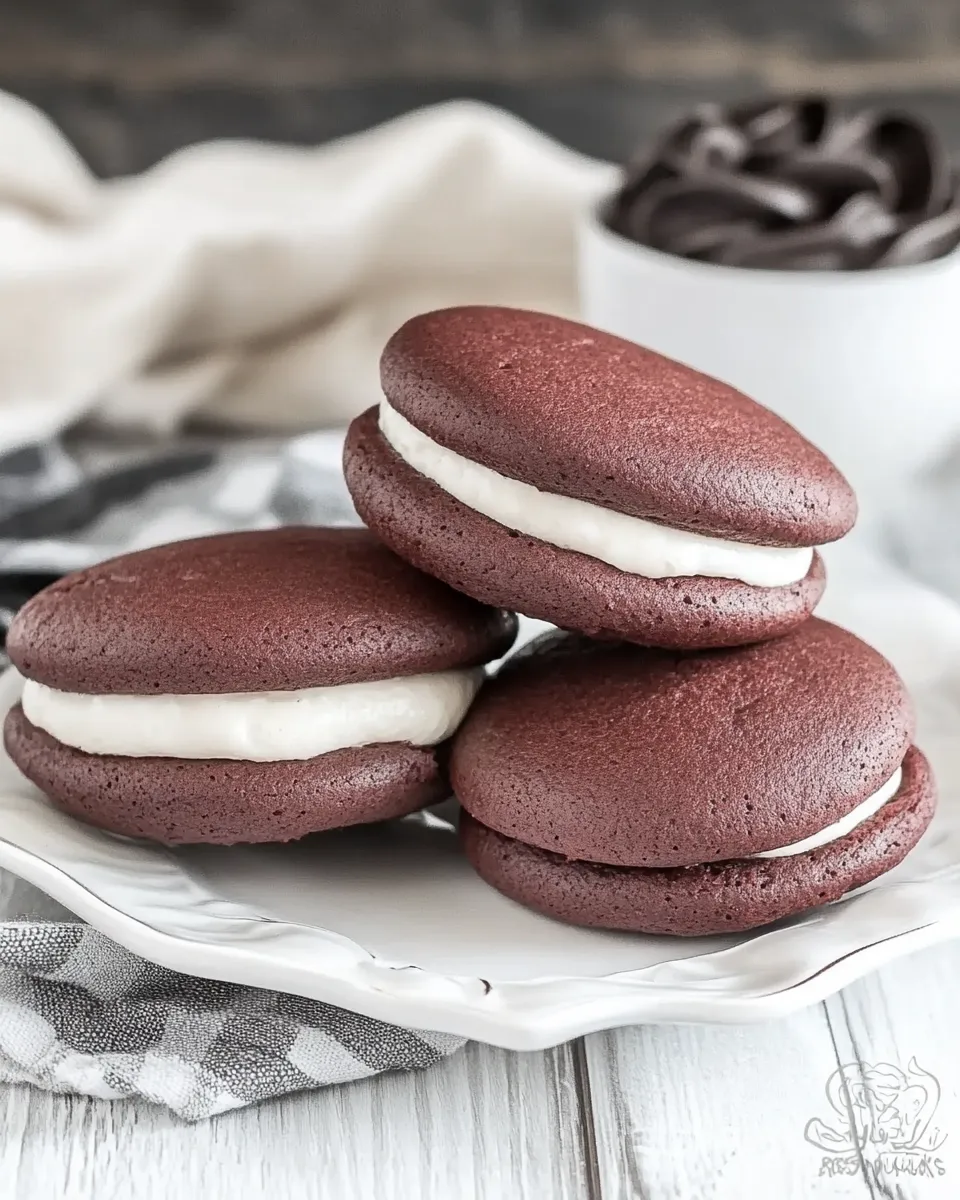
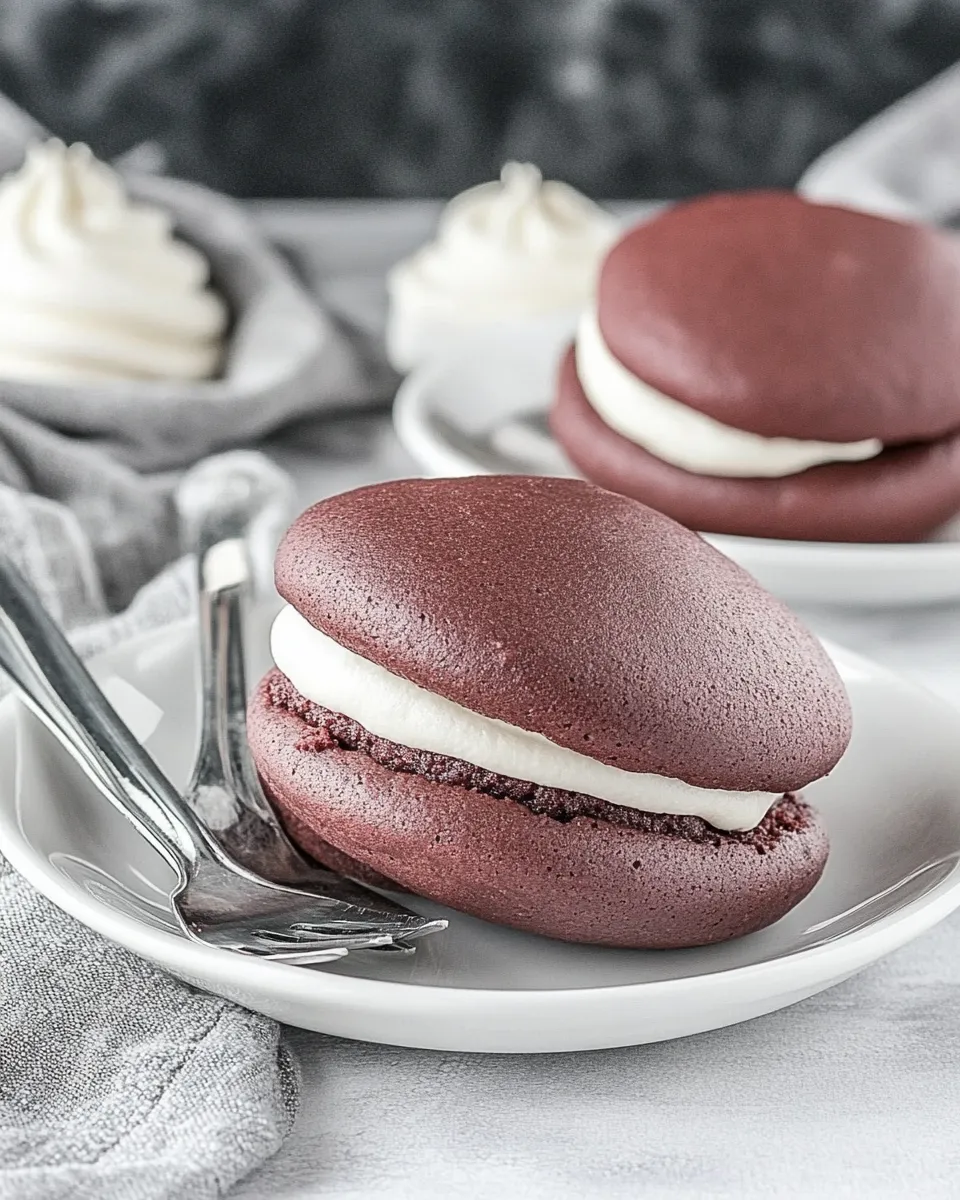
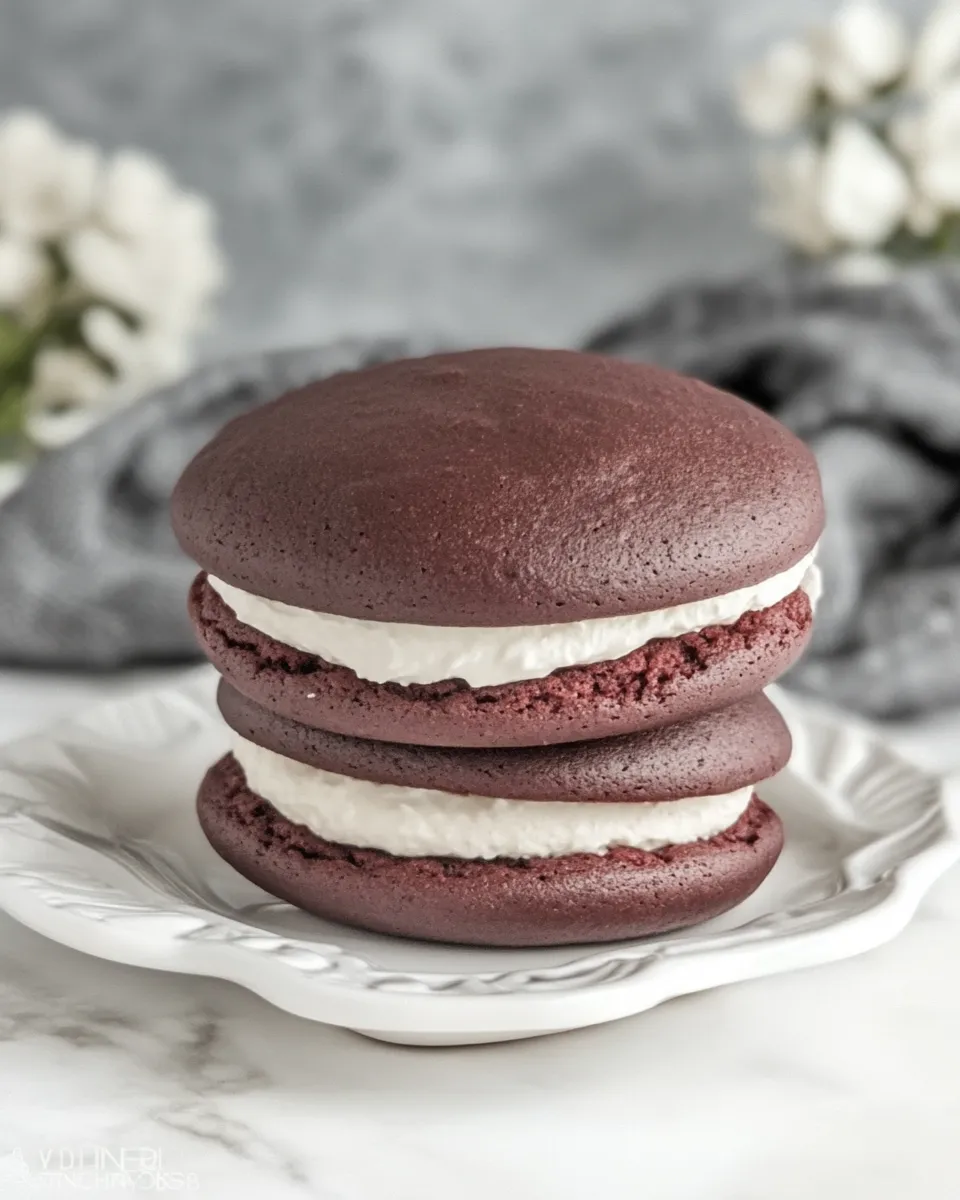
Red Velvet Whoopie Pies
If you’re looking for a delightful dessert that combines the richness of red velvet with the soft, cake-like texture of whoopie pies, you’ve come to the right place! These Red Velvet Whoopie Pies are perfect for any occasion, whether it’s a birthday party, a cozy evening at home, or just a sweet treat to satisfy your cravings. With their vibrant color and creamy filling, these whoopie pies are not only delicious but also visually stunning. Get ready to impress your friends and family with this easy-to-follow recipe!
Top Reasons to Make Red Velvet Whoopie Pies
– They are irresistibly soft and chewy, making each bite a delight.
– The unique combination of red velvet cake and cream cheese filling makes for a mouthwatering flavor.
– They are easy to customize with different fillings, making them versatile for any taste preference.
– Perfect for celebrations, gifting, or simply indulging yourself.
– They are a fun twist on traditional cookies and cakes, adding a playful element to your dessert table.
Your Shopping Guide
When preparing to make these Red Velvet Whoopie Pies, make sure you have the following ingredients on hand:
- 2 cups all-purpose flour
- 1/3 cup cocoa powder (unsweetened)
- 1 teaspoon baking soda
- 1/2 teaspoon salt
- 8 tablespoons (1 stick) butter, at room temperature
- 1 cup sugar
- 1 large egg
- 2 tablespoons red food coloring
- 1 1/2 teaspoons vanilla extract
- 1 cup buttermilk (made by adding 1 tablespoon lemon juice or vinegar to 1 scant cup of milk)
Must-Have Equipment
Before you start baking, ensure you have the following equipment:
- Mixing bowls: For combining your ingredients smoothly.
- Electric mixer: To make the mixing process quicker and easier.
- Baking sheets: For placing your whoopie pies to bake.
- Parchment paper: To prevent sticking and make cleanup easier.
- Cooling rack: For allowing your pies to cool properly.
The Method for Red Velvet Whoopie Pies
Now, let’s dive into the step-by-step process of making these scrumptious Red Velvet Whoopie Pies.
Step 1: Prepare Your Oven and Baking Sheets
Preheat your oven to 350°F (175°C). Line two baking sheets with parchment paper and set them aside.
Step 2: Combine Dry Ingredients
In a medium bowl, whisk together the flour, cocoa powder, baking soda, and salt. This helps ensure that all the dry ingredients are evenly distributed.
Step 3: Cream Butter and Sugar
In a large mixing bowl, beat the butter and sugar together using an electric mixer on medium speed until the mixture is light and fluffy.
Step 4: Add Wet Ingredients
Add the egg, red food coloring, and vanilla extract to the butter mixture. Beat until well combined. The color should be a vibrant red.
Step 5: Incorporate Buttermilk and Dry Ingredients
Alternate adding the dry mixture and buttermilk to the wet mixture. Start and end with the dry ingredients, mixing until just combined. Be careful not to overmix.
Step 6: Drop the Batter
Using a cookie scoop or tablespoon, drop rounded tablespoons of batter onto the prepared baking sheets, ensuring they are spaced about 2 inches apart.
Step 7: Bake
Bake in the preheated oven for 10-12 minutes, or until the tops spring back when lightly pressed. Let them cool on the baking sheets for a few minutes before transferring to a wire rack to cool completely.
Step 8: Prepare the Filling
While the whoopie pies are cooling, prepare your filling. You can use a simple cream cheese frosting or any filling of your choice.
Step 9: Assemble the Whoopie Pies
Once the cookies are completely cool, spread a generous amount of filling on the flat side of one pie and top it with another pie. Gently press down to secure.
Seasonal Flavor Boosts
To make your Red Velvet Whoopie Pies even more exciting, consider these seasonal flavor boosts:
- Add a pinch of cinnamon for a warm spice touch in the fall.
- Incorporate peppermint extract during the winter holidays for a festive flavor.
- Mix in some orange zest for a refreshing twist in the spring.
- Use pumpkin spice in the filling for a delicious autumn-inspired treat.
Recipe Notes & Chef’s Commentary
- Make sure your butter is at room temperature for easier mixing.
- Feel free to adjust the amount of red food coloring to achieve your desired color.
- For a different flavor profile, try using a chocolate cream cheese filling instead of traditional frosting.
- If you’re a fan of textures, consider adding crushed nuts or sprinkles to the filling for added crunch.
Refrigerate, Freeze, Reheat
These Red Velvet Whoopie Pies can be stored in the refrigerator for up to a week. Simply place them in an airtight container to keep them fresh. If you want to make them ahead of time, you can freeze the assembled whoopie pies for up to three months. To reheat, let them sit at room temperature for about 30 minutes before enjoying, or pop them in the microwave for a few seconds to warm them up.
Questions People Ask
Can I use cake flour instead of all-purpose flour?
Yes, though the texture may be slightly different. Cake flour will yield a softer whoopie pie.
Can I make these gluten-free?
Absolutely! You can substitute the all-purpose flour with a gluten-free flour blend that measures cup-for-cup.
What can I use instead of red food coloring?
If you prefer a natural alternative, you can use beet juice or powdered beetroot to achieve a similar hue.
How do I know when my whoopie pies are done baking?
The whoopie pies are done when they spring back to the touch and are set around the edges. They should not look wet or shiny on top.
Next Up in Your Queue
Ready, Set, Cook
Now that you have all the tips, tricks, and methods for creating the perfect Red Velvet Whoopie Pies, it’s time to roll up your sleeves and get baking! With their vibrant color and delicious flavor, these whoopie pies are sure to be a hit. Whether for a special occasion or just a sweet treat to brighten your day, they will not disappoint. Enjoy the process, and savor each delightful bite!
Red Velvet Whoopie Pies
Ingredients
Equipment
Method
- Preheat your oven to 350°F (175°C). Line two baking sheets with parchment paper and set them aside.
- In a medium bowl, whisk together the flour, cocoa powder, baking soda, and salt.
- In a large mixing bowl, beat the butter and sugar together using an electric mixer on medium speed until light and fluffy.
- Add the egg, red food coloring, and vanilla extract to the butter mixture. Beat until well combined.
- Alternate adding the dry mixture and buttermilk to the wet mixture, starting and ending with the dry ingredients. Mix until just combined.
- Using a cookie scoop or tablespoon, drop rounded tablespoons of batter onto the prepared baking sheets, spaced about 2 inches apart.
- Bake for 10-12 minutes, or until the tops spring back when lightly pressed. Let cool on the baking sheets for a few minutes before transferring to a wire rack.
- While the whoopie pies are cooling, prepare your filling. You can use a simple cream cheese frosting or any filling of your choice.
- Once the cookies are completely cool, spread a generous amount of filling on the flat side of one pie and top with another pie.
Notes
- Make sure your butter is at room temperature for easier mixing.
- Adjust the amount of red food coloring to achieve your desired color.
- Try using a chocolate cream cheese filling for a different flavor profile.
- Add crushed nuts or sprinkles to the filling for added texture.