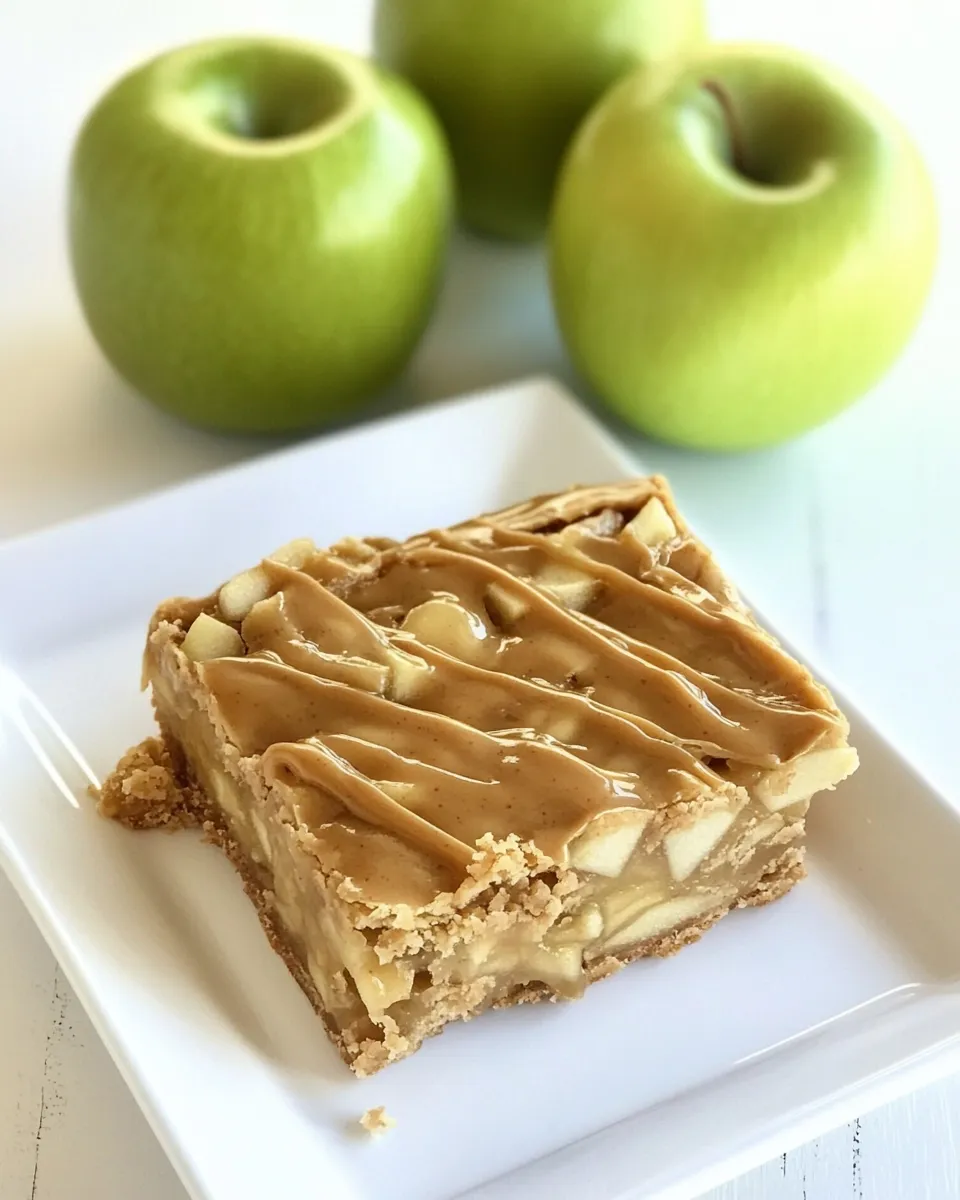
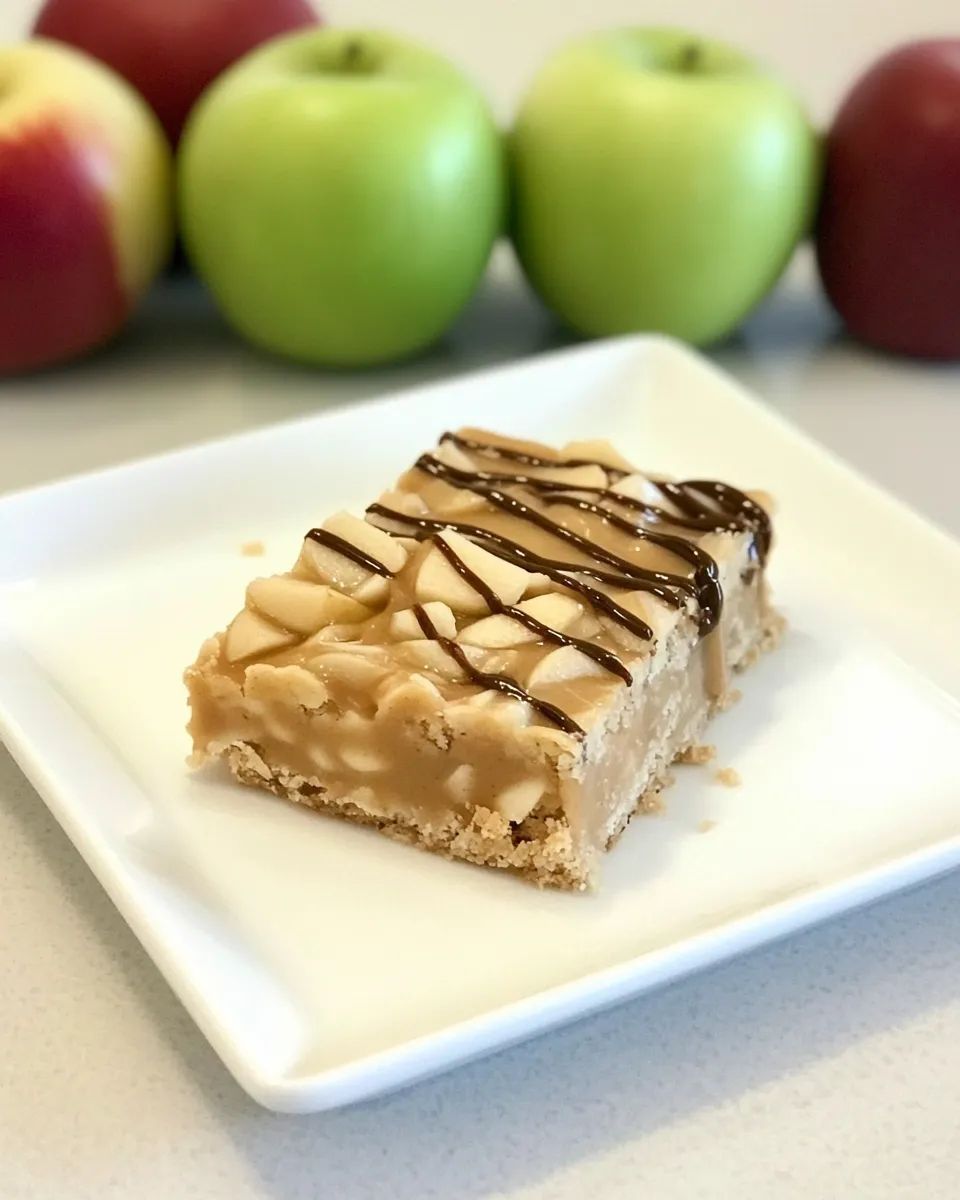
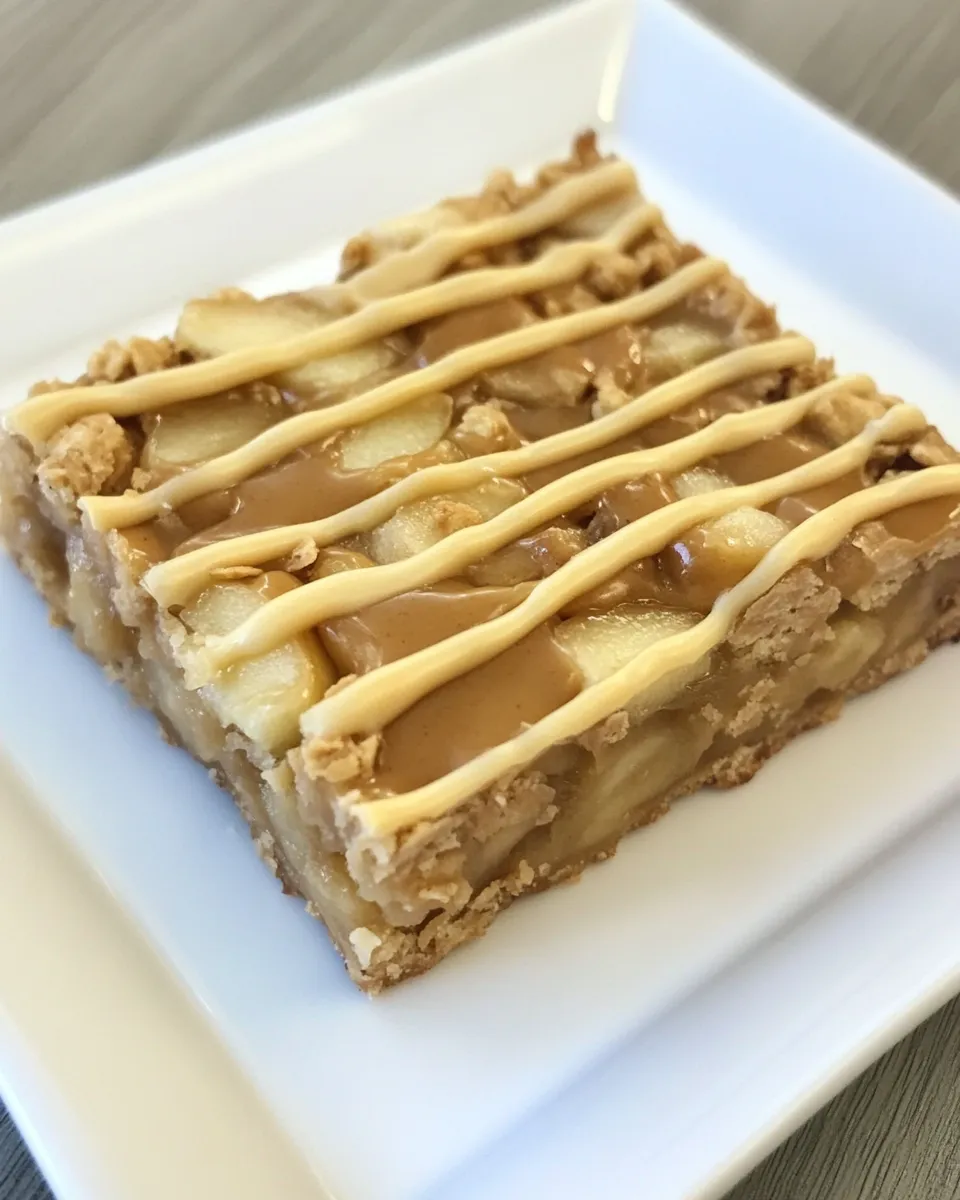
Peanut Butter Apple Bars
Peanut Butter Apple Bars are the perfect blend of sweet, nutty, and fruity that will have everyone reaching for a second (or third) piece. These bars are not only delicious but also incredibly simple to whip up, making them an ideal treat for any gathering. With a rich peanut butter base and chunks of fresh apples, they offer a comforting flavor that feels like home. Drizzled with a creamy peanut butter glaze, these bars are the ultimate dessert for peanut butter lovers and a delightful way to enjoy apples. Let’s dive into how to make these scrumptious bars that are sure to become a favorite in your recipe collection.
Why It’s Crowd-Pleasing
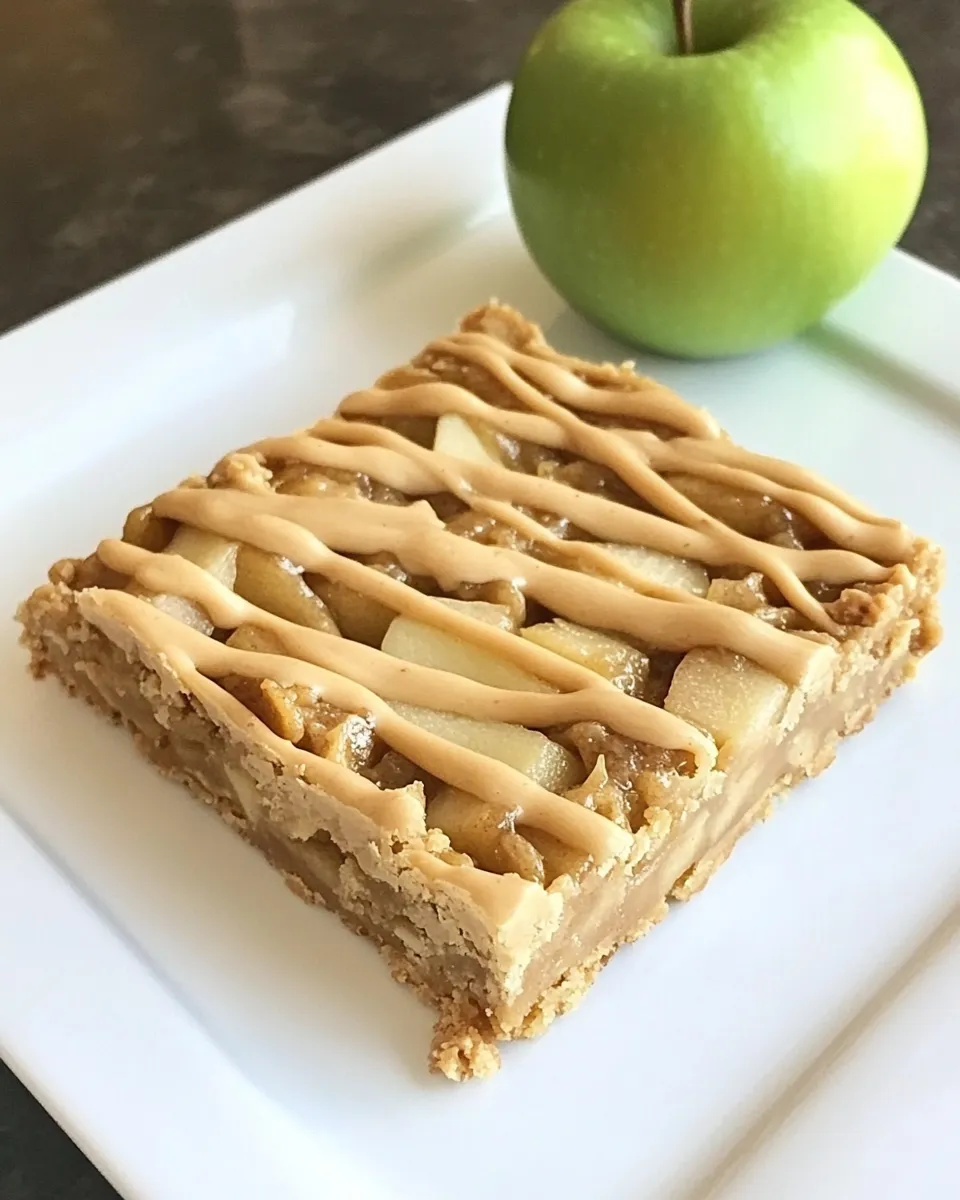
Peanut Butter Apple Bars are a hit for several reasons. First, the combination of peanut butter and apples creates a delightful contrast between creamy and crunchy. The sweetness of the light brown sugar complements the tartness of the Granny Smith apples, making each bite a burst of flavor. Moreover, they are incredibly versatile; you can serve them warm, at room temperature, or chilled, making them perfect for any occasion—from casual family gatherings to festive celebrations. Plus, with the addition of a simple peanut butter glaze, they look as good as they taste. These bars are sure to impress both kids and adults alike!
Your Shopping Guide
To make these Peanut Butter Apple Bars, you’ll need to gather a few key ingredients. Here’s your shopping list:
- Unsalted butter: 1/2 cup (1 stick)
- Light brown sugar: 2 cups
- Creamy peanut butter: 1/2 cup
- Large eggs: 2
- Vanilla extract: 1 teaspoon
- All-purpose flour: 2 1/2 cups
- Baking powder: 1 teaspoon
- Baking soda: 1/4 teaspoon
- Salt: 1/2 teaspoon
- Diced apples: 1 cup (Granny Smith apples recommended)
For the peanut butter glaze, you will need:
- Sifted powdered sugar: 1 1/2 cups
- Milk: 1/4 cup
- Creamy peanut butter: 1/4 cup
- Vanilla extract: 1/2 teaspoon
Equipment & Tools
Before you start baking, make sure you have the following equipment:
- Mixing bowls: For combining ingredients.
- Measuring cups and spoons: Essential for accurate measurements.
- 9×13-inch baking pan: To bake the bars evenly.
- Spatula: For spreading the batter and mixing ingredients.
- Whisk: To mix wet ingredients smoothly.
- Cooling rack: For allowing the bars to cool before glazing.
Peanut Butter Apple Bars: How It’s Done
Making these delicious Peanut Butter Apple Bars is a straightforward process. Follow these simple steps:
Step 1: Preheat the Oven
Preheat your oven to 350°F (175°C). Grease your 9×13-inch baking pan or line it with parchment paper for easy removal.
Step 2: Prepare the Batter
In a large mixing bowl, cream together the unsalted butter and light brown sugar until light and fluffy. This should take about 2-3 minutes using an electric mixer.
Step 3: Add Peanut Butter and Eggs
Mix in the creamy peanut butter until well combined. Then, add the eggs one at a time, mixing well after each addition. Don’t forget to add the vanilla extract!
Step 4: Combine Dry Ingredients
In another bowl, whisk together the all-purpose flour, baking powder, baking soda, and salt. Gradually add this dry mixture to the wet ingredients, mixing until just combined.
Step 5: Fold in Apples
Gently fold in the diced apples, being careful not to overmix.
Step 6: Bake the Bars
Pour the batter into your prepared baking pan, spreading it evenly. Bake in the preheated oven for 25-30 minutes, or until a toothpick inserted in the center comes out clean.
Step 7: Cool the Bars
Once baked, remove the bars from the oven and let them cool in the pan for about 10 minutes. Then, transfer them to a cooling rack to cool completely.
Step 8: Make the Glaze
While the bars are cooling, prepare the peanut butter glaze. In a medium bowl, whisk together the sifted powdered sugar, milk, creamy peanut butter, and vanilla extract until smooth.
Step 9: Glaze the Bars
Once the bars are completely cooled, drizzle the peanut butter glaze over the top, spreading it with a spatula if desired.
Step 10: Cut and Serve
Cut the bars into squares, serve them up, and enjoy the deliciousness!
Better Choices & Swaps
If you’re looking to make some adjustments or substitutions in the Peanut Butter Apple Bars recipe, consider the following:
- Nut Butter: Swap creamy peanut butter for almond butter or sunflower seed butter for a different nutty flavor.
- Apples: Use different apple varieties like Honeycrisp or Fuji for a sweeter taste.
- Gluten-Free: Substitute all-purpose flour with a gluten-free baking blend.
- Dairy-Free: Use coconut oil in place of unsalted butter and a non-dairy milk alternative for the glaze.
Insider Tips
- Make sure your butter is at room temperature for easier mixing.
- Don’t overmix the batter once you add the dry ingredients to keep the bars soft and chewy.
- Experiment with add-ins like chopped nuts or chocolate chips for extra flavor and texture.
- For an added touch, sprinkle some chopped peanuts or a pinch of sea salt on top of the glaze before it sets.
Best Ways to Store
To keep your Peanut Butter Apple Bars fresh and delicious:
- Store them in an airtight container at room temperature for up to 3 days.
- If you want to keep them longer, refrigerate them for up to a week.
- You can also freeze the bars by wrapping each piece in plastic wrap and placing them in a freezer-safe container for up to 3 months. Just thaw before serving!
Troubleshooting Q&A
What if my bars turned out too dry?
If your Peanut Butter Apple Bars came out dry, it might be due to overbaking. Make sure to check them a few minutes before the suggested baking time and remove them as soon as a toothpick comes out clean.
Can I use crunchy peanut butter instead?
Absolutely! Using crunchy peanut butter will add a delightful texture to the bars. Just be aware that it will change the overall consistency slightly.
How do I know when my bars are done baking?
The bars are done when the edges are lightly golden brown and a toothpick inserted in the center comes out clean. They should spring back slightly when touched.
Can I make these bars ahead of time?
Yes! You can make Peanut Butter Apple Bars a day in advance. Just store them in an airtight container at room temperature or in the fridge until you’re ready to serve.
Desserts to Finish
If you’re looking for more delightful desserts to complement your Peanut Butter Apple Bars, here are a few ideas:
- Chocolate Chip Cookies – A classic favorite that everyone loves.
- Banana Bread – Moist and flavorful, perfect for breakfast or dessert.
- Vegan Chocolate Cake – Rich and decadent, this cake is a showstopper.
- Red Velvet Cupcakes – Beautiful, delicious, and perfect for any celebration.
Time to Try It
Now that you have all the information you need, it’s time to roll up your sleeves and start baking these Peanut Butter Apple Bars! With their delightful flavor and easy preparation, you’ll surely impress your friends and family. Don’t forget to share your creations and let others enjoy this scrumptious treat. Happy baking!
Peanut Butter Apple Bars
Ingredients
Equipment
Method
- Step 1: Preheat your oven to 350°F (175°C). Grease your 9x13-inch baking pan or line it with parchment paper for easy removal.
- Step 2: In a large mixing bowl, cream together the unsalted butter and light brown sugar until light and fluffy, about 2-3 minutes using an electric mixer.
- Step 3: Mix in the creamy peanut butter until well combined. Then, add the eggs one at a time, mixing well after each addition. Don’t forget to add the vanilla extract!
- Step 4: In another bowl, whisk together the all-purpose flour, baking powder, baking soda, and salt. Gradually add this dry mixture to the wet ingredients, mixing until just combined.
- Step 5: Gently fold in the diced apples, being careful not to overmix.
- Step 6: Pour the batter into your prepared baking pan, spreading it evenly. Bake for 25-30 minutes, or until a toothpick inserted in the center comes out clean.
- Step 7: Once baked, remove the bars from the oven and let them cool in the pan for about 10 minutes. Then, transfer them to a cooling rack to cool completely.
- Step 8: While the bars are cooling, prepare the peanut butter glaze. In a medium bowl, whisk together the sifted powdered sugar, milk, creamy peanut butter, and vanilla extract until smooth.
- Step 9: Once the bars are completely cooled, drizzle the peanut butter glaze over the top, spreading it with a spatula if desired.
- Step 10: Cut the bars into squares, serve them up, and enjoy the deliciousness!
Notes
- Make sure your butter is at room temperature for easier mixing.
- Don’t overmix the batter once you add the dry ingredients to keep the bars soft and chewy.
- Experiment with add-ins like chopped nuts or chocolate chips for extra flavor and texture.
- For an added touch, sprinkle some chopped peanuts or a pinch of sea salt on top of the glaze before it sets.