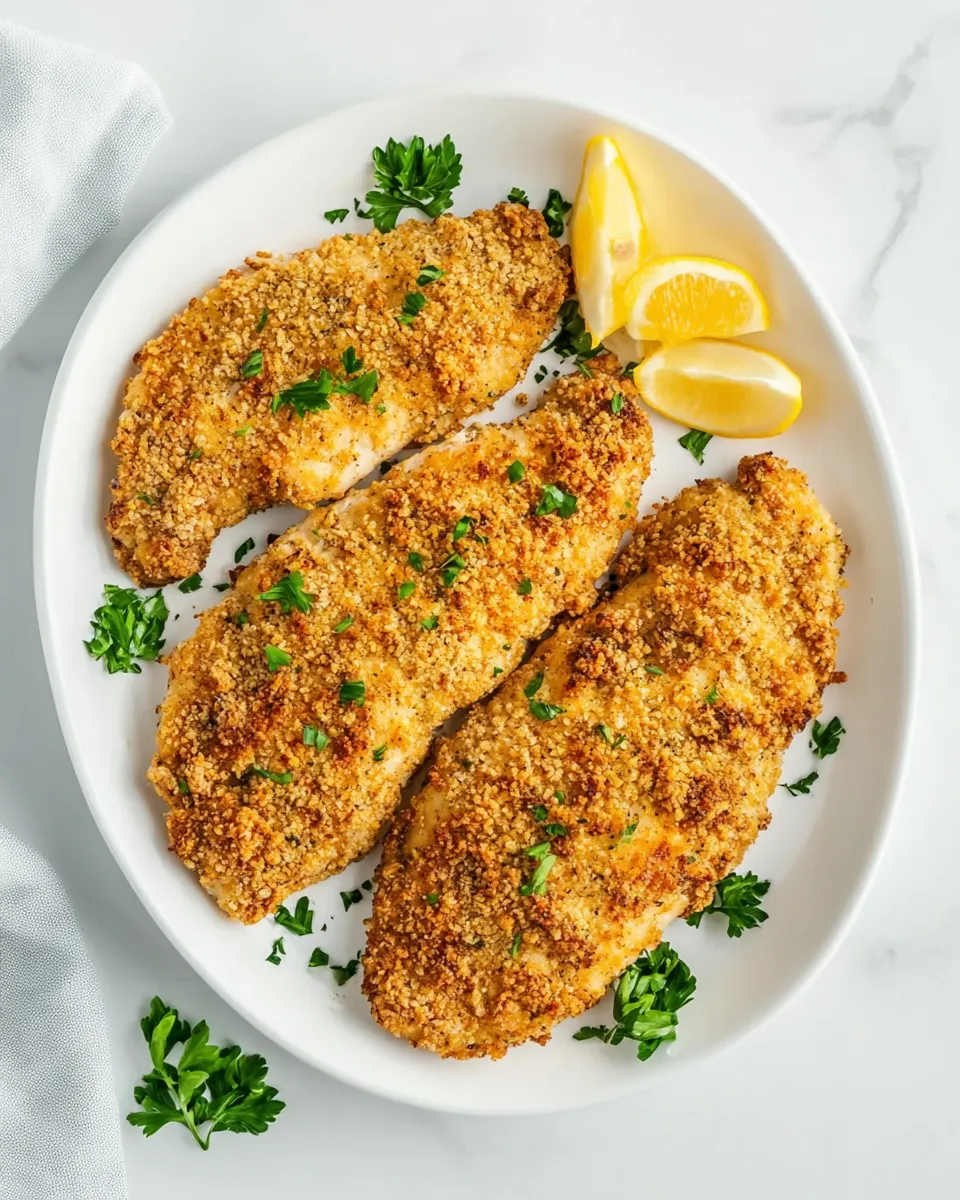
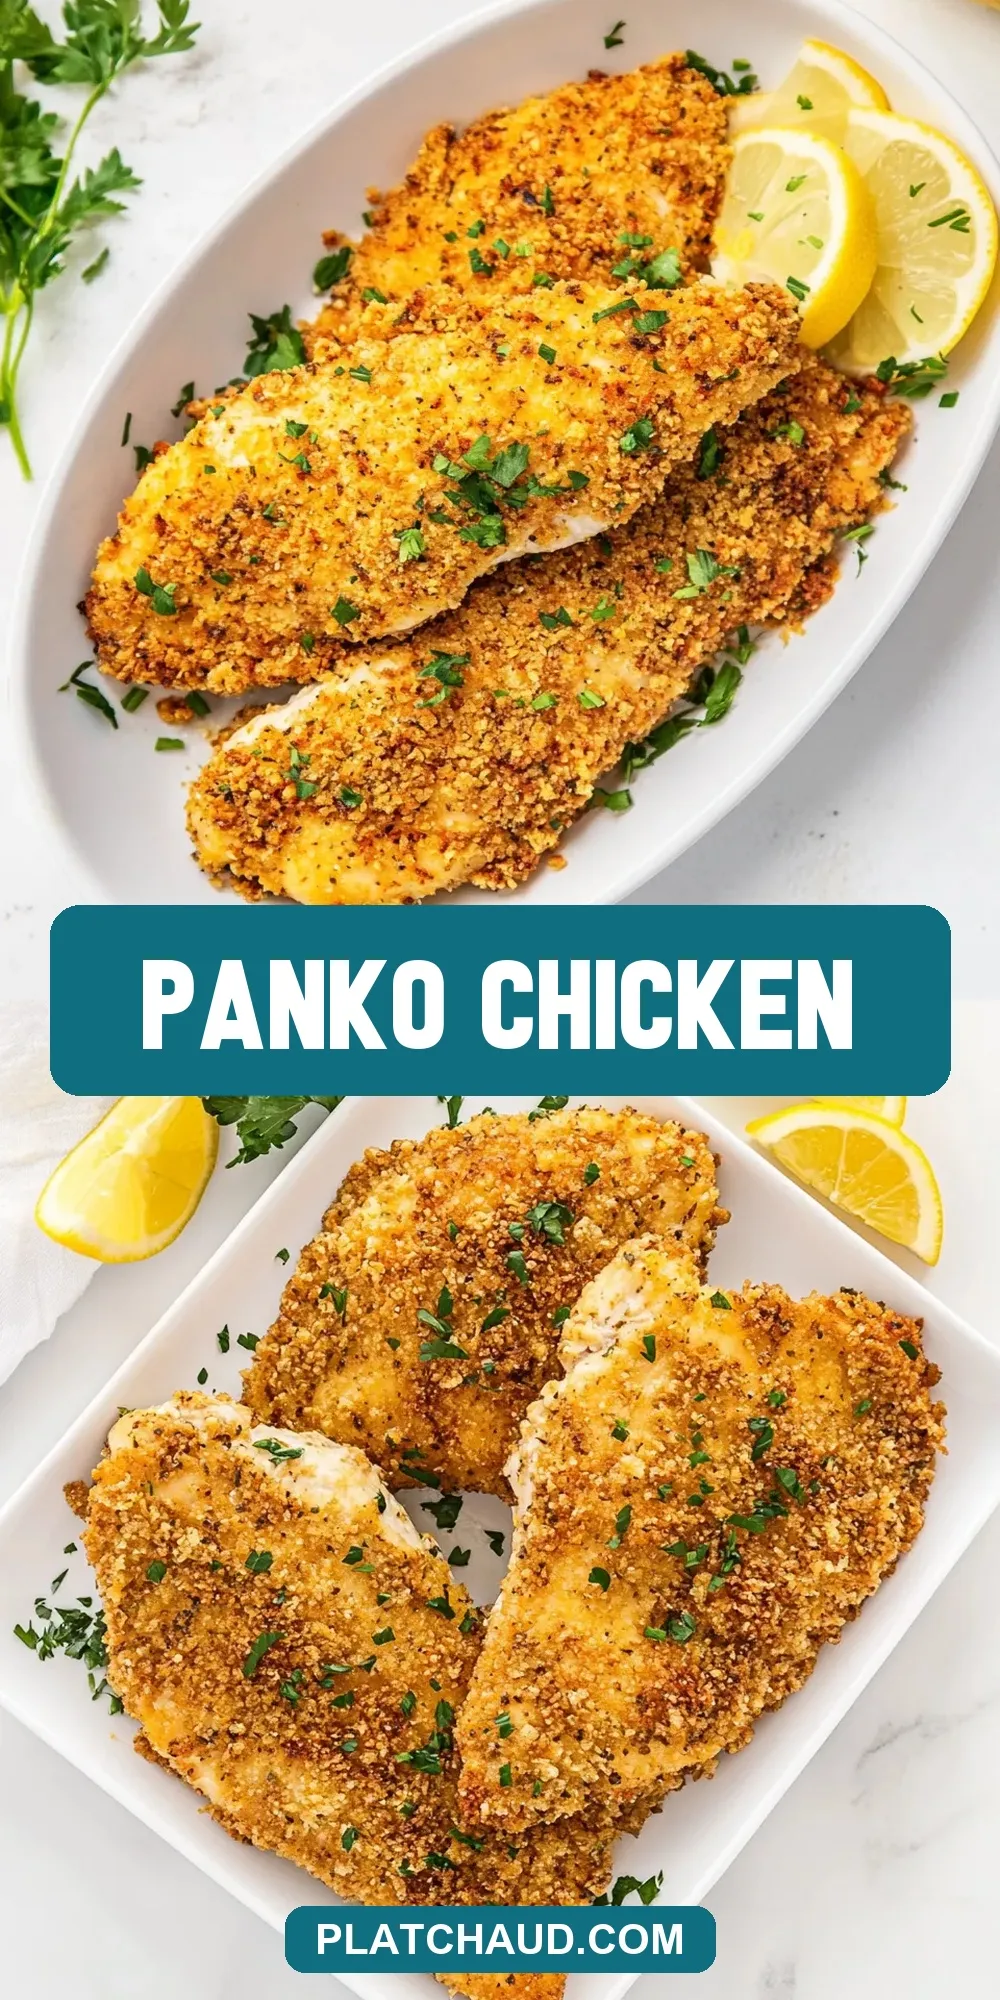
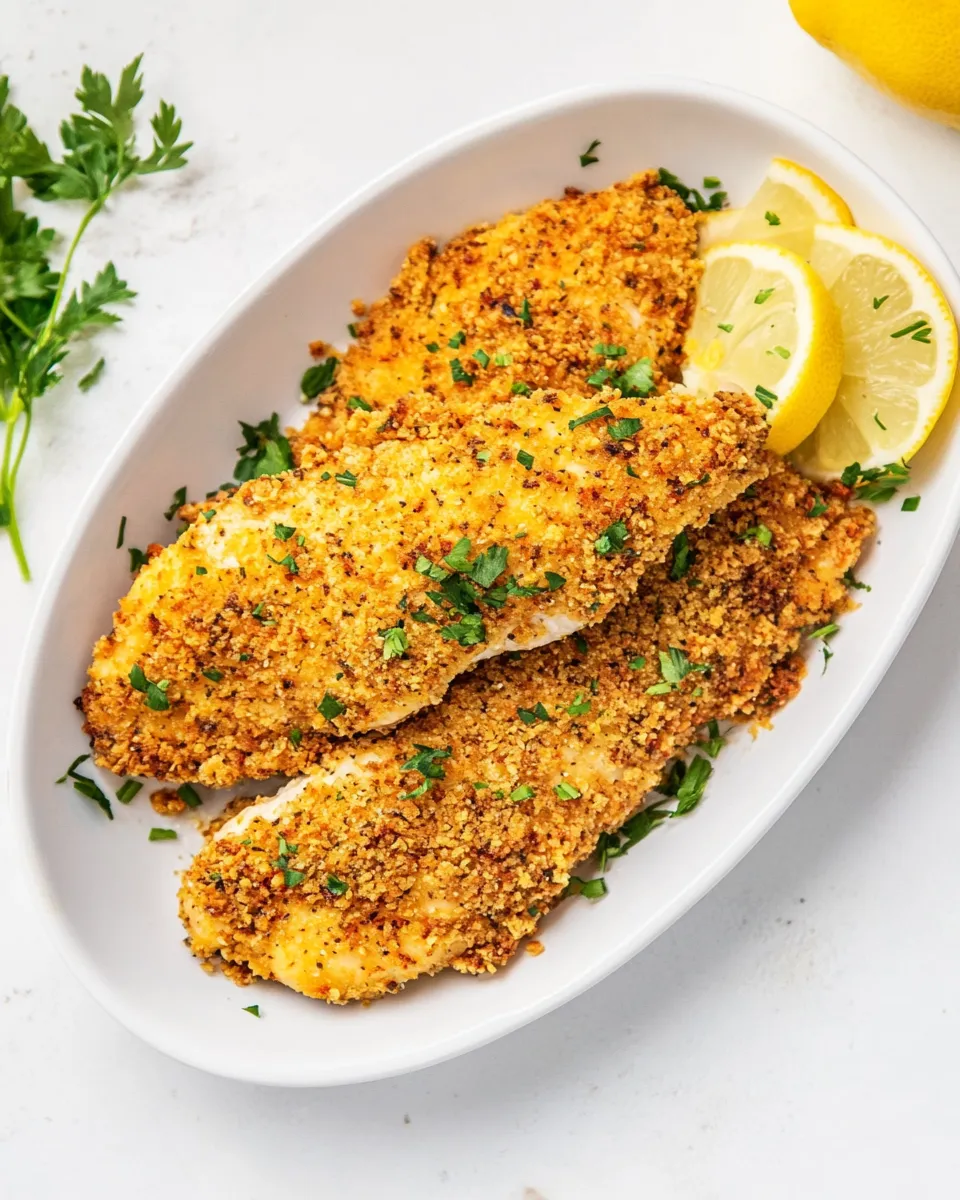
Panko Chicken
Panko Chicken is a delightful dish that transforms simple chicken breasts into a crispy, flavorful meal that is perfect for both weeknights and special occasions. With its crunchy panko coating and tender chicken, this recipe is sure to become a family favorite. In this article, we will explore the steps to create this mouthwatering dish, along with tips and tricks to elevate your cooking game.
Why This Recipe Works

The secret to the perfect Panko Chicken lies in the unique texture of panko breadcrumbs. Unlike traditional breadcrumbs, panko is lighter and crispier, giving the chicken a wonderful crunch without the heaviness. This recipe combines pantry staples like flour, eggs, and seasonings to create a flavorful coating that adheres beautifully to the chicken. The addition of olive oil not only enhances the flavor but also helps achieve that golden brown color that makes this dish so appealing. Whether served with a side of vegetables or on top of a salad, Panko Chicken is sure to impress.
Shopping List
- 1 cup all-purpose flour
- 1 teaspoon garlic powder
- 1 teaspoon onion powder
- 1 teaspoon salt
- 1 teaspoon black pepper
- 2 large eggs (room temperature)
- 1 cup plain panko breadcrumbs
- 1/2 cup grated Parmesan cheese
- 3 tablespoons olive oil
- 4 boneless skinless chicken breast cutlets (approximately 1-1.5 pounds to 1/2-inch thickness)
- Fresh chopped parsley (optional garnish)
- Fresh lemon wedges (optional garnish)
Setup & Equipment
- Three shallow dishes: For flour, eggs, and panko mixture.
- Baking sheet: To place the chicken on before baking.
- Parchment paper: For easy cleanup on the baking sheet.
- Meat mallet or rolling pin: To pound the chicken to even thickness.
- Wire rack: Optional, for extra crispiness when baking.
Stepwise Method: Panko Chicken
Step 1: Prepare the Chicken
Start by preheating your oven to 400°F (200°C). While the oven is heating, place the chicken cutlets between two sheets of plastic wrap or parchment paper. Using a meat mallet or rolling pin, gently pound the chicken to an even thickness of about 1/2 inch. This ensures that the chicken cooks evenly and remains juicy.
Step 2: Set Up the Breading Station
In three shallow dishes, set up your breading station. In the first dish, combine the all-purpose flour, garlic powder, onion powder, salt, and black pepper. In the second dish, whisk the two large eggs until well combined. In the third dish, mix the plain panko breadcrumbs with the grated Parmesan cheese.
Step 3: Bread the Chicken
Coat each chicken cutlet in the flour mixture, shaking off any excess. Next, dip the floured chicken into the egg mixture, ensuring it’s fully coated. Finally, press the chicken into the panko and Parmesan mixture, covering both sides thoroughly. Ensure that the coating is secure for maximum crunch.
Step 4: Bake the Chicken
Line a baking sheet with parchment paper for easy cleanup and place a wire rack on top if you have one. This allows air to circulate around the chicken, making it crispier. Drizzle the olive oil over the rack or use a non-stick cooking spray. Place the breaded chicken cutlets on the rack or directly on the baking sheet. Bake in the preheated oven for 20-25 minutes or until the chicken is golden brown and cooked through (internal temperature should reach 165°F or 74°C).
Step 5: Serve and Enjoy
Once baked, remove the Panko Chicken from the oven and let it rest for a few minutes. Garnish with fresh chopped parsley and serve with lemon wedges for a zesty kick. Pair it with your favorite sides, such as roasted vegetables, mashed potatoes, or a crisp salad.
Seasonal Ingredient Swaps
- Herbs: In place of parsley, consider using fresh basil or cilantro for a different flavor profile.
- Cheese: Swap Parmesan for Pecorino Romano or nutritional yeast if you prefer a dairy-free option.
- Spices: Add a pinch of smoked paprika or cayenne pepper for a little heat.
- Breadcrumbs: Use seasoned breadcrumbs instead of plain panko for added flavor.
Don’t Do This
- Don’t skip the resting time after baking; this allows the juices to redistribute within the chicken.
- Avoid overcrowding the baking sheet, as it can lead to steaming instead of crisping.
- Do not use cold chicken; bringing the chicken to room temperature ensures even cooking.
- Steer clear of using stale panko, as freshness is key to achieving that crispy texture.
Store, Freeze & Reheat
Leftover Panko Chicken can be stored in an airtight container in the refrigerator for up to 3 days. For longer storage, freeze the cooked chicken in a single layer on a baking sheet, then transfer to a freezer-safe bag once frozen. It can be stored for up to 3 months. To reheat, place the chicken in a preheated oven at 375°F (190°C) for about 10-15 minutes until heated through and crispy.
Handy Q&A
Can I use chicken thighs instead of breasts?
Absolutely! Chicken thighs can be used for a juicier alternative. Just adjust the cooking time as dark meat may require a bit longer to cook through.
What can I serve with Panko Chicken?
Panko Chicken pairs wonderfully with a variety of sides. Consider serving it with roasted vegetables, a fresh garden salad, or even over pasta with a light sauce, similar to Honey Garlic Chicken Thighs Over Orzo.
Can I make this dish ahead of time?
Yes, you can prep the chicken and bread it ahead of time. Store the breaded cutlets in the refrigerator for up to a day before baking.
How can I make Panko Chicken gluten-free?
To make this dish gluten-free, swap out the all-purpose flour with a gluten-free flour blend and use gluten-free panko breadcrumbs. The results will still be delicious!
Our Most-Loved Recipes
Final Thoughts
Panko Chicken is not just a dish; it’s an experience of flavors and textures coming together to create something truly special. With its crunch and juiciness, it’s perfect for any occasion, whether you’re cooking for family or entertaining guests. By following this recipe, you’ll create a dish that is sure to impress and satisfy even the pickiest eaters. Enjoy the process of cooking, and don’t forget to share your delicious results!
Share on Pinterest
Panko Chicken
Ingredients
Equipment
Method
- Start by preheating your oven to 400°F (200°C). Place the chicken cutlets between two sheets of plastic wrap or parchment paper. Pound the chicken to an even thickness of about 1/2 inch.
- In three shallow dishes, set up your breading station. In the first dish, combine the flour, garlic powder, onion powder, salt, and black pepper. In the second dish, whisk the eggs. In the third dish, mix the panko breadcrumbs and Parmesan cheese.
- Coat each chicken cutlet in the flour mixture, shaking off any excess. Dip into the egg mixture, then press into the panko and Parmesan mixture, covering both sides thoroughly.
- Line a baking sheet with parchment paper and place a wire rack on top if you have one. Drizzle olive oil over the rack or use non-stick spray. Place the breaded chicken on the rack or directly on the baking sheet. Bake for 20-25 minutes or until golden brown and cooked through.
- Once baked, let the Panko Chicken rest for a few minutes. Garnish with parsley and serve with lemon wedges.
Notes
- Don’t skip the resting time after baking to allow juices to redistribute.
- Avoid overcrowding the baking sheet for crispiness.
- Use room temperature chicken for even cooking.