Onigiri Recipe (Japanese Rice Balls)
Japanese cuisine has a unique ability to blend simplicity with flavor, and one of the most delightful examples of this is the Onigiri Recipe (Japanese Rice Balls). These rice balls are not just a staple in Japanese households; they are also a perfect on-the-go snack or a lovely addition to any picnic. With a few ingredients and some love, you can create these beautifully crafted rice balls that are both delicious and versatile.
Onigiri, often shaped into triangles or rounds, can be filled or topped with various ingredients, which makes them an exciting option for a meal or snack. The best part? They are incredibly easy to make at home, and with this recipe, you’ll be able to impress your family and friends with your culinary skills. So, let’s dive into the world of onigiri!
What Sets This Recipe Apart
This onigiri recipe is designed to be straightforward yet versatile. It incorporates Japanese sushi rice, which provides the perfect sticky texture to hold the shapes well. The addition of furikake, a flavorful seasoning blend, adds an extra layer of umami, while the optional tobiko (fish roe) gives a delightful pop of flavor. This recipe allows for customization, making it a fun activity for families or gatherings where everyone can create their favorite filling and toppings.
Shopping List
To make your own onigiri, you’ll need the following ingredients:
- 1 cup Japanese sushi rice
- 1 tablespoon rice vinegar (optional)
- 2 tablespoons furikake (bottled Japanese seasoning)
- 1 pinch salt
- 1 pinch white sesame
- Toasted seaweed sheets
- 1 tablespoon tobiko (or fish roe)
Make sure to choose high-quality sushi rice; it’s essential for achieving the right consistency that makes onigiri so enjoyable.
Appliances & Accessories
To make the process easier, consider using the following appliances and accessories:
- Rice cooker – This can help you achieve perfectly cooked sushi rice.
- Mixing bowl – For combining your rice and seasonings.
- Plastic wrap – Useful for shaping the onigiri and preventing sticking.
- Sharp knife – For cutting the seaweed into strips.
These tools will help streamline your preparation process, making it enjoyable and efficient.
Onigiri Recipe (Japanese Rice Balls) Cooking Guide
Now, let’s get started with making your delicious onigiri. Follow these simple steps:
Step 1: Rinse the Rice
Begin by rinsing 1 cup of Japanese sushi rice under cold water. This helps remove excess starch, ensuring your rice is fluffy and not overly sticky.
Step 2: Cook the Rice
Cook the rinsed rice according to your rice cooker’s instructions. Generally, you will use a 1:1 ratio of rice to water. Allow the rice to steam for about 10 minutes after cooking to achieve the best texture.
Step 3: Season the Rice
Once the rice is cooked, transfer it to a mixing bowl. If using, add 1 tablespoon of rice vinegar to enhance the flavor. Sprinkle in a pinch of salt and mix gently while the rice is still warm. Be careful not to mash the grains.
Step 4: Shape the Onigiri
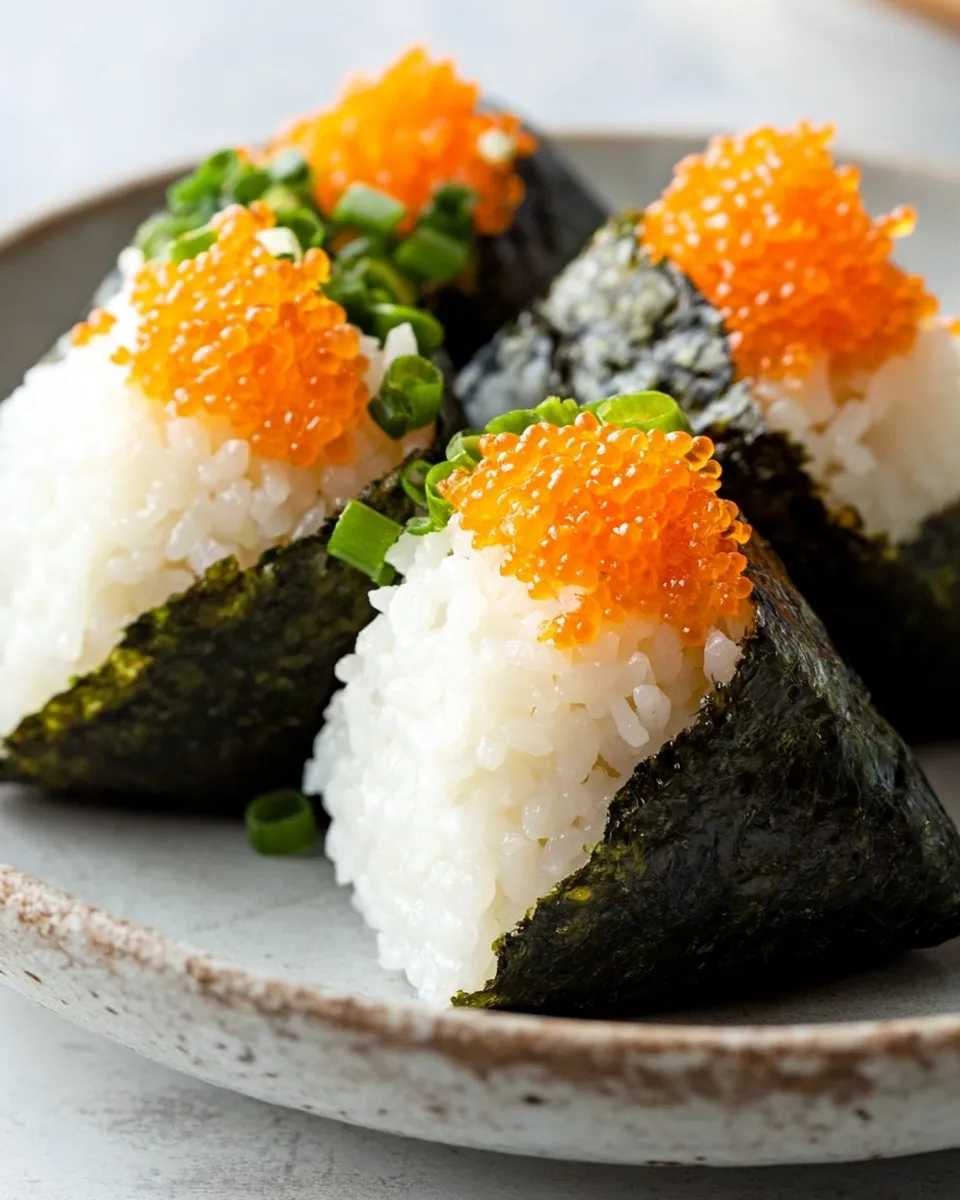
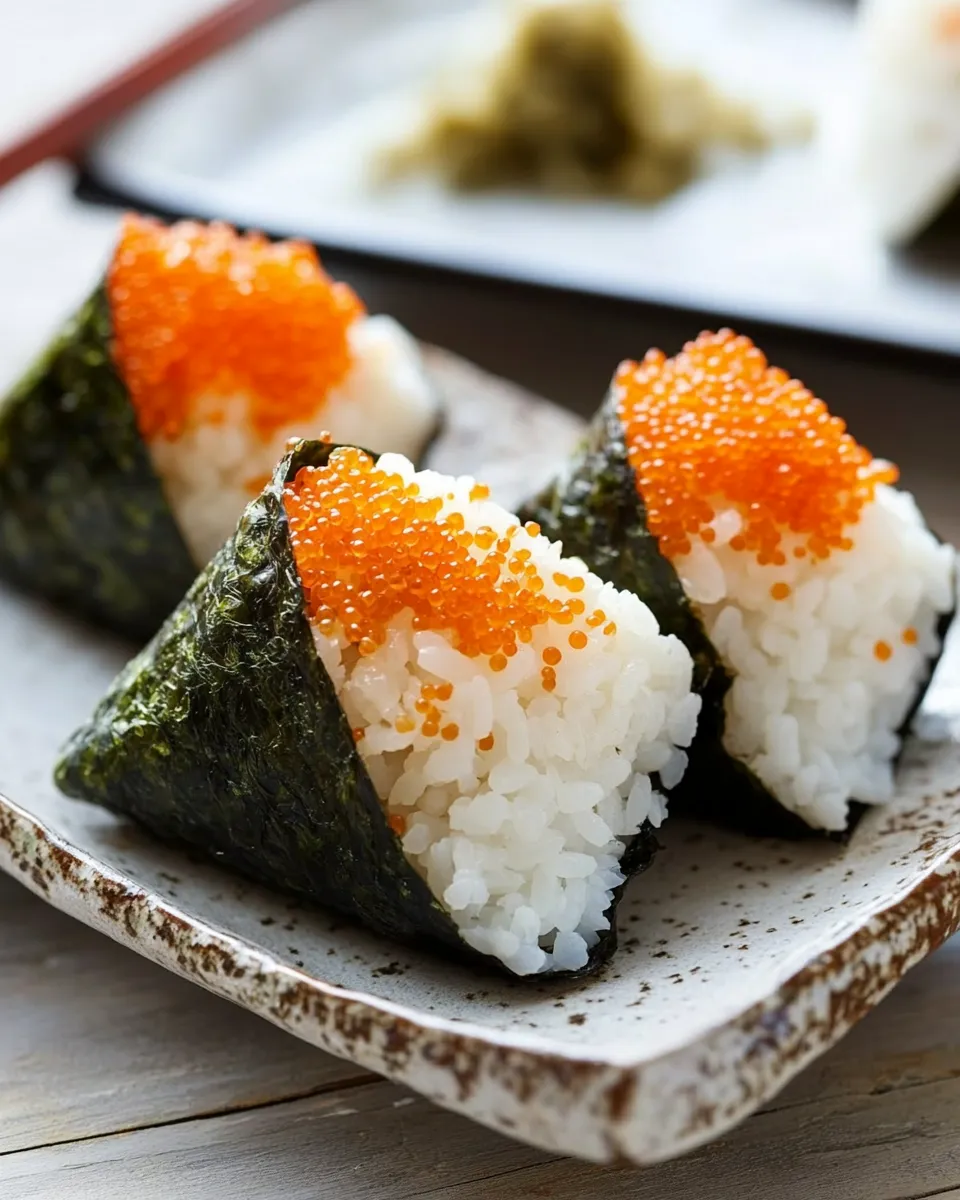
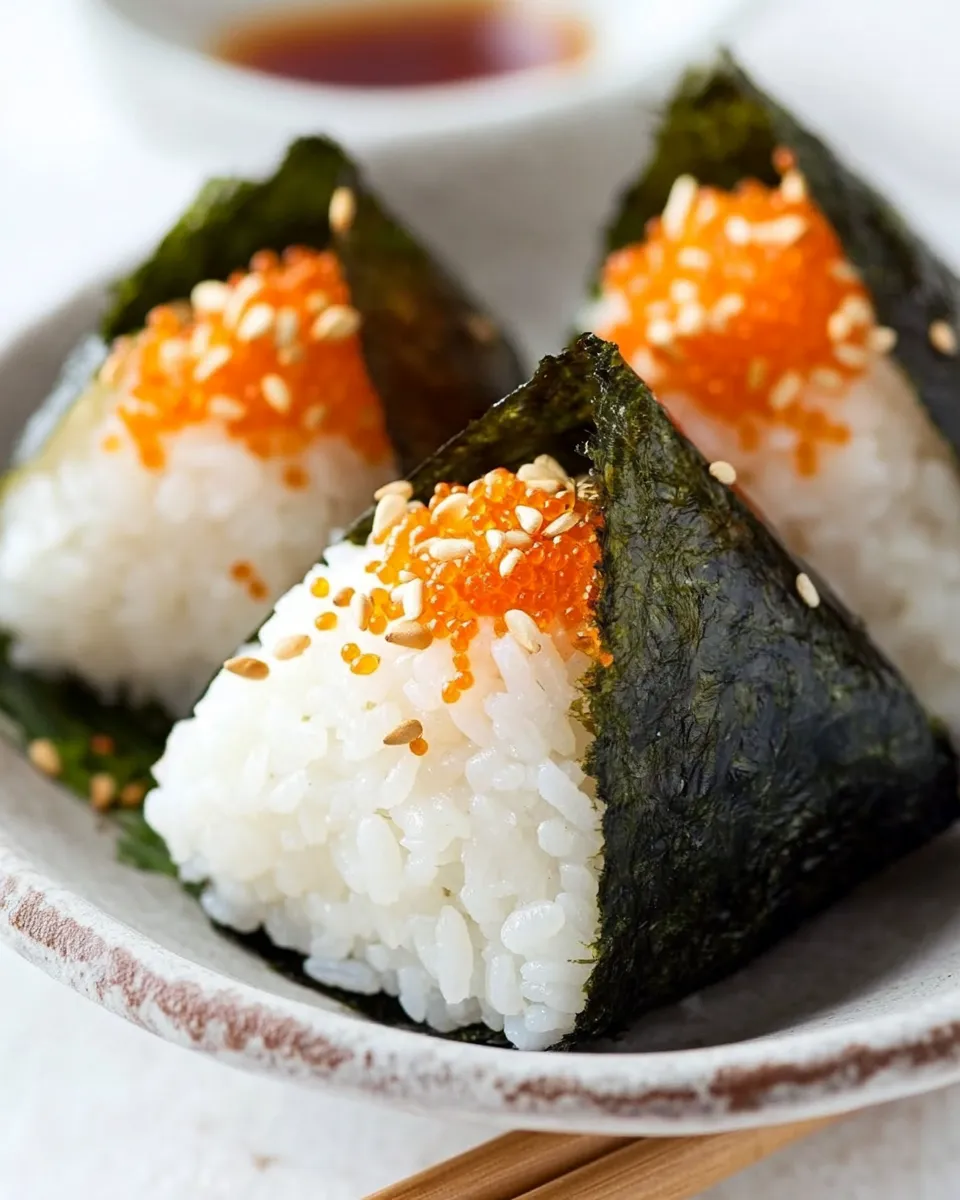
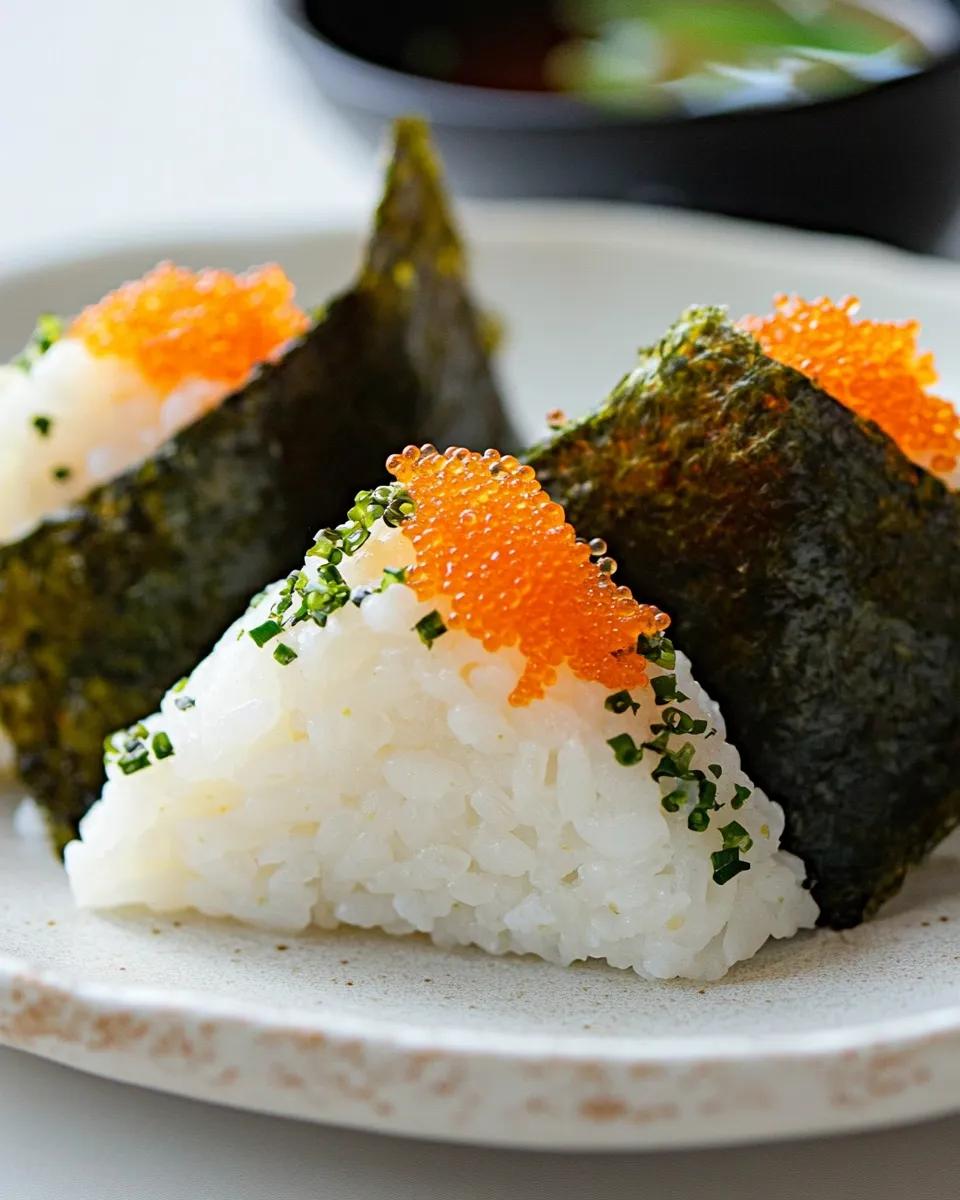
To shape your onigiri, wet your hands with water to prevent sticking. Take a portion of rice (about 1/4 cup) and form it into a triangle or ball shape. You can also create a small indentation in the center to fill with tobiko if desired.
Step 5: Add Furikake and Toppings
Sprinkle 2 tablespoons of furikake over the shaped rice. Optionally, you can add a bit of tobiko into the indentation you created earlier.
Step 6: Wrap with Seaweed
Cut your toasted seaweed into strips and wrap it around the onigiri. This not only adds flavor but also makes it easier to handle.
Step 7: Serve and Enjoy
Your onigiri is ready to be enjoyed! They can be served immediately or stored for later. Pair them with your favorite dipping sauce or enjoy them on their own.
In-Season Swaps
Feel free to customize your onigiri with seasonal ingredients. Here are a few suggestions:
- Spring: Add fresh avocado or edamame for a vibrant touch.
- Summer: Incorporate diced mango or cucumber for a refreshing bite.
- Fall: Use roasted squash or mushrooms for a warm, earthy flavor.
- Winter: Try adding kimchi for a spicy kick.
These swaps can elevate your onigiri experience and keep it interesting throughout the year.
Avoid These Mistakes
When making onigiri, it’s easy to make mistakes that can affect the final product. Here are some pitfalls to avoid:
- Not rinsing the rice thoroughly can result in overly sticky rice.
- Using cold rice can make it difficult to shape; always work with warm rice.
- Overfilling the onigiri can cause them to fall apart.
- Forgetting to wet your hands can lead to sticky fingers and messy shaping.
By being mindful of these common mistakes, you’ll have a much smoother cooking experience.
Save It for Later
Onigiri can be a perfect meal prep option. Here are some tips to save them for later:
- Wrap each onigiri individually in plastic wrap to keep them fresh.
- Store them in an airtight container in the fridge for up to 3 days.
- The onigiri can also be frozen; just ensure they are well-wrapped to avoid freezer burn.
- To reheat, let them thaw in the refrigerator and then microwave for a short time until warmed through.
This makes onigiri a fantastic option for busy days when you need a quick bite.
Onigiri Recipe (Japanese Rice Balls) Q&A
Can I use brown rice instead of sushi rice?
While you can use brown rice, it will change the texture and flavor of the onigiri. Sushi rice is recommended for the authentic sticky consistency.
What if I don’t have furikake?
If you can’t find furikake, you can create a simple seasoning with salt, sesame seeds, and a bit of nori crushed into flakes.
Can I make onigiri without seaweed?
Yes! Onigiri can be enjoyed without seaweed. You can serve them plain, or with a sprinkle of sesame seeds for added flavor.
How can I make vegetarian onigiri?
Simply skip the fish roe and fill your onigiri with vegetables like avocado, pickled radish, or sautéed mushrooms for a delicious vegetarian option.
One Pan, More Ideas
If you’re looking to explore more rice dishes, here are some delicious options:
- Cilantro Lime Rice – A zesty option that pairs well with many dishes.
- Shrimp Fried Rice – A protein-packed meal that’s easy to make.
These recipes will complement your onigiri and provide variety to your meals.
Hungry for More?
If you enjoyed this Onigiri Recipe (Japanese Rice Balls), there’s a world of flavors waiting for you. From sushi rolls to hearty ramen, the journey through Japanese cuisine is endless. We encourage you to experiment in the kitchen, try new ingredients, and make these recipes your own. Happy cooking!
Onigiri Recipe (Japanese Rice Balls)
Ingredients
Equipment
Method
- Step 1: Rinse the Rice - Begin by rinsing 1 cup of Japanese sushi rice under cold water to remove excess starch.
- Step 2: Cook the Rice - Cook the rinsed rice according to your rice cooker's instructions using a 1:1 ratio of rice to water.
- Step 3: Season the Rice - Transfer the cooked rice to a mixing bowl, add rice vinegar, salt, and mix gently.
- Step 4: Shape the Onigiri - Wet your hands and form a portion of rice (about 1/4 cup) into a triangle or ball shape.
- Step 5: Add Furikake and Toppings - Sprinkle furikake over the shaped rice and add tobiko if desired.
- Step 6: Wrap with Seaweed - Cut toasted seaweed into strips and wrap it around the onigiri.
- Step 7: Serve and Enjoy - Your onigiri is ready! They can be served immediately or stored for later.
Notes
- Wrap each onigiri individually in plastic wrap to keep them fresh.
- Store in an airtight container in the fridge for up to 3 days.
- Onigiri can be frozen; ensure they are well-wrapped to avoid freezer burn.