No Bake Mini-Nutella Cheesecake
If you’re a fan of indulgent desserts that are easy to whip up, then this No Bake Mini-Nutella Cheesecake is about to become your new obsession. Imagine a creamy, luscious cheesecake that combines the rich flavor of Nutella with a crunchy, buttery crust, all without turning on your oven. Perfect for warm weather or any time you want a sweet treat that doesn’t require hours in the kitchen, this mini cheesecake is not just a dessert; it’s a celebration of flavors and textures. Let’s dive into why this recipe is a must-try!
Why I Love This Recipe
There’s something magical about a no-bake cheesecake, especially when it features Nutella. The smooth, velvety texture paired with the nutty, chocolatey flavor makes every bite a delight. Plus, it’s incredibly adaptable! You can personalize it with your favorite toppings, whether you prefer fresh berries or a drizzle of chocolate glaze. These mini cheesecakes are perfect for gatherings, potlucks, or simply treating yourself after a long day.
What Goes Into No Bake Mini-Nutella Cheesecake
To create this delightful dessert, you’ll need the following ingredients:
- 100g digestive biscuits or graham crackers: These form the base of your cheesecake, providing a crunchy texture.
- 50g ground walnuts: Adds a nutty flavor and a bit of crunch.
- 30g butter: Helps bind the crust together and adds richness.
- 200g cream cheese: The star of the cheesecake filling, providing that creamy texture.
- 200g Nutella: Infuses the cheesecake with a rich chocolate hazelnut flavor.
- 200ml whipping cream: Whipped to add lightness and volume to the cheesecake.
- 2 sheets gelatin: Helps set the cheesecake, ensuring it holds its shape.
- Chocolate glaze: For drizzling on top, adding a decadent finish.
- Chocolate candy: For decoration and extra chocolatey goodness.
- Raspberries: Fresh berries add a pop of color and a tart contrast to the sweetness.
Kitchen Gear Checklist
Before we get started, gather the following kitchen gear:
- Mixing bowls: For combining the crust and cheesecake filling.
- Springform pan or mini tart pans: Ideal for creating the cheesecake shape.
- Hand mixer or stand mixer: To whip the cream and mix the cheesecake filling.
- Rubber spatula: Perfect for scraping down the sides of the bowl and folding ingredients.
- Measuring cups and spoons: For accurate ingredient measurements.
- Microwave-safe bowl: To melt the gelatin and butter.
Directions: No Bake Mini-Nutella Cheesecake

Step 1: Prepare the Crust
Start by crushing the digestive biscuits or graham crackers into fine crumbs. You can use a food processor or place them in a zip-top bag and crush them with a rolling pin. In a mixing bowl, combine the crushed biscuits, ground walnuts, and melted butter. Mix until the mixture resembles wet sand.
Step 2: Form the Base
Press the crust mixture firmly into the bottom of your springform pan or mini tart pans, making sure it’s evenly distributed. Use the back of a measuring cup to pack it down tightly. Refrigerate the crust while you prepare the filling.
Step 3: Bloom the Gelatin
Soak the gelatin sheets in cold water for about 5-10 minutes until softened. Once ready, gently squeeze out excess water and melt the gelatin in a microwave-safe bowl for about 10-15 seconds. Allow it to cool slightly.
Step 4: Make the Cheesecake Filling
In a large mixing bowl, beat the cream cheese until smooth and creamy. Gradually add in the Nutella, mixing until well combined. In a separate bowl, whip the cream until soft peaks form. Carefully fold the whipped cream into the Nutella mixture until fully incorporated.
Step 5: Combine Gelatin with Cheesecake Mixture
Stir the melted gelatin into the cheesecake mixture until completely blended, ensuring there are no lumps.
Step 6: Assemble the Cheesecake
Pour the cheesecake filling over the chilled crust, smoothing the top with a spatula. Cover with plastic wrap and refrigerate for at least 4 hours, or overnight, to allow it to set properly.
Step 7: Add the Toppings
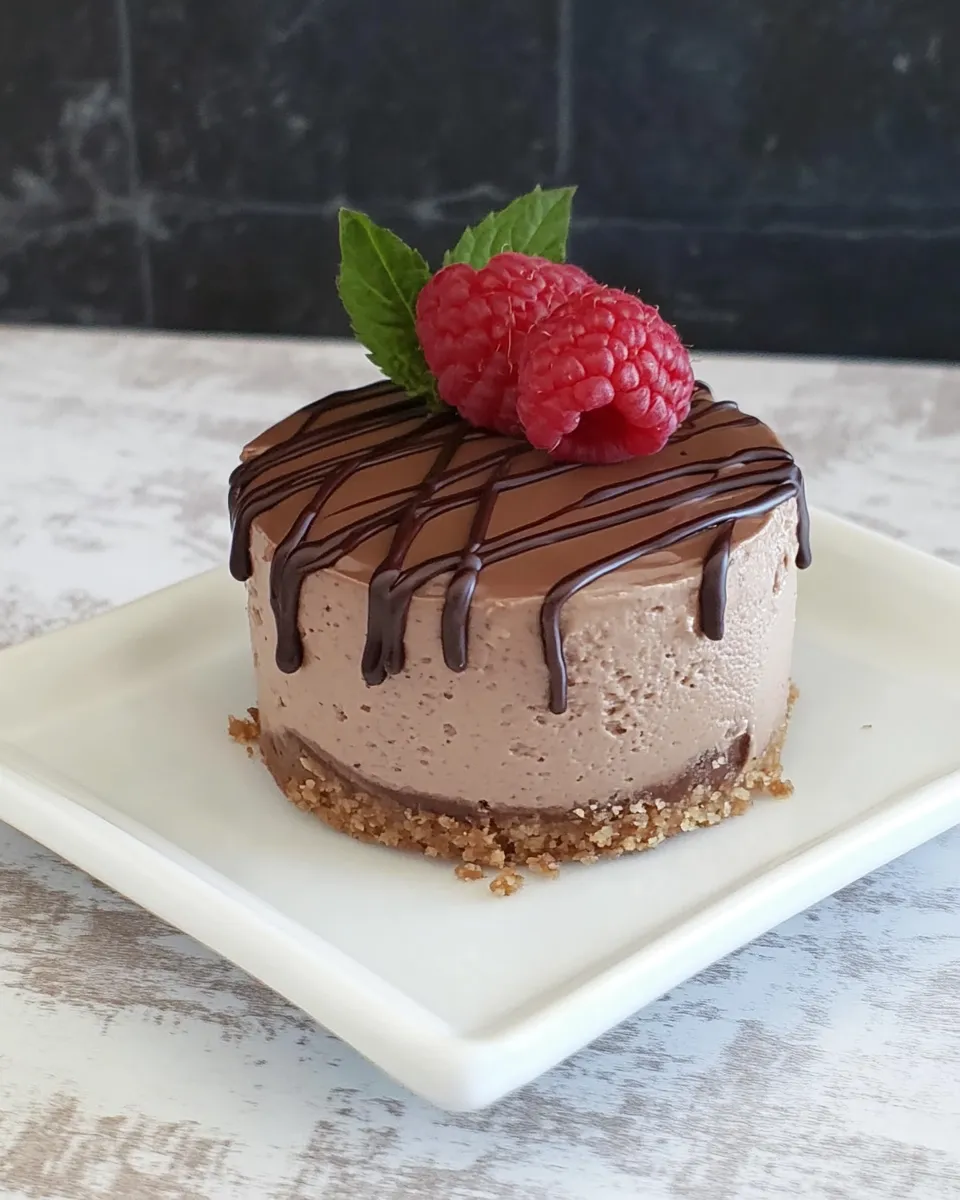
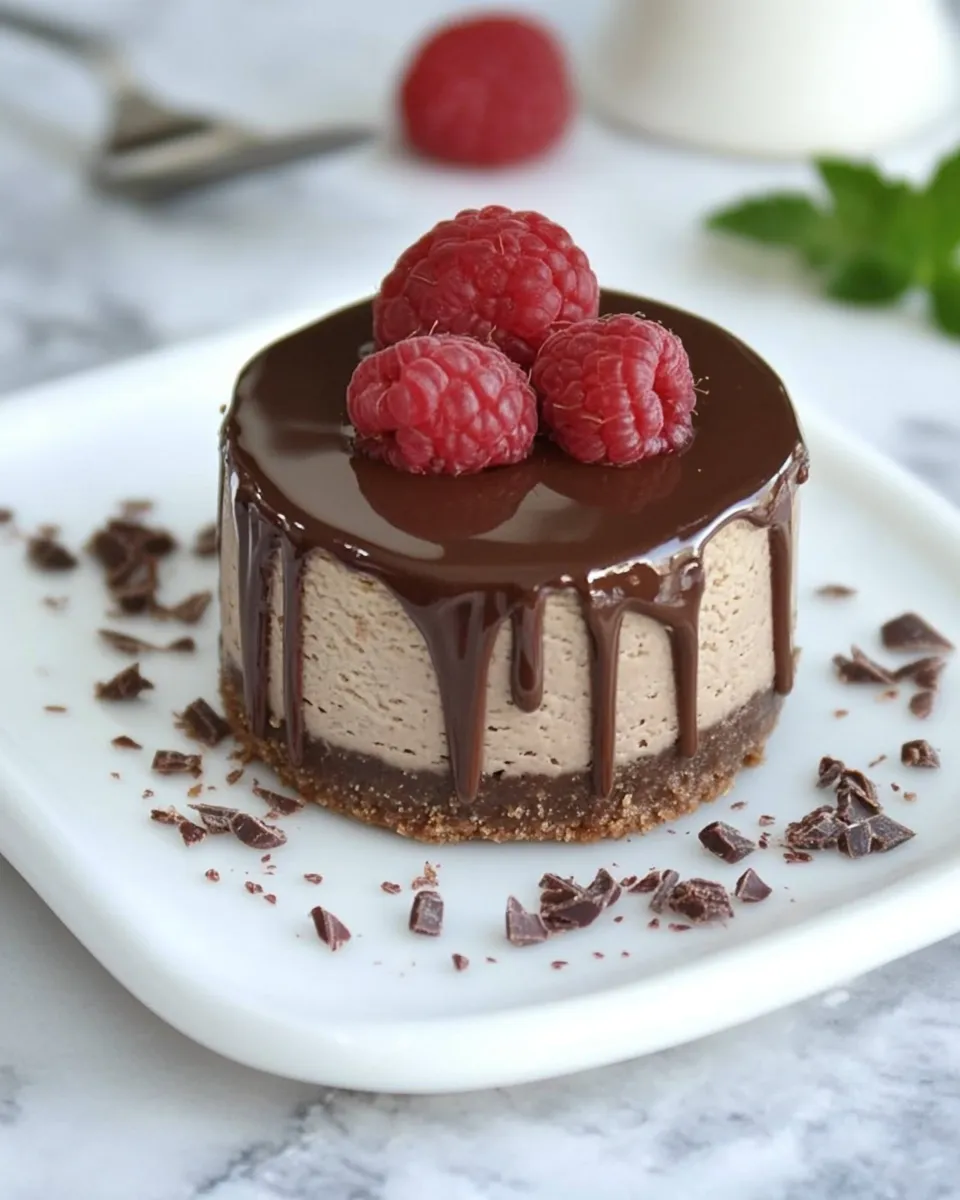
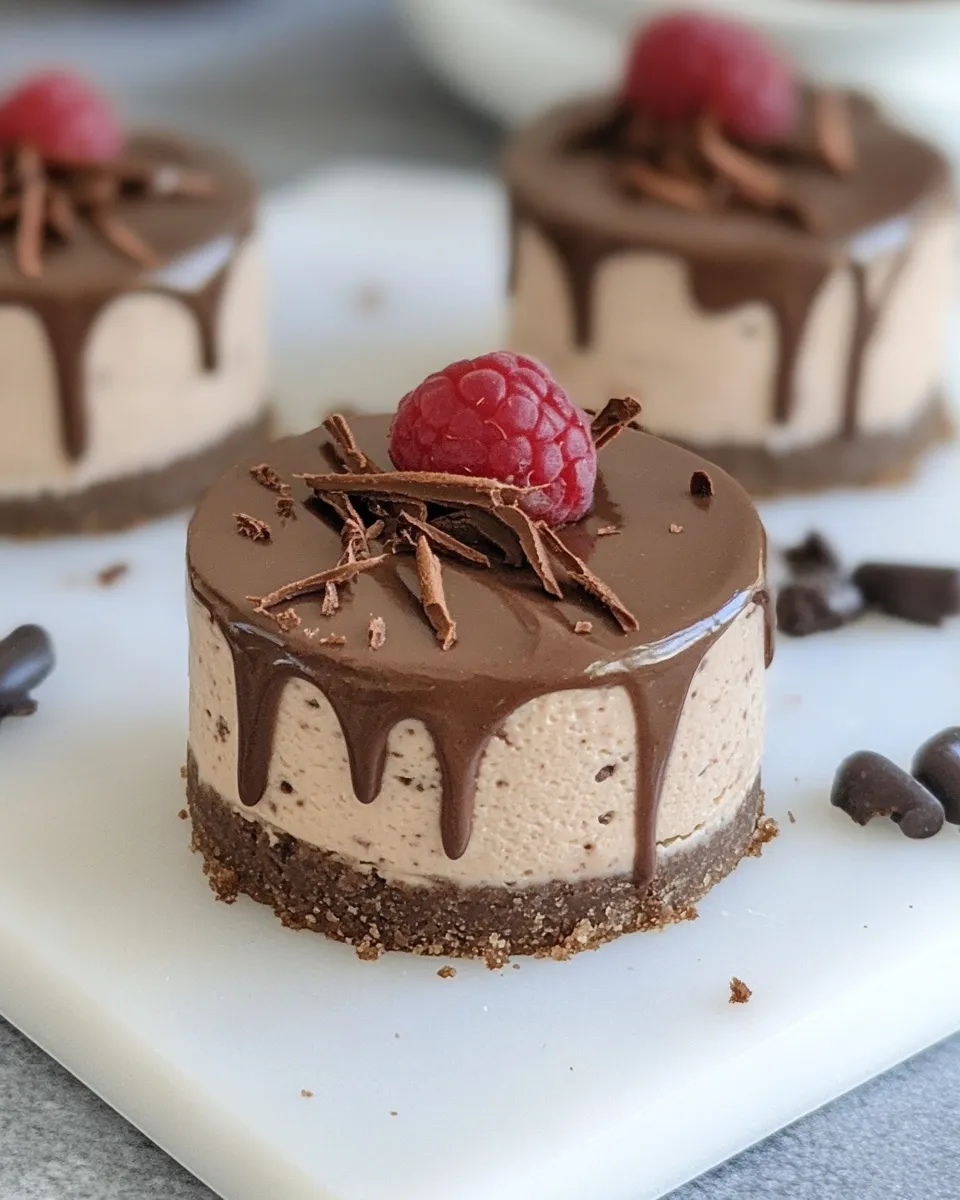
Once the cheesecake has set, drizzle with chocolate glaze, and decorate with chocolate candies and fresh raspberries for a stunning presentation.
International Equivalents
- 100g digestive biscuits = approximately 3.5 oz
- 50g ground walnuts = approximately 1.75 oz
- 30g butter = approximately 1 oz
- 200g cream cheese = approximately 7 oz
- 200g Nutella = approximately 7 oz
- 200ml whipping cream = approximately 7 fl oz
- 2 sheets gelatin = approximately 2 teaspoons of powdered gelatin
Pro Perspective
This No Bake Mini-Nutella Cheesecake is not just a dessert; it’s a canvas for creativity. Feel free to experiment with different toppings, such as chopped hazelnuts, or even a swirl of peanut butter for a unique twist. If you’re looking for a lighter version, consider using low-fat cream cheese or Greek yogurt in place of regular cream cheese. And for a fun flavor contrast, try adding a hint of espresso powder to the filling for a mocha-inspired treat!
Keep It Fresh: Storage Guide
This cheesecake can be stored in an airtight container in the refrigerator for up to 5 days. If you want to prepare it in advance, the flavors actually improve as they meld together, making it a great make-ahead dessert. Just be sure to add any fresh toppings, like raspberries or chocolate glaze, just before serving for the best presentation.
Your Top Questions
Can I use a different type of nut in the crust?
Absolutely! Feel free to swap ground walnuts with almonds, pecans, or even a nut-free option like sunflower seeds for the crust. Just make sure to adjust the measurements accordingly.
Is there a vegan alternative for this recipe?
You can make a vegan version by using vegan cream cheese, coconut cream in place of whipped cream, and a vegan chocolate spread as a substitute for Nutella. Check the gelatin packaging for a plant-based gelling agent like agar-agar if you want to keep it fully vegan.
Can I freeze the No Bake Mini-Nutella Cheesecake?
Yes! This cheesecake can be frozen for up to 2 months. Just wrap it tightly in plastic wrap and aluminum foil to prevent freezer burn. Thaw it in the refrigerator overnight before serving.
What can I use instead of gelatin?
If you prefer not to use gelatin, you can substitute it with agar-agar or a vegan gelatin alternative. Follow the package instructions for proper measurements and setting times.
Healthy-ish Favorites
Bring It Home
Indulging in a No Bake Mini-Nutella Cheesecake is more than just enjoying a dessert; it’s about creating memories shared over delicious food. Whether you’re treating yourself or impressing guests, this cheesecake will surely be a hit. With its rich flavors and creamy texture, every bite is a little piece of heaven. So gather your ingredients, roll up your sleeves, and get ready to make a dessert that will leave everyone asking for seconds!
No Bake Mini-Nutella Cheesecake
Ingredients
Equipment
Method
- Start by crushing the digestive biscuits or graham crackers into fine crumbs. In a mixing bowl, combine the crushed biscuits, ground walnuts, and melted butter. Mix until the mixture resembles wet sand.
- Press the crust mixture firmly into the bottom of your springform pan or mini tart pans, making sure it’s evenly distributed. Refrigerate the crust while you prepare the filling.
- Soak the gelatin sheets in cold water for about 5-10 minutes until softened. Melt the gelatin in a microwave-safe bowl for about 10-15 seconds and allow it to cool slightly.
- In a large mixing bowl, beat the cream cheese until smooth. Gradually add in the Nutella, mixing until well combined. In a separate bowl, whip the cream until soft peaks form. Fold the whipped cream into the Nutella mixture until fully incorporated.
- Stir the melted gelatin into the cheesecake mixture until completely blended, ensuring there are no lumps.
- Pour the cheesecake filling over the chilled crust, smoothing the top with a spatula. Cover with plastic wrap and refrigerate for at least 4 hours, or overnight, to allow it to set.
- Once set, drizzle with chocolate glaze, and decorate with chocolate candies and fresh raspberries.
Notes
- Feel free to experiment with different toppings like chopped hazelnuts or a swirl of peanut butter.
- For a lighter version, use low-fat cream cheese or Greek yogurt.
- This cheesecake can be stored in an airtight container in the fridge for up to 5 days.