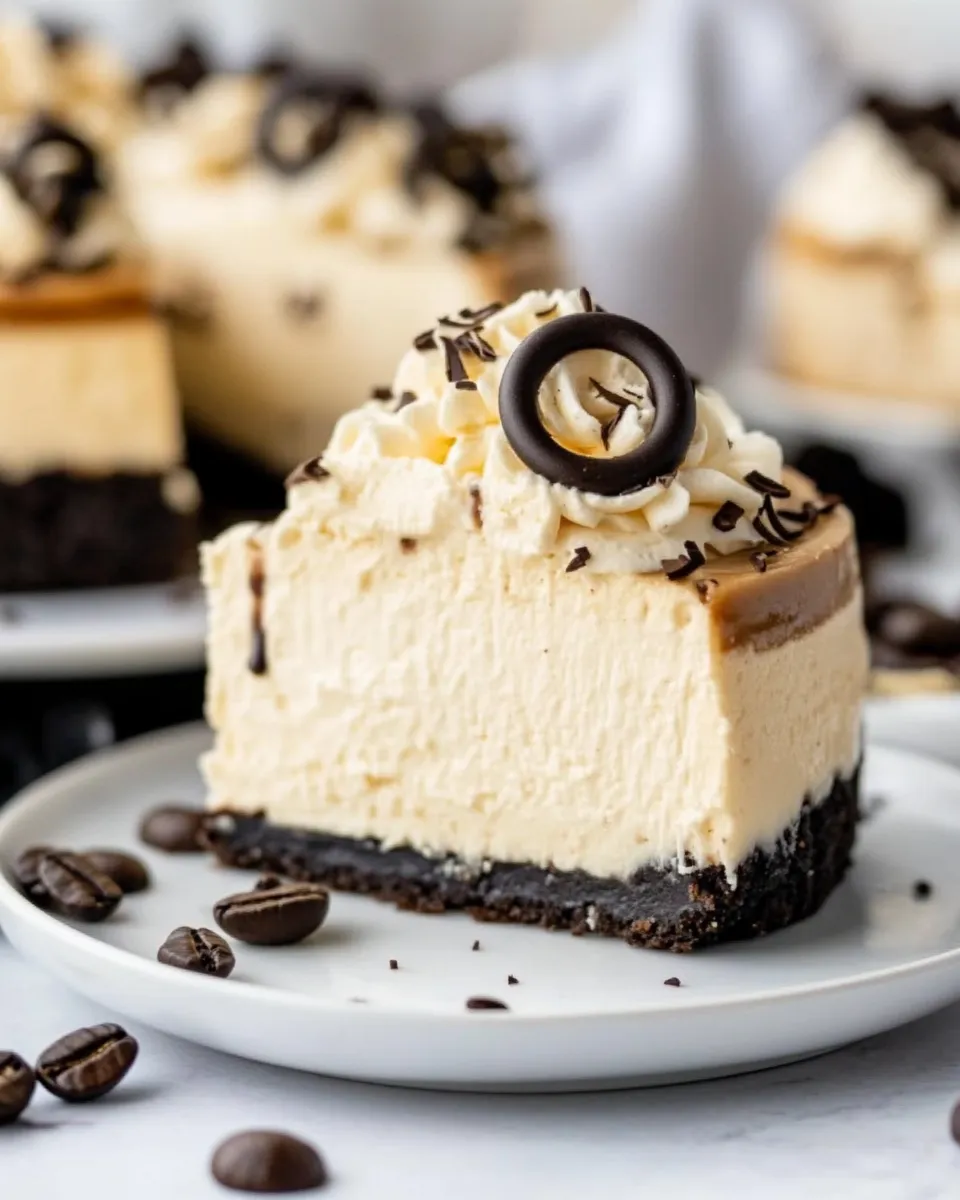
Espresso Cheesecake
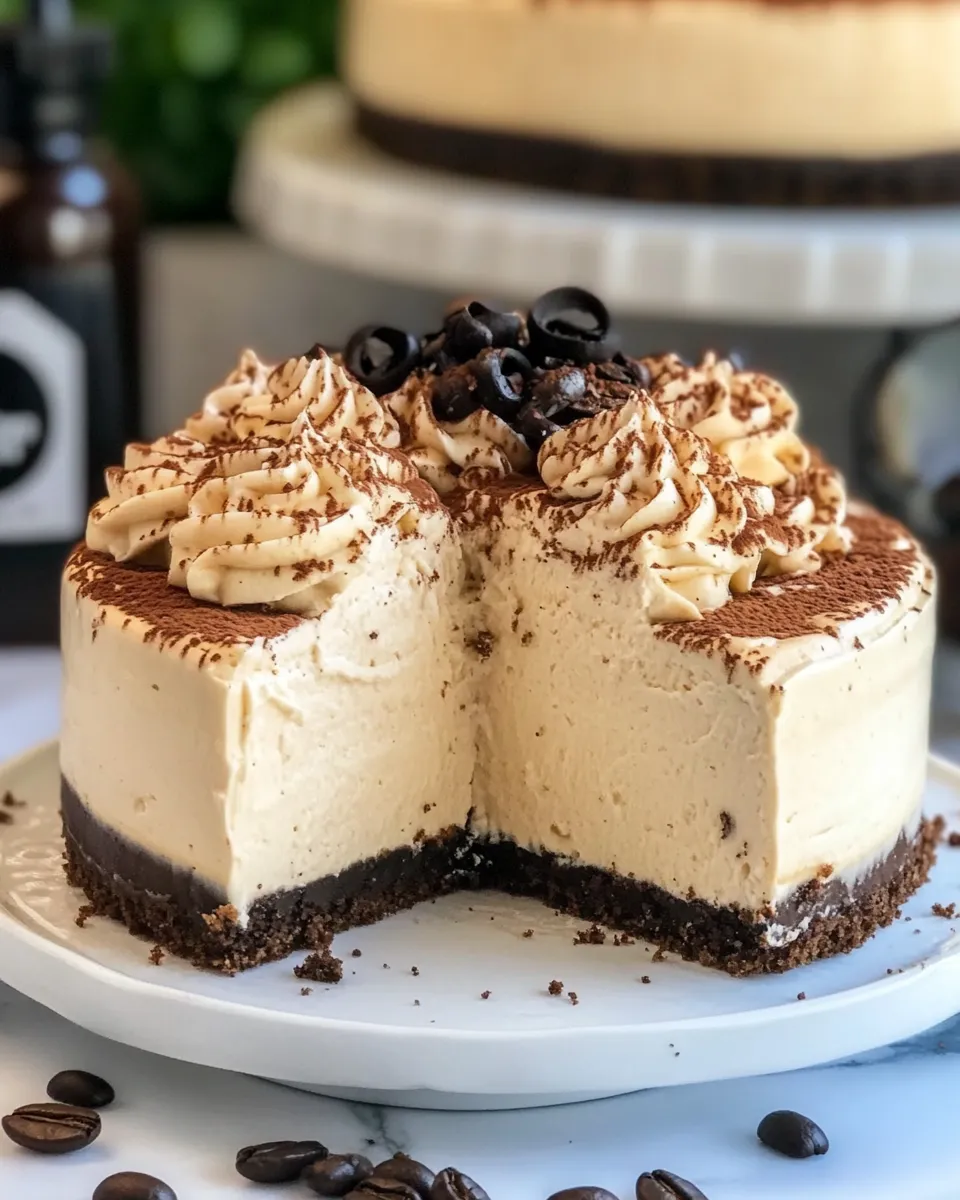
There’s something undeniably luxurious about a slice of Espresso Cheesecake. It combines the creamy richness of traditional cheesecake with a bold coffee flavor, creating a dessert that’s perfect for coffee lovers and cheesecake enthusiasts alike. Whether you’re serving it at a dinner party or indulging in a cozy night at home, this cheesecake will impress and satisfy. The luscious texture, the deep flavor of espresso, and the delightful chocolate topping will have everyone asking for seconds!
Why It’s Crowd-Pleasing
Espresso Cheesecake is not just a dessert; it’s a delightful experience. The combination of creamy cheesecake and robust coffee flavor is a match made in heaven. Each bite is smooth, rich, and decadently satisfying. It’s a fantastic choice for gatherings, as it appeals to both coffee aficionados and dessert lovers. Plus, the chocolate ganache on top adds a touch of elegance, making it visually stunning as well. The best part? It’s surprisingly easy to make!
The Essentials
To create this Espresso Cheesecake, you’ll need the following ingredients:
- 2 cups OREO cookie crumbs (approximately 20 cookies, not double stuffed)
- 6 tablespoons butter, melted
- 1 teaspoon salt
- 24 ounces cream cheese, softened (3 packages)
- 1 cup granulated sugar
- 3 tablespoons flour
- 1 cup espresso or strong coffee, cooled to room temperature
- 1 cup heavy whipping cream
- 1 teaspoon vanilla extract
- 3 large eggs, room temperature
- 4 ounces bittersweet or dark chocolate, roughly chopped (bars are best, but high-quality chocolate chips work too)
- 4 ounces cream cheese, softened
- 4 tablespoons butter, softened
- 1 teaspoon vanilla extract
- ½ to 1 cup powdered sugar
- Espresso beans (optional)
Appliances & Accessories
Before you start baking, gather the following appliances and accessories:
- Springform Pan: Ideal for cheesecakes, allowing easy removal.
- Mixing Bowls: For mixing the cheesecake batter and the ganache.
- Electric Mixer: A hand or stand mixer will help achieve a smooth batter.
- Spatula: For folding and scraping down the sides of the bowl.
- Measuring Cups and Spoons: Essential for accurate ingredient measurements.
- Double Boiler or Microwave: For melting the chocolate ganache.
Espresso Cheesecake: Step-by-Step Guide
Step 1: Prepare the Crust
In a mixing bowl, combine the OREO cookie crumbs with melted butter and salt. Stir until the mixture resembles wet sand. Press the mixture firmly into the bottom of a 9-inch springform pan. Make sure it’s evenly spread out and compact. Bake in a preheated oven at 350°F (175°C) for 8-10 minutes. Remove and let it cool.
Step 2: Make the Cheesecake Batter
In a large mixing bowl, beat the softened cream cheese with an electric mixer until smooth and creamy. Gradually add the granulated sugar and continue to mix until well combined. Add in the flour, cooled espresso, heavy whipping cream, and vanilla extract, mixing until fully incorporated.
Step 3: Add the Eggs
Add the eggs one at a time, mixing on low speed after each addition just until combined. Be careful not to overmix, as this can lead to cracks in your cheesecake.
Step 4: Bake the Cheesecake
Pour the cheesecake batter over the cooled crust in the springform pan. Bake at 325°F (160°C) for about 60-70 minutes, or until the edges are set and the center is slightly jiggly. Turn off the oven and crack the door open, allowing the cheesecake to cool gradually for about an hour. This will help prevent cracks.
Step 5: Chill the Cheesecake
Once the cheesecake has cooled to room temperature, cover it with plastic wrap and refrigerate for at least 4 hours, or overnight for best results.
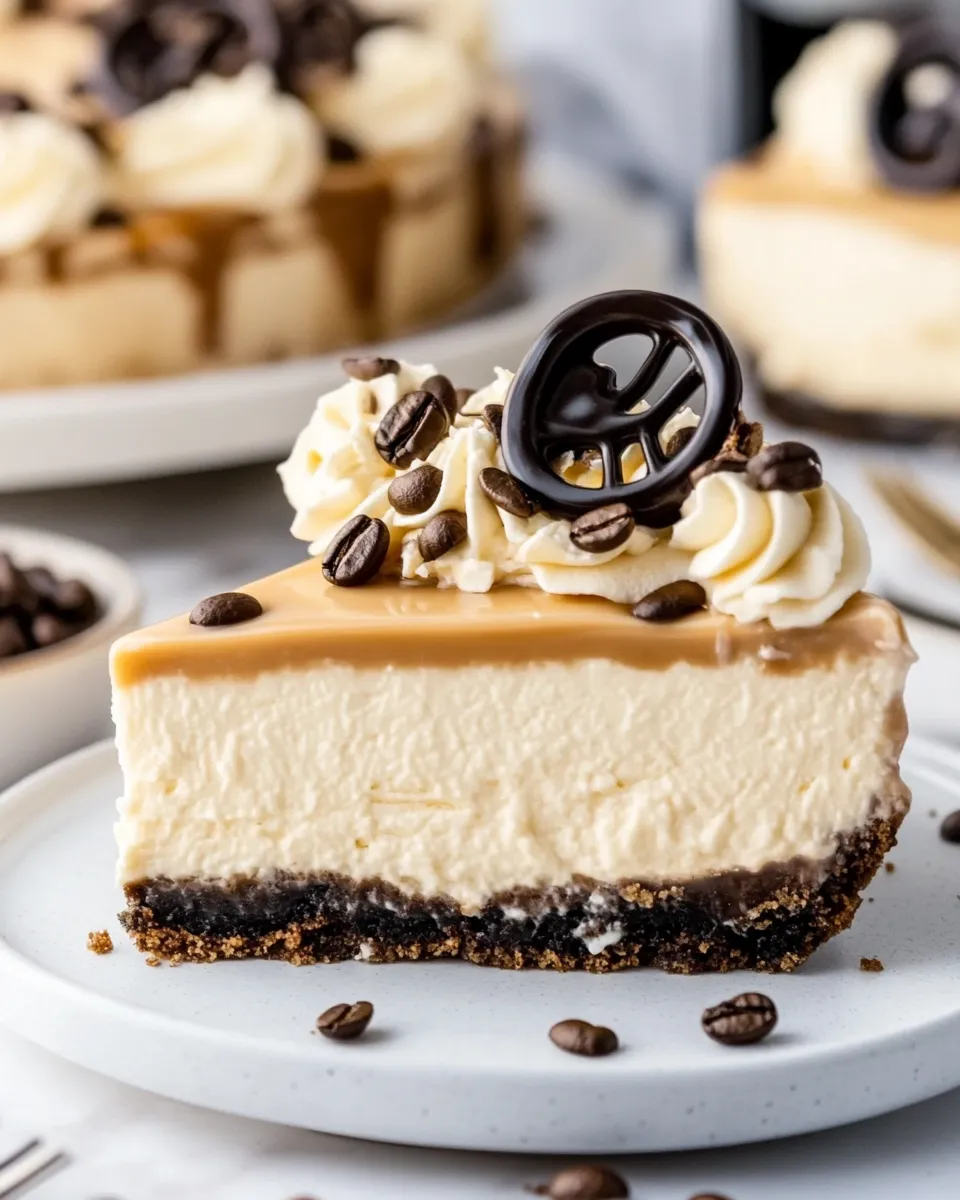
Step 6: Prepare the Ganache
In a double boiler or microwave, melt the chopped chocolate until smooth. Allow it to cool slightly, then mix in softened cream cheese, butter, and vanilla extract. Gradually add powdered sugar until you reach your desired sweetness and consistency.
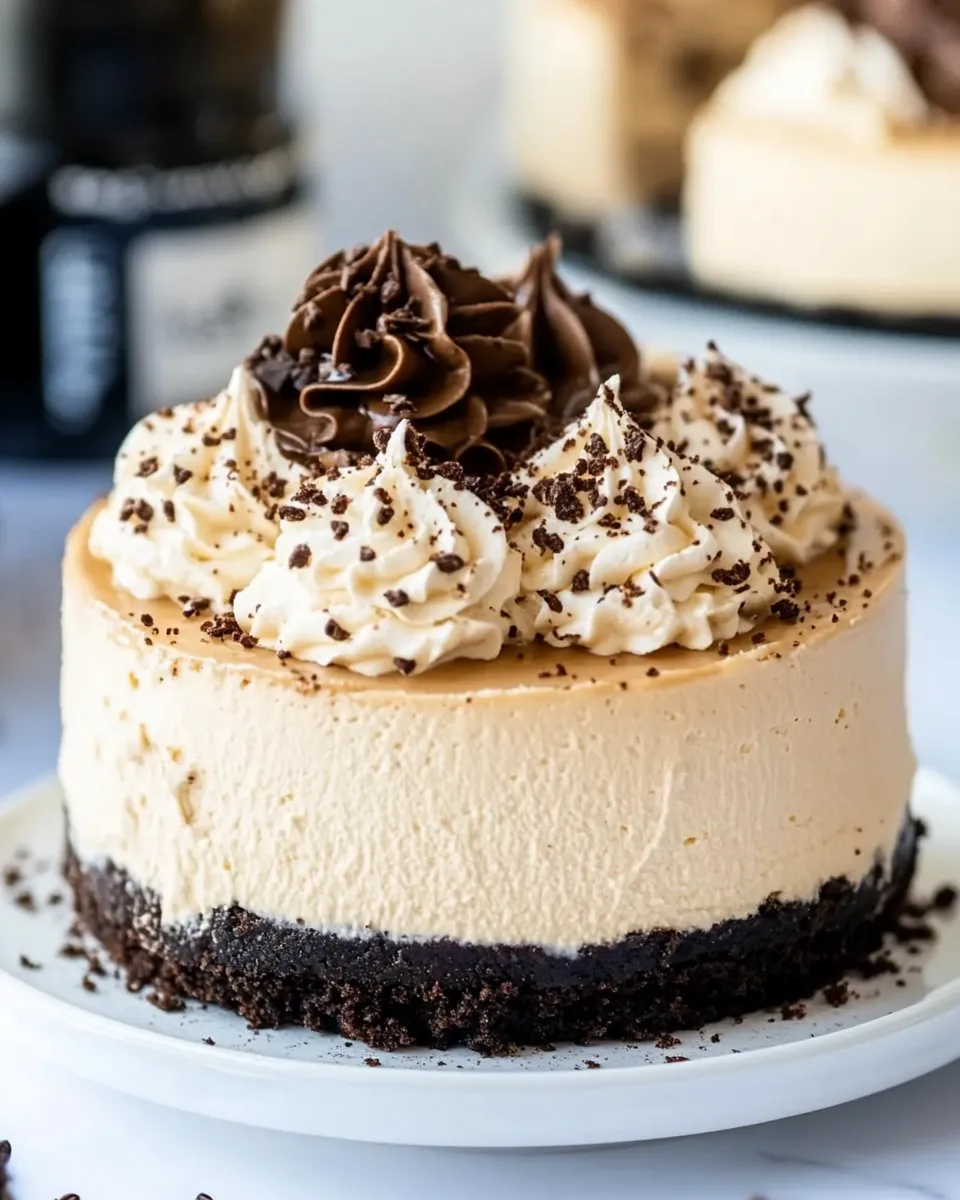
Step 7: Top the Cheesecake
Once the cheesecake is fully chilled, spread the chocolate ganache evenly on top. If desired, garnish with espresso beans for an extra coffee kick and an elegant presentation.
Step 8: Serve and Enjoy
Slice the cheesecake and serve it chilled. Each bite is creamy, rich, and bursting with espresso flavor—a true delight for any dessert lover!
Better Choices & Swaps
If you’re looking to customize your Espresso Cheesecake, consider these alternatives:
- Gluten-Free Option: Use gluten-free cookie crumbs instead of OREO cookies.
- Dairy-Free Version: Substitute cream cheese with a dairy-free alternative and use coconut cream in place of heavy cream.
- Less Sweet Option: Reduce the amount of sugar in the cheesecake batter and ganache for a less sweet dessert.
- Flavor Variations: Add a splash of coffee liqueur or flavored extracts like almond or hazelnut to enhance the flavor.
Troubleshooting Tips
If you encounter any issues while making your Espresso Cheesecake, consider these tips:
- Cracked Cheesecake: Ensure your oven temperature is accurate and avoid overmixing the batter. Gradually cooling the cheesecake in the oven can also help.
- Runny Ganache: If your ganache is too runny, try adding more powdered sugar or chilling it a bit longer before spreading.
- Grainy Texture: Make sure your cream cheese is fully softened to avoid lumps in your batter.
- Overcooked Cheesecake: Keep an eye on baking time; every oven varies. A slight jiggle in the center is normal.
Shelf Life & Storage
For optimal freshness, store your Espresso Cheesecake in the refrigerator:
- Refrigerate: The cheesecake can be kept in the fridge for up to 5 days.
- Freeze: To store longer, wrap the cheesecake tightly in plastic wrap and freeze for up to 2 months. Thaw in the refrigerator overnight before serving.
Your Top Questions
Can I make this cheesecake ahead of time?
Absolutely! In fact, making it a day ahead allows the flavors to meld beautifully. Just cover it well and refrigerate until you’re ready to serve.
What can I use instead of espresso?
If you don’t have espresso on hand, strong brewed coffee works just as well. Just ensure it’s cooled to room temperature before adding to the batter.
Can I use a different crust?
Yes! You can use graham cracker crumbs or even a nut-based crust for a different flavor profile. Just adjust the amount of butter and sugar accordingly.
How do I know when my cheesecake is done?
The cheesecake is done when the edges are set, and the center has a slight jiggle. It will firm up as it cools.
Next Up in Your Queue
If you enjoyed this Espresso Cheesecake, you might also like:
The Last Word
Making an Espresso Cheesecake is not just about creating a dessert; it’s about crafting a moment of indulgence that you can share with friends and family. With its creamy texture, rich flavor, and stunning appearance, this cheesecake is sure to become a favorite in your dessert repertoire. Each slice is a delightful balance of coffee and cream, making it a perfect ending to any meal. So, grab your ingredients, roll up your sleeves, and treat yourself to this delightful Espresso Cheesecake. You won’t regret it!
Espresso Cheesecake
Ingredients
Equipment
Method
- Step 1: Prepare the Crust. In a mixing bowl, combine the OREO cookie crumbs with melted butter and salt. Stir until the mixture resembles wet sand. Press the mixture firmly into the bottom of a 9-inch springform pan. Bake in a preheated oven at 350°F (175°C) for 8-10 minutes. Remove and let it cool.
- Step 2: Make the Cheesecake Batter. In a large mixing bowl, beat the softened cream cheese with an electric mixer until smooth. Gradually add the granulated sugar and continue to mix until well combined. Add in the flour, cooled espresso, heavy whipping cream, and vanilla extract, mixing until fully incorporated.
- Step 3: Add the Eggs. Add the eggs one at a time, mixing on low speed after each addition just until combined. Be careful not to overmix.
- Step 4: Bake the Cheesecake. Pour the cheesecake batter over the cooled crust. Bake at 325°F (160°C) for about 60-70 minutes, or until the edges are set and the center is slightly jiggly. Turn off the oven and crack the door open, allowing the cheesecake to cool gradually.
- Step 5: Chill the Cheesecake. Once cooled, cover with plastic wrap and refrigerate for at least 4 hours, or overnight for best results.
- Step 6: Prepare the Ganache. Melt the chopped chocolate until smooth. Mix in softened cream cheese, butter, and vanilla extract. Gradually add powdered sugar until desired consistency.
- Step 7: Top the Cheesecake. Spread the chocolate ganache evenly on top. Garnish with espresso beans if desired.
- Step 8: Serve and Enjoy. Slice the cheesecake and serve it chilled. Each bite is creamy, rich, and bursting with espresso flavor.
Notes
- For a gluten-free option, use gluten-free cookie crumbs.
- Consider a dairy-free version with non-dairy cream cheese and coconut cream.
- Store leftovers in the fridge for up to 5 days.