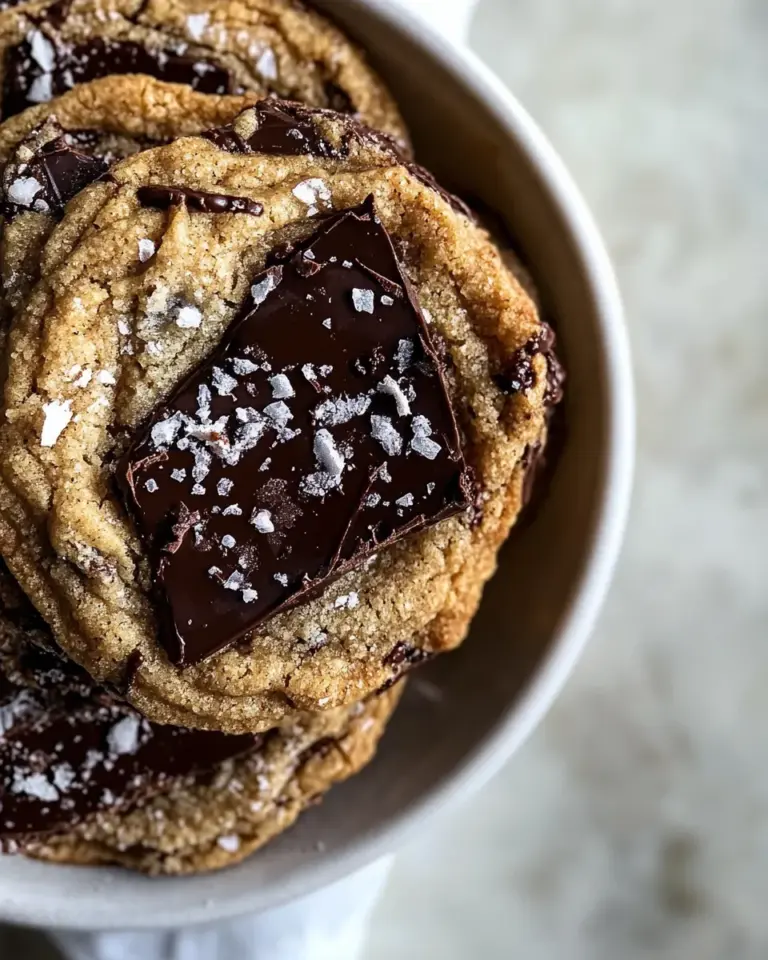
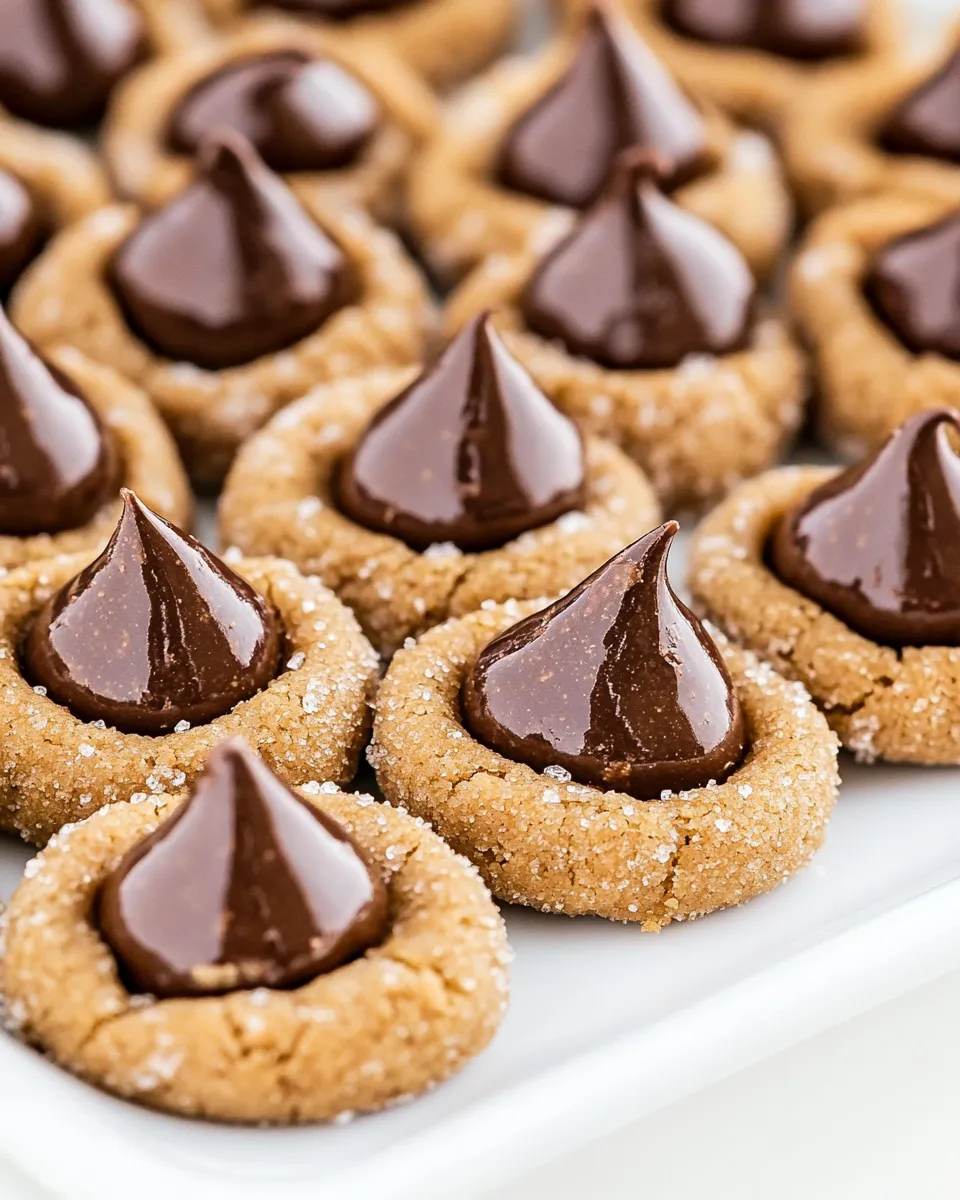
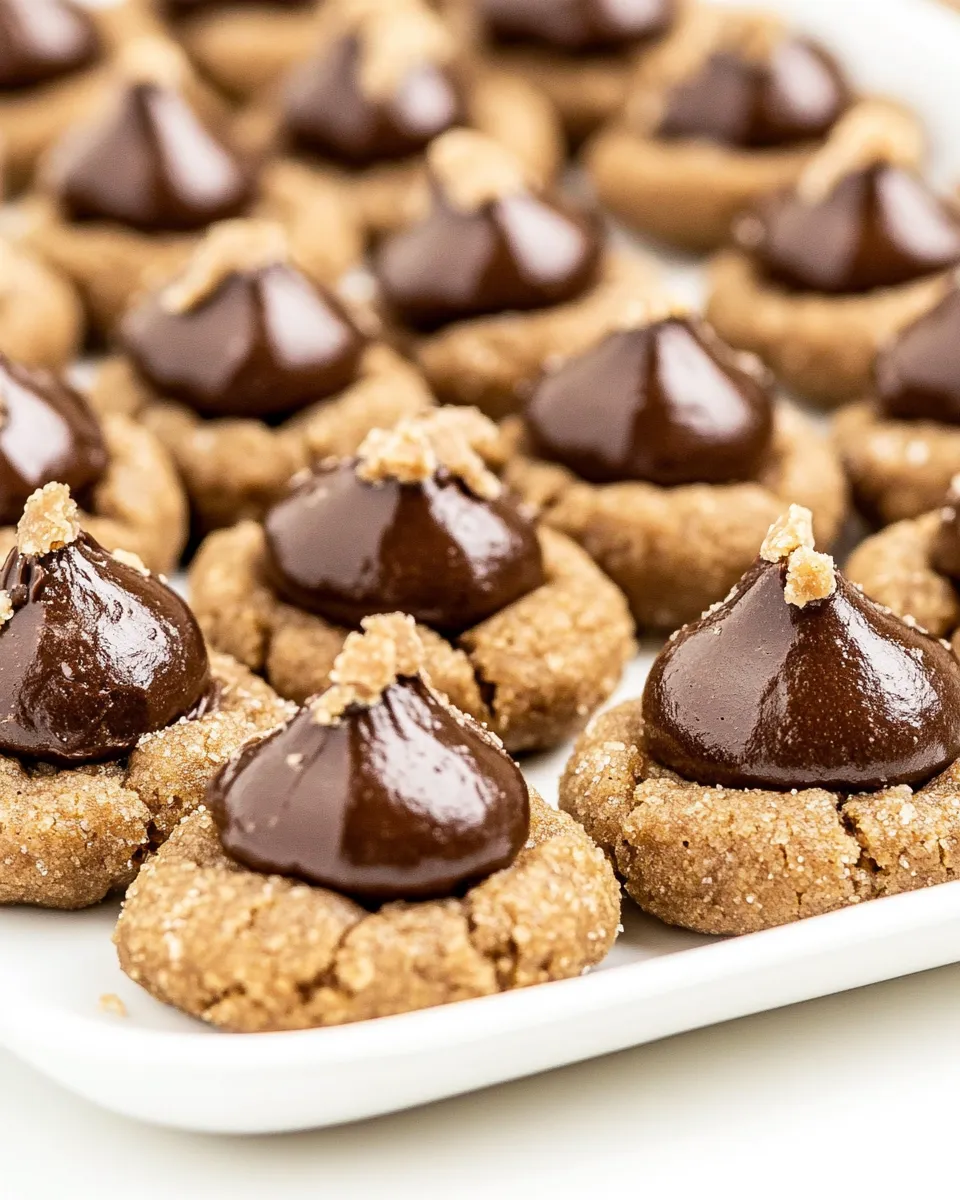
Chocolate Peanut Butter Blossoms
Chocolate Peanut Butter Blossoms are the perfect marriage of two classic flavors that never go out of style. These delightful cookies feature a rich, chocolatey base that perfectly complements the creamy, nutty essence of peanut butter. Topped with a smooth chocolate kiss, they are as tempting as they are delicious. Whether it’s a festive gathering, a cozy night at home, or simply a sweet craving, these cookies are sure to impress and satisfy.
The Upside of Chocolate Peanut Butter Blossoms
Imagine biting into a cookie that’s soft in the center, slightly crisp on the edges, and bursting with flavor. That’s the magic of Chocolate Peanut Butter Blossoms! Not only are they incredibly tasty, but they also offer the following benefits:
- Simple Ingredients: Made with pantry staples, these cookies are easy to whip up anytime.
- Kid-Friendly: Kids love rolling the dough and placing the chocolate kisses on top, making it a fun activity.
- Perfect for Sharing: Bring them to parties or bake sales, and watch them disappear before your eyes!
The Ingredient Lineup
Getting started with Chocolate Peanut Butter Blossoms requires a few essential ingredients. Here’s what you’ll need:
- 1 cup granulated sugar (100 grams)
- 1 cup light brown sugar (71 grams)
- 10 tablespoons unsalted butter (141 grams, cool but softened)
- 10 tablespoons creamy peanut butter (169 grams)
- 2 teaspoons pure vanilla extract (8 grams or vanilla bean paste)
- 1 large egg (50 grams, room temperature)
- 1 cup all-purpose flour (150 grams)
- 1/4 cup unsweetened cocoa powder (21 grams)
- 1/2 teaspoon baking soda
- 1/2 teaspoon baking powder (2 grams)
- 1/4 teaspoon kosher salt
- Raw or Turbinado sugar (for coating the cookies, optional)
- 55 Chocolate Kisses (312 grams, unwrapped)
Tools of the Trade
Having the right tools can make all the difference when baking. Here’s what you’ll need:
- Mixing bowls: For combining your ingredients.
- Electric mixer: To cream the butter and sugars effortlessly.
- Baking sheets: Line them with parchment paper for easy cleanup.
- Cookie scoop: For uniform cookie sizes.
- Cooling rack: To allow your cookies to cool properly after baking.
Chocolate Peanut Butter Blossoms: From Prep to Plate
Now, let’s dive into the step-by-step process to create these divine cookies.
Step 1: Preheat Your Oven
Start by preheating your oven to 350°F (175°C). This ensures that your cookies bake evenly.
Step 2: Cream the Butters and Sugars
In a large mixing bowl, combine the granulated sugar, light brown sugar, and softened butter. Using an electric mixer, beat on medium speed until the mixture is light and fluffy, about 2-3 minutes. Add in the creamy peanut butter and continue mixing until fully incorporated.
Step 3: Add the Egg and Vanilla
Next, beat in the egg and vanilla extract until well combined. This adds moisture and enhances the flavor of your Chocolate Peanut Butter Blossoms.
Step 4: Mix the Dry Ingredients
In a separate bowl, whisk together the all-purpose flour, cocoa powder, baking soda, baking powder, and kosher salt. Gradually add this dry mixture to the wet ingredients, mixing on low speed until just combined. Be careful not to overmix, as this can result in dense cookies.
Step 5: Shape the Cookies
Using a cookie scoop or your hands, form the dough into 1-inch balls. If you’d like, roll them in raw or turbinado sugar for an extra crunch and sweetness. Place them on a prepared baking sheet, leaving about 2 inches of space between each cookie.
Step 6: Bake to Perfection
Bake the cookies in your preheated oven for 10-12 minutes, or until the edges are set but the centers still appear soft. Remember, they will continue to bake a little once removed from the oven.
Step 7: Add the Chocolate Kisses
As soon as you pull the cookies from the oven, press a chocolate kiss into the center of each cookie while they’re still warm. This creates a beautiful and indulgent focal point for your Chocolate Peanut Butter Blossoms.
Step 8: Cool and Enjoy
Allow the cookies to cool on the baking sheet for about 5 minutes before transferring them to a cooling rack. Once they’re completely cool, they’re ready to be devoured!
Holiday-Friendly Variations
These cookies are versatile and can be adapted for various occasions. Here are some fun ideas to try:
- Mint Chocolate Kisses: Swap regular chocolate kisses for mint-flavored ones for a refreshing twist.
- Peanut Butter Cups: Replace the chocolate kisses with mini peanut butter cups for an extra peanut butter punch.
- Decorative Sprinkles: Add colorful sprinkles on top of the kisses right after pressing them for a festive touch.
- Nutty Crunch: Mix in chopped nuts, like peanuts or walnuts, into the dough for added texture.
Avoid These Mistakes
To ensure your Chocolate Peanut Butter Blossoms turn out perfectly, steer clear of these common pitfalls:
- Overmixing the Dough: Mixing too much can lead to dense cookies. Just mix until combined.
- Incorrect Oven Temperature: Always preheat your oven. An uncalibrated oven can ruin your baking.
- Skipping the Cooling Time: Allowing the cookies to cool on the baking sheet helps them set properly.
- Not Using Room Temperature Ingredients: Ingredients blend better at room temperature, leading to a smoother dough.
Prep Ahead & Store
If you want to get a jump on baking, here are some prep and storage tips:
These cookies can be made ahead of time and stored in an airtight container for 4-5 days at room temperature. If you want to freeze them, let the cookies cool completely, then place them in a single layer in a freezer-safe container. They can last up to 3 months in the freezer. Just thaw at room temperature before serving.
Your Top Questions
Can I use crunchy peanut butter instead of creamy?
Absolutely! Using crunchy peanut butter will give your cookies a delightful texture. Just keep in mind that it will alter the smoothness of the dough slightly.
What can I use if I don’t have cocoa powder?
If you don’t have cocoa powder, you can replace it with more all-purpose flour, but the cookies will lose their chocolate flavor. Alternatively, consider using carob powder for a different twist.
How do I prevent the cookies from spreading too much?
Ensure your butter is not too warm when mixing, and chill the dough for 30 minutes before baking. This helps the cookies maintain their shape.
Can I make these cookies gluten-free?
Yes! Substitute the all-purpose flour with a gluten-free baking blend, and your Chocolate Peanut Butter Blossoms can be enjoyed by everyone.
Weekend Projects
If you’re looking for more delightful treats to try, here are some weekend baking projects you might enjoy:
- Mini Peanut Butter Cookies – Perfect for snacking!
- Buckeye Fudge – A rich and decadent dessert.
- Dulce De Leche Brown Butter Chocolate Chip Cookie Bars – A twist on traditional cookies.
Before You Go
Chocolate Peanut Butter Blossoms are truly a classic cookie that brings joy with every bite. With their perfect balance of chocolate and peanut butter, they are sure to become a favorite in your baking repertoire. So gather your ingredients, invite your friends or family to join in the fun, and enjoy the delightful process of making these scrumptious cookies. Happy baking!
Chocolate Peanut Butter Blossoms
Ingredients
Equipment
Method
- Start by preheating your oven to 350°F (175°C). This ensures that your cookies bake evenly.
- In a large mixing bowl, combine the granulated sugar, light brown sugar, and softened butter. Using an electric mixer, beat on medium speed until the mixture is light and fluffy, about 2-3 minutes. Add in the creamy peanut butter and continue mixing until fully incorporated.
- Next, beat in the egg and vanilla extract until well combined. This adds moisture and enhances the flavor of your Chocolate Peanut Butter Blossoms.
- In a separate bowl, whisk together the all-purpose flour, cocoa powder, baking soda, baking powder, and kosher salt. Gradually add this dry mixture to the wet ingredients, mixing on low speed until just combined. Be careful not to overmix, as this can result in dense cookies.
- Using a cookie scoop or your hands, form the dough into 1-inch balls. If you’d like, roll them in raw or turbinado sugar for an extra crunch and sweetness. Place them on a prepared baking sheet, leaving about 2 inches of space between each cookie.
- Bake the cookies in your preheated oven for 10-12 minutes, or until the edges are set but the centers still appear soft. Remember, they will continue to bake a little once removed from the oven.
- As soon as you pull the cookies from the oven, press a chocolate kiss into the center of each cookie while they’re still warm. This creates a beautiful and indulgent focal point for your Chocolate Peanut Butter Blossoms.
- Allow the cookies to cool on the baking sheet for about 5 minutes before transferring them to a cooling rack. Once they’re completely cool, they’re ready to be devoured!
Notes
- These cookies can be stored in an airtight container for 4-5 days at room temperature.
- If freezing, let the cookies cool completely, then place them in a single layer in a freezer-safe container.
- Thaw frozen cookies at room temperature before serving.