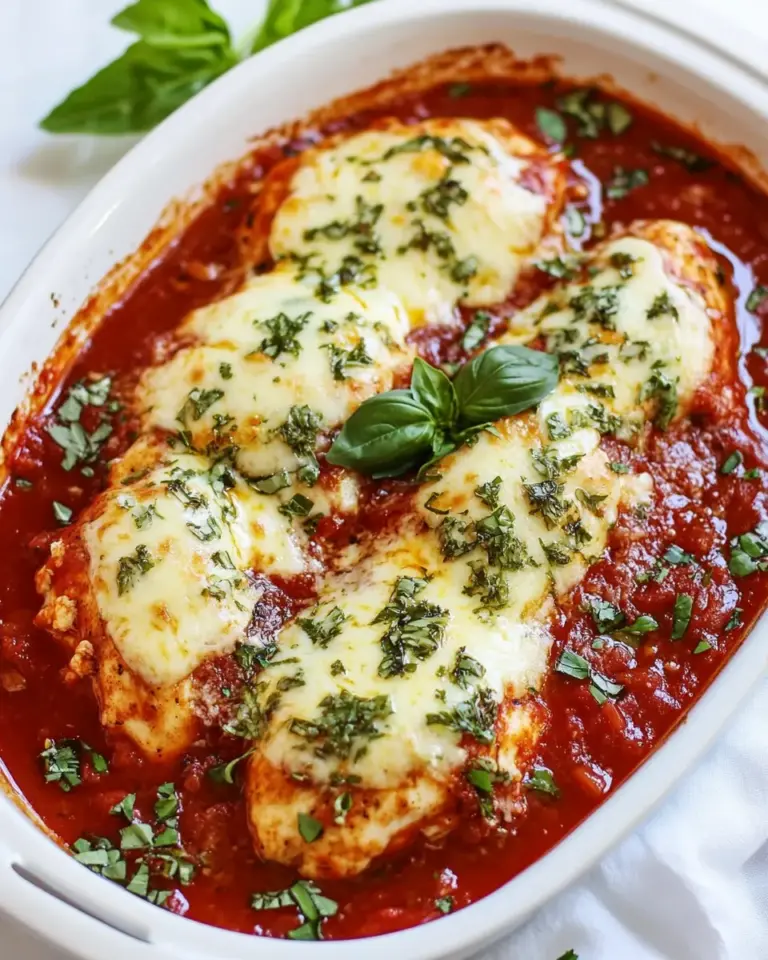
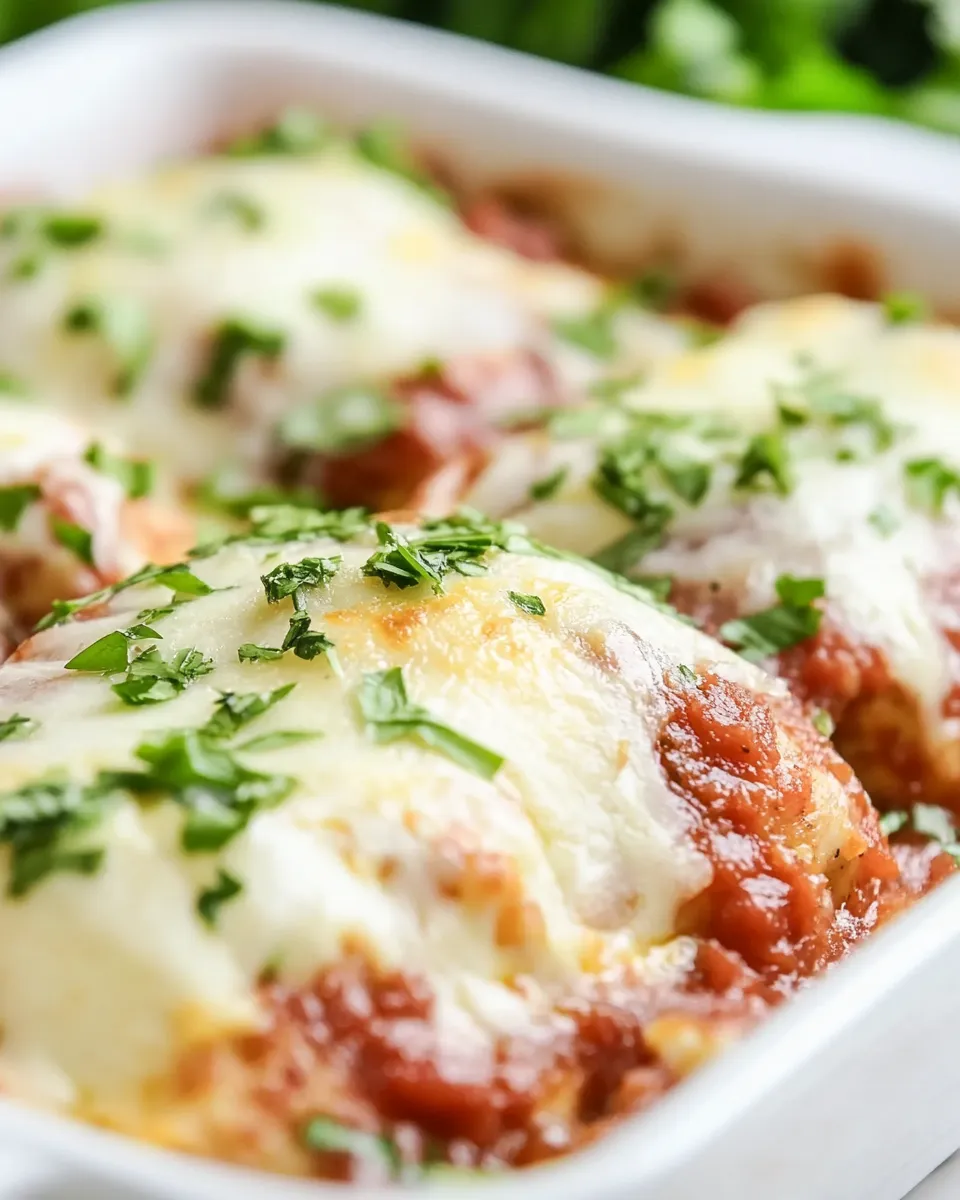
Baked Salsa Chicken
If you’re looking for a simple yet delicious weeknight dinner, look no further! This Baked Salsa Chicken is a crowd-pleaser that combines the flavors of zesty salsa with tender chicken breasts, all topped with gooey cheese. With minimal prep time and a few pantry staples, you can have a flavorful meal ready in no time. Plus, it’s perfect for those busy evenings when you need something quick, satisfying, and oh-so-tasty.
What You’ll Love About This Recipe
This Baked Salsa Chicken is not just easy to make; it’s also packed with flavor and nutrition. You’ll love how the salsa adds moisture and zest, while the cheese provides a creamy finish. Here’s what makes this recipe a must-try:
– Quick prep and cook time
– Healthy and satisfying
– Family-friendly flavors
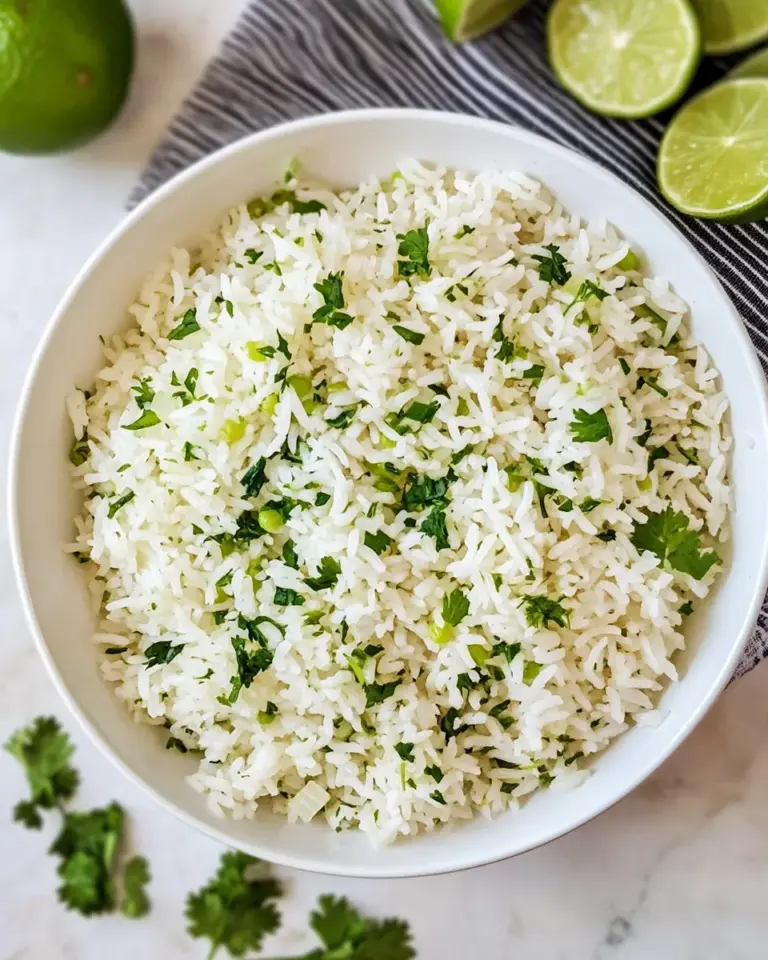
– Versatile—great with rice, tacos, or salads
– Perfect for meal prep or leftovers
What Goes Into Baked Salsa Chicken
To create this scrumptious dish, you’ll need just a handful of ingredients that you might already have in your kitchen:
- 1 pound boneless skinless chicken breasts – The star of the dish! Tender chicken that soaks up all the flavors.
- 1 large egg – Helps the breadcrumbs stick, creating a crunchy coating.
- 1 cup dried breadcrumbs – Adds texture and crunch to the chicken.
- 1 tablespoon taco seasoning – A burst of flavor that compliments the salsa perfectly.
- 1 cup salsa – Choose your favorite variety for added spice and flavor.
- 1 cup shredded Monterey Jack or Cheddar cheese – Melts beautifully on top for a cheesy finish.
Equipment at a Glance
Before diving into the cooking process, gather these essential tools:
- Baking dish – A 9×13 inch dish works great for this recipe.
- Mixing bowls – Perfect for combining your ingredients.
- Measuring cups and spoons – Ensure accurate measurements for perfect results.
- Whisk or fork – Useful for beating the egg.
- Oven mitts – Safety first when handling hot dishes!
Baked Salsa Chicken Cooking Guide
Ready to get cooking? Follow this step-by-step guide for a delicious Baked Salsa Chicken:
Step 1: Preheat the Oven
Start by preheating your oven to 375°F (190°C). This ensures your chicken cooks evenly and gets that perfect golden color.
Step 2: Prepare the Chicken
In a mixing bowl, beat the large egg until well combined. In another bowl, combine the dried breadcrumbs and taco seasoning.
Step 3: Coat the Chicken
Dip each chicken breast into the egg mixture, allowing any excess to drip off. Then, coat the chicken in the breadcrumb mixture, pressing gently to ensure they adhere well.
Step 4: Arrange in the Baking Dish
Place the coated chicken breasts in a lightly greased baking dish. Make sure they are evenly spaced for even cooking.
Step 5: Add Salsa
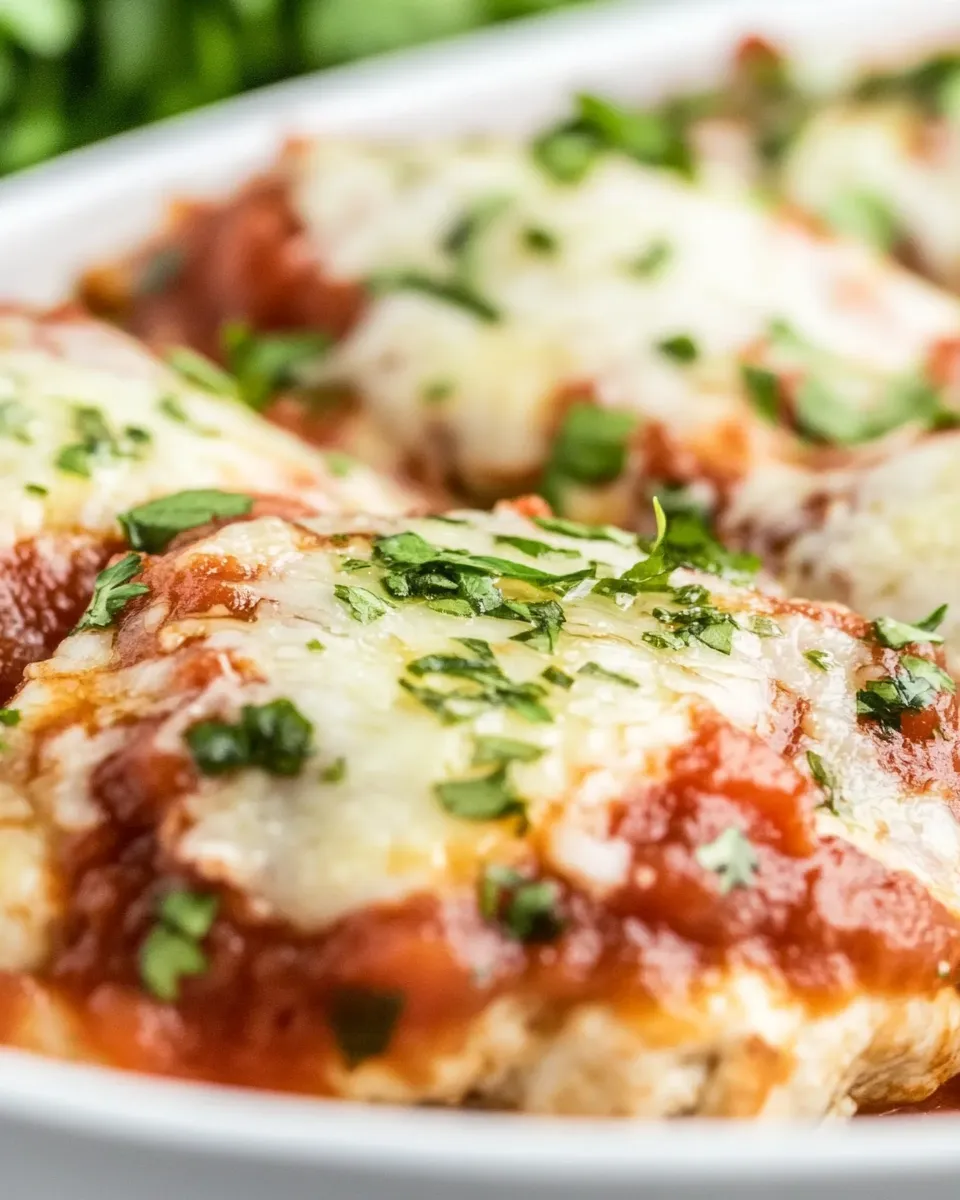
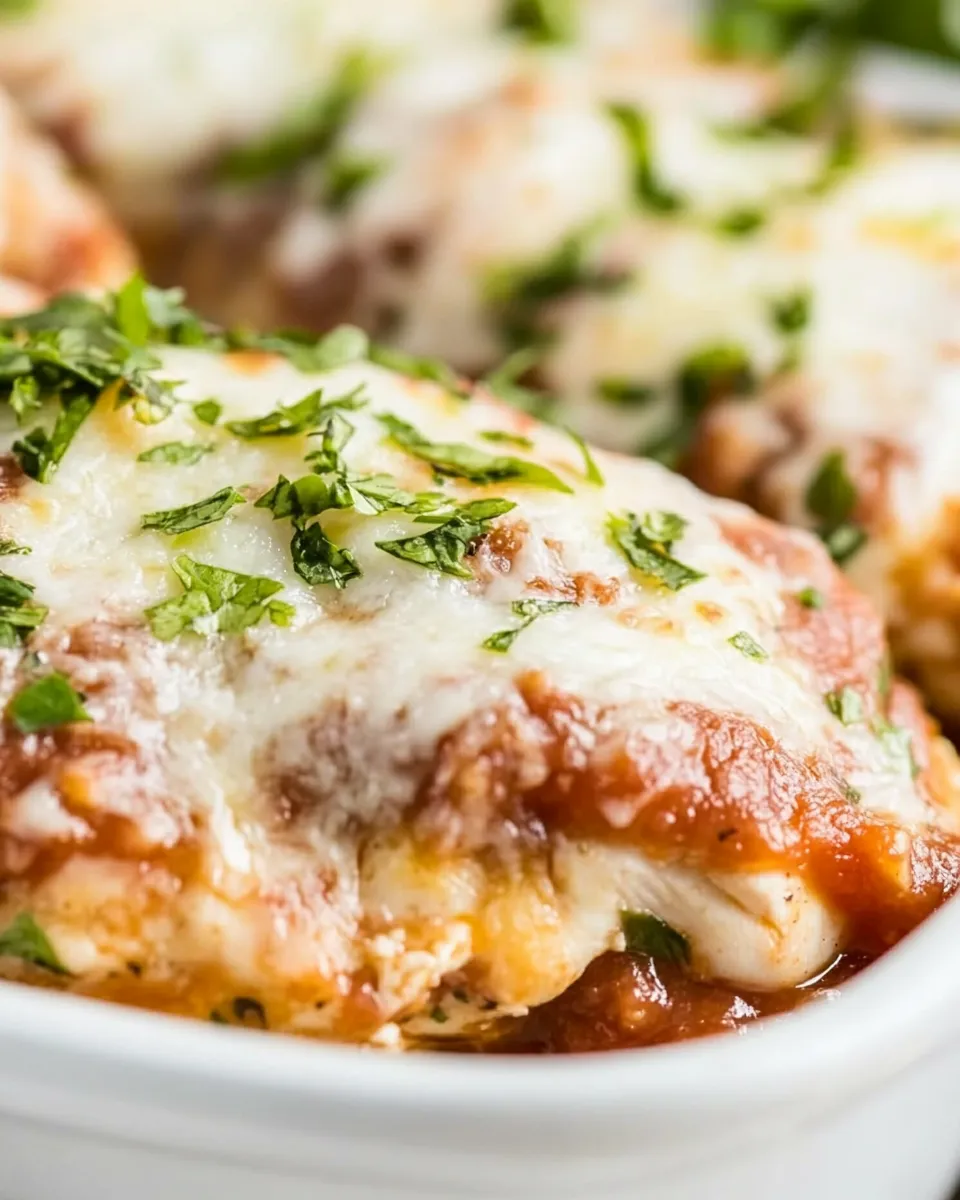
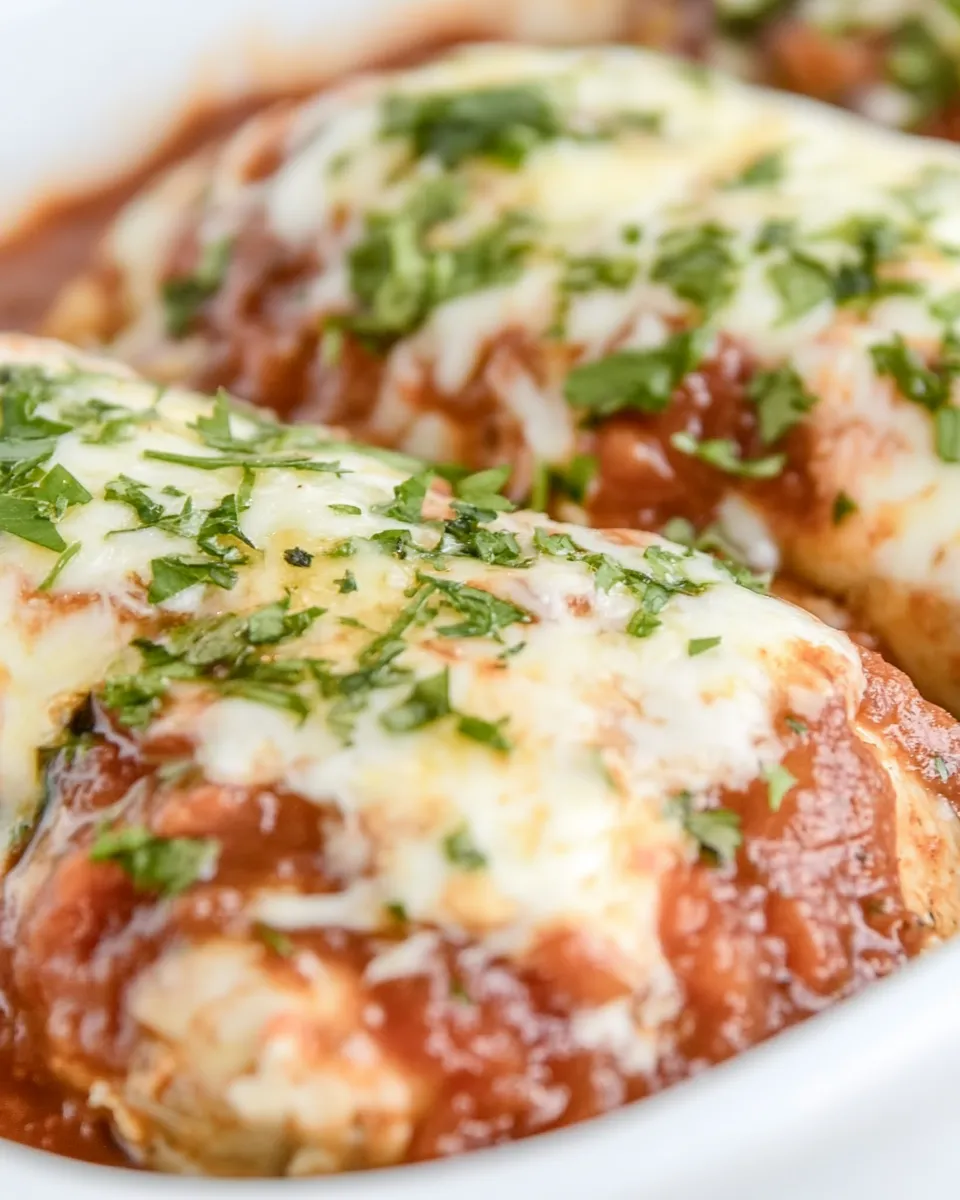
Spoon the salsa generously over each chicken breast, ensuring they are well covered. This not only adds flavor but keeps the chicken moist during baking.
Step 6: Top with Cheese
Sprinkle the shredded Monterey Jack or Cheddar cheese on top of the salsa-covered chicken. The cheese will melt and create a delicious, gooey topping.
Step 7: Bake
Place the baking dish in the preheated oven and bake for about 25-30 minutes, or until the chicken is cooked through and no longer pink in the center. The internal temperature should reach 165°F (74°C).
Step 8: Serve and Enjoy
Once cooked, remove the dish from the oven and let it rest for a few minutes. Serve your Baked Salsa Chicken with rice, on tacos, or alongside a fresh salad. Enjoy every bite!
Allergy-Friendly Substitutes
If you have dietary restrictions, here are some easy substitutes you can use in this recipe:
- Gluten-free breadcrumbs – Perfect for those with gluten intolerance.
- Egg substitute – Use a flaxseed meal mixture or unsweetened applesauce if you’re avoiding eggs.
- Low-sodium salsa – Great for anyone watching their salt intake.
- Vegan cheese – Swap for a plant-based cheese option if you prefer a dairy-free version.
Chef’s Rationale
The beauty of this Baked Salsa Chicken lies in its simplicity and versatility. The combination of chicken, salsa, and cheese results in a dish that is flavorful and satisfying without requiring hours in the kitchen. The taco seasoning adds a delightful kick, while the breadcrumbs create a satisfying crunch. This recipe is designed for busy weeknights, giving you a hearty meal with minimal effort. Plus, it pairs wonderfully with a variety of sides, making it a versatile addition to your meal planning.
Storage & Reheat Guide
If you have leftovers (if you can resist!), here’s how to store and reheat your Baked Salsa Chicken:
- Storage – Allow the chicken to cool before transferring it to an airtight container. Store in the refrigerator for up to 3-4 days.
- Freezing – You can freeze leftovers for up to 3 months. Ensure it’s well-wrapped to prevent freezer burn.
- Reheating – To reheat, place the chicken in a baking dish and cover with foil. Warm in the oven at 350°F (175°C) until heated through, about 15-20 minutes.
Reader Q&A
Can I use frozen chicken breasts for this recipe?
Yes, you can use frozen chicken breasts, but it’s best to thaw them first to ensure even cooking. You can do this overnight in the refrigerator or use the microwave for a quicker option.
What type of salsa works best?
Any salsa that you enjoy will work great! Whether you prefer mild, medium, or spicy, the choice is yours. You can also experiment with fresh salsa or even a fruit salsa for a unique twist.
Can I make this dish ahead of time?
Absolutely! You can prepare the chicken and coat it with breadcrumbs and salsa, then cover and refrigerate until you’re ready to bake. Just add a few extra minutes to the cooking time if baking straight from the fridge.
What sides pair well with Baked Salsa Chicken?
This dish pairs wonderfully with a variety of sides such as Mexican rice, black beans, or a fresh garden salad. You can also serve it in tacos or over a bed of greens for a lighter meal.
Our Most-Loved Recipes
If you enjoyed this Baked Salsa Chicken, you might love some of our other popular recipes:
- Mexican Beefy Nacho Casserole – A cheesy, hearty dish the whole family will love.
- Chicken Enchilada Pizza – A fun twist on traditional pizza that’s bursting with flavor.
Let’s Eat
Now that you have the guide to creating the perfect Baked Salsa Chicken, it’s time to gather your ingredients and get cooking! This dish is not only easy to prepare but also incredibly satisfying, making it a great option for family dinners or meal prep. Enjoy the delightful combination of flavors and the joy of sharing a homemade meal with your loved ones. Happy cooking!
Baked Salsa Chicken
Ingredients
Equipment
Method
- Preheat your oven to 375°F (190°C).
- In a mixing bowl, beat the egg until well combined. In another bowl, combine the breadcrumbs and taco seasoning.
- Dip each chicken breast into the egg mixture, allowing excess to drip off. Coat the chicken in the breadcrumb mixture, pressing gently to adhere.
- Place the coated chicken breasts in a lightly greased baking dish, spaced evenly.
- Spoon the salsa generously over each chicken breast.
- Sprinkle the cheese on top of the salsa-covered chicken.
- Bake for about 25-30 minutes, or until the chicken is cooked through and no longer pink in the center.
- Let it rest for a few minutes before serving with rice, on tacos, or alongside a fresh salad.
Notes
- For a gluten-free option, use gluten-free breadcrumbs.
- You can prep the chicken ahead of time and refrigerate before baking.
- This dish pairs well with various sides like rice or salads.