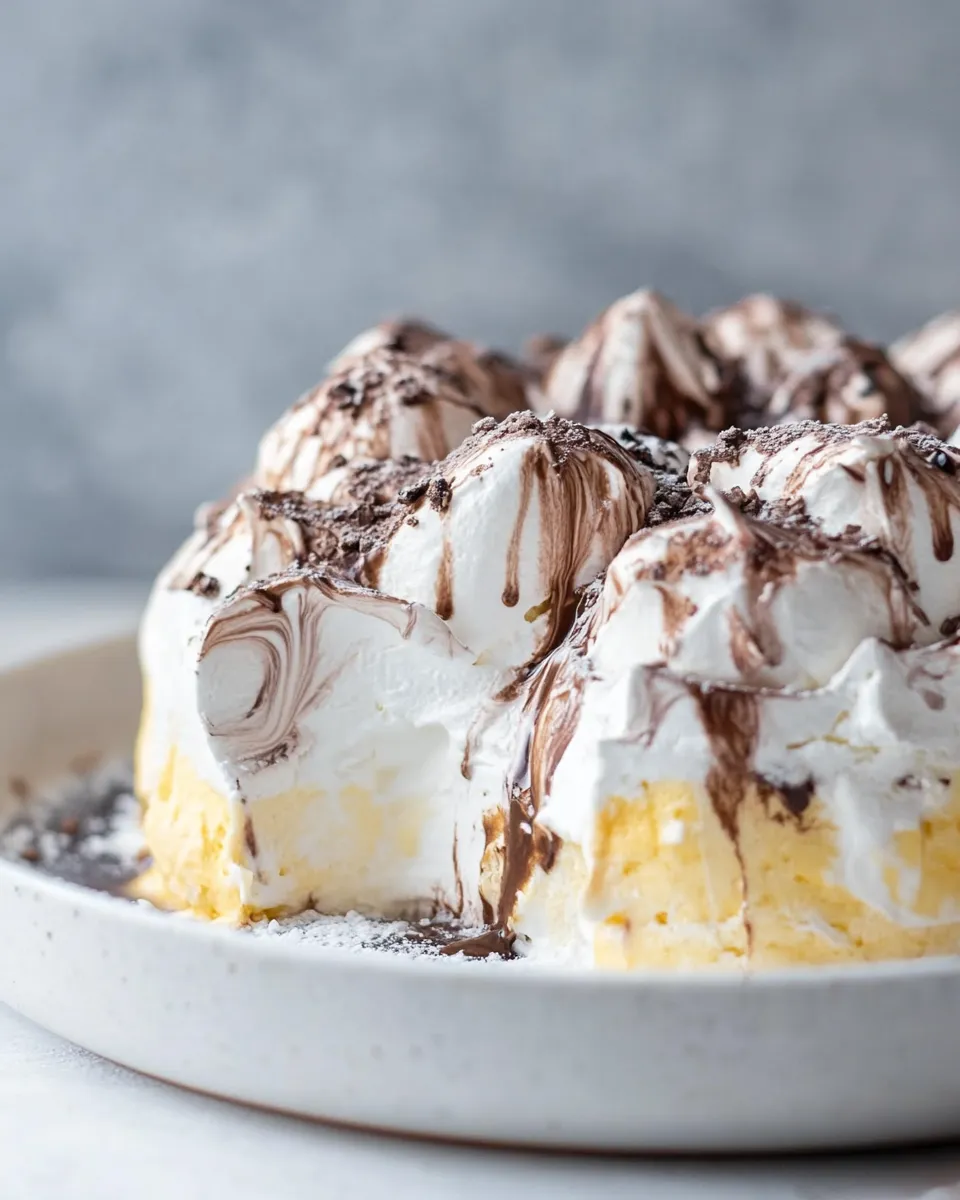
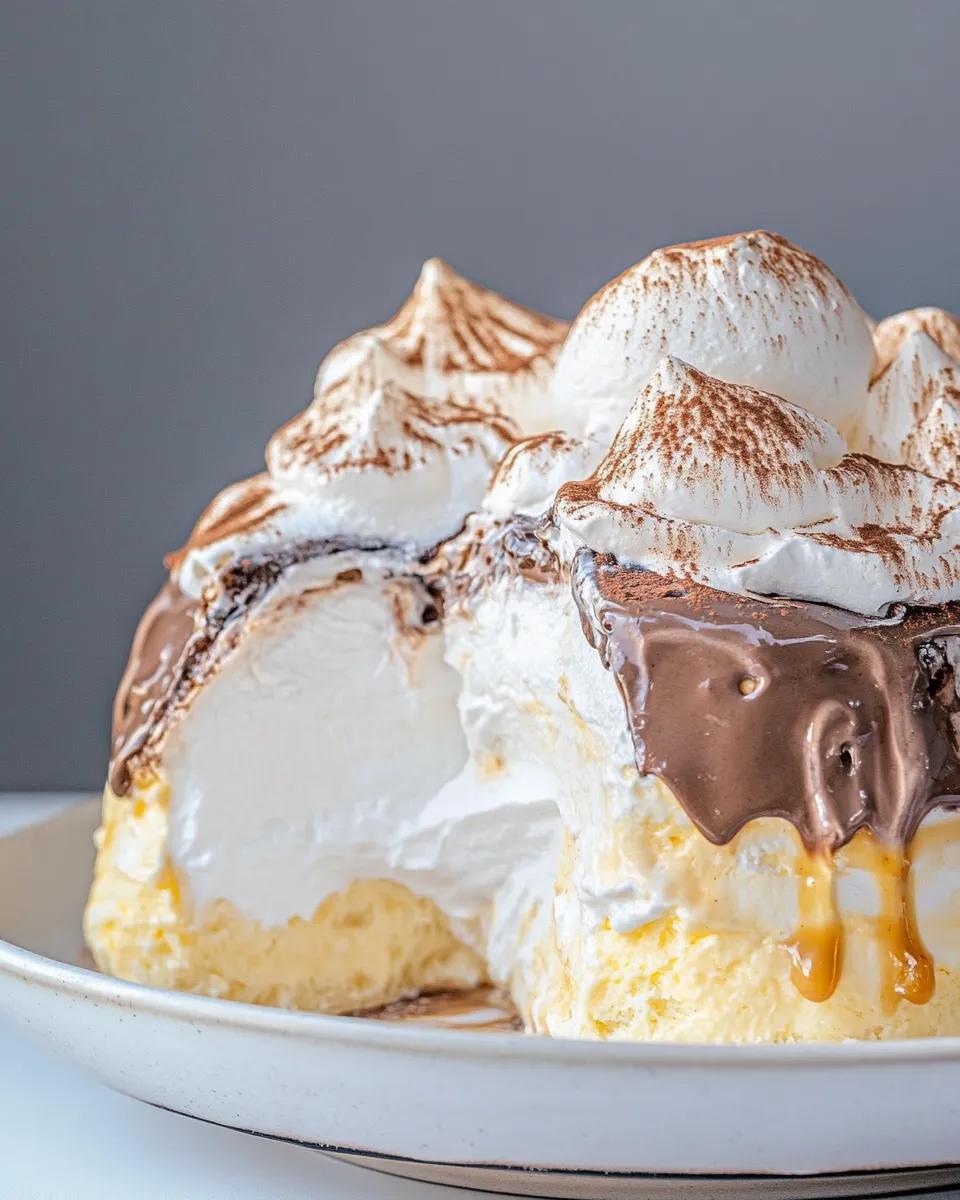
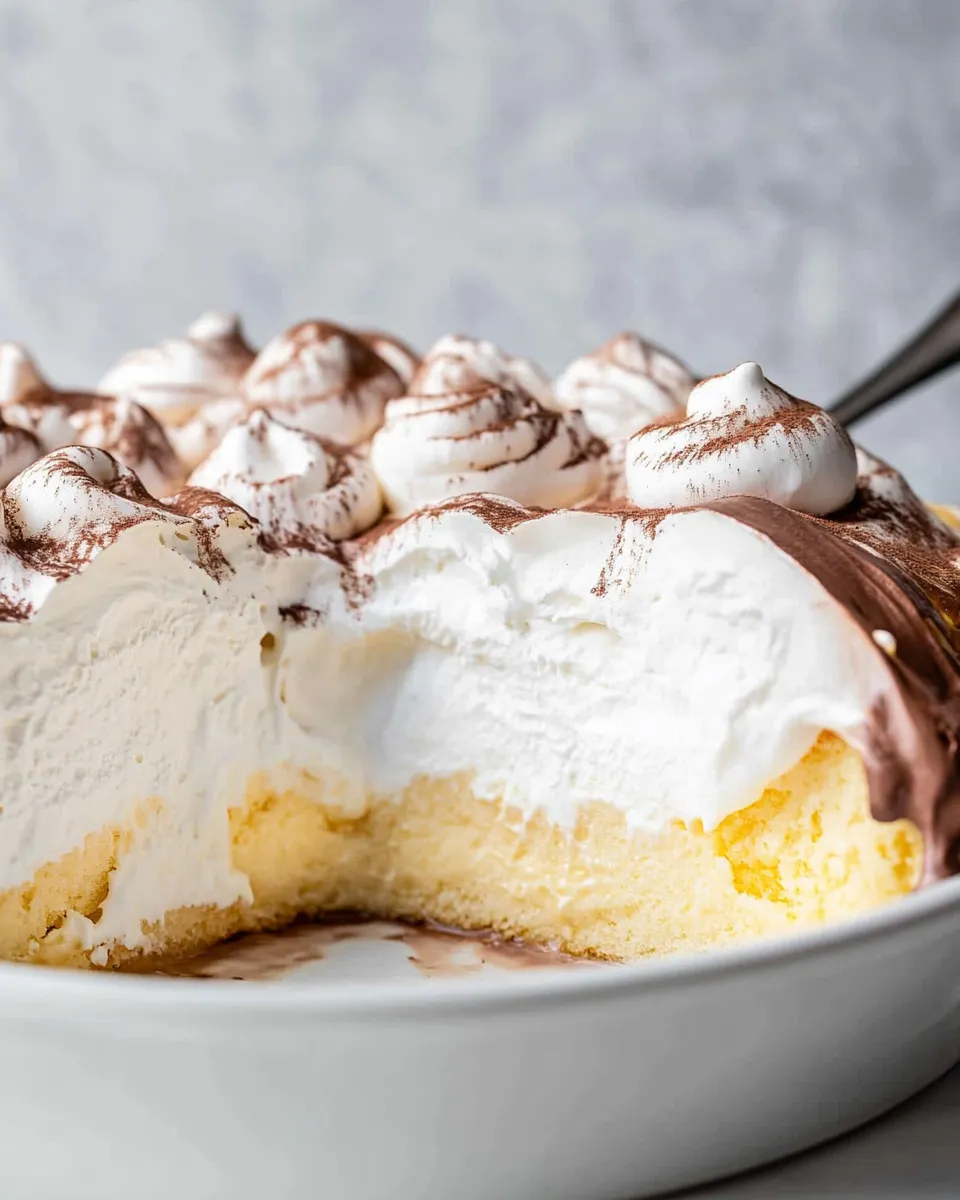
Baked Alaska
Baked Alaska is a show-stopping dessert that combines layers of cake and ice cream, all enveloped in a fluffy meringue. This delightful creation not only pleases the palate but also dazzles the eyes, making it the perfect centerpiece for any gathering. Imagine slicing into the beautiful exterior to reveal the cold, creamy ice cream nestled atop a soft cake layer. It’s a classic dessert that carries a sense of celebration, and today, I’m thrilled to guide you through the process of making your very own Baked Alaska.
Why I Love This Recipe
What draws me to Baked Alaska is its magnificent juxtaposition of temperatures and textures. The warm, toasted meringue contrasts beautifully with the cold ice cream, while the cake adds a lovely softness to each bite. This dessert can be customized with any flavors you desire, allowing you to make it your own. Whether it’s for a birthday, holiday, or just a special treat, Baked Alaska never fails to impress. Plus, it’s a fun recipe to make with family or friends, creating memories as you whip up this timeless treat.
Ingredient Breakdown
To create this stunning dessert, you’ll need the following ingredients:
- 1 prepared cake round: You can use any flavor you like—vanilla, chocolate, or even a fruity option would work beautifully.
- 3-4 pints ice cream: Choose your favorite flavors! Classic options include vanilla, chocolate, and strawberry, but feel free to experiment with cookie dough or mint chocolate chip.
- 8 large egg whites, room temperature: Fresh egg whites are essential for a stable meringue that holds its shape.
- 1 pinch cream of tartar: This helps stabilize the egg whites, ensuring your meringue is fluffy and light.
- 1 cup granulated sugar: This sweetener is crucial for achieving a glossy meringue that will be toasted to perfection.
Toolbox for This Recipe
To make your Baked Alaska, you’ll need a few key tools:
- Mixing bowl: A large bowl for whipping the egg whites.
- Electric mixer: This will make the meringue process quicker and easier.
- Spatula: Use it to spread the meringue evenly over the ice cream and cake.
- Oven-safe baking dish: You’ll use this to bake your assembled Alaska.
- Kitchen torch (optional): For a professional finish, a torch gives you control over the browning of the meringue.
Baked Alaska: How It’s Done
Making Baked Alaska is a multi-step process, but don’t worry! Each step is straightforward and rewarding.
Step 1: Prepare the Cake Layer
Start by baking your chosen cake round according to the recipe or package instructions. Let it cool completely on a wire rack before proceeding.
Step 2: Scoop the Ice Cream
While the cake cools, scoop the ice cream into a bowl and mix it slightly to soften it. This will make it easier to spread. You can create layers of different flavors or keep it simple with one.
Step 3: Assemble the Layers
Place the cooled cake round on a serving platter. Spread a thick layer of softened ice cream over the top of the cake, making sure to cover it completely. If you want to get creative, you can use different ice cream flavors for each layer. Freeze the assembled cake and ice cream for at least 1 hour to firm it up.
Step 4: Make the Meringue
In a clean mixing bowl, add the egg whites and a pinch of cream of tartar. Beat with an electric mixer on medium speed until soft peaks form. Gradually add the granulated sugar, continuing to beat until you achieve stiff, glossy peaks.
Step 5: Cover the Ice Cream with Meringue
Once the ice cream is firm, remove the cake from the freezer. Immediately spread the meringue over the ice cream and cake, ensuring it’s completely covered. Use a spatula to create peaks and swirls for a beautiful presentation.
Step 6: Toast the Meringue
Preheat your oven to broil. Place the assembled Baked Alaska in the oven for about 3-5 minutes, watching closely until the meringue turns a lovely golden brown. Alternatively, you can use a kitchen torch to toast the meringue for more control.
Step 7: Serve and Enjoy!
Once toasted, remove the Baked Alaska from the oven and let it sit for just a few minutes before slicing. Serve immediately and watch as your guests marvel at the stunning dessert.
Substitutions by Diet
If you have dietary restrictions or preferences, here are some substitutions you can make:
- Gluten-free: Use a gluten-free cake mix or recipe to create the cake layer.
- Dairy-free: Opt for dairy-free ice cream and ensure the cake is also dairy-free.
- Low-sugar: Use a sugar substitute for the meringue, but be aware that it may not whip up as well as sugar.
- Vegan: Substitute the egg whites with aquafaba (the liquid from canned chickpeas) for the meringue.
What Not to Do
To ensure your Baked Alaska turns out perfectly, avoid these common pitfalls:
- Don’t skip the chilling step: Allowing the ice cream to set is crucial for easy slicing.
- Don’t overbeat the egg whites: If you beat them too long, they can become grainy and dry.
- Don’t leave the meringue unprotected: Cover the ice cream completely to prevent it from melting.
- Don’t walk away while toasting: The meringue can go from perfectly browned to burnt in an instant.
Shelf Life & Storage
Baked Alaska is best enjoyed fresh, but if you have leftovers, here’s how to store them:
- Store in the freezer: Wrap it tightly in plastic wrap and aluminum foil to prevent freezer burn.
- Consume within 2-3 days: For the best taste and texture, enjoy it within a few days of making.
Quick Q&A
Can I make Baked Alaska ahead of time?
Yes! You can assemble the cake and ice cream layers in advance and freeze them. Just add the meringue and toast it right before serving.
What types of ice cream work best?
Any flavor works, but a combination of rich, creamy ice creams like vanilla and chocolate with fruity flavors like strawberry creates a delightful balance.
Can I use store-bought cake?
Absolutely! Using a store-bought cake can save time and still yield delicious results.
What if I don’t have a kitchen torch?
You can use the broiler in your oven to toast the meringue, just be sure to keep a close eye on it!
More Recipes You’ll Love
If you enjoyed this Baked Alaska recipe, you might also like these delicious treats:
Hungry for More?
Baked Alaska is just one of many incredible desserts you can make at home. The joy of creating something from scratch, especially something as visually appealing as this, is truly rewarding. I hope you give this recipe a try, and don’t hesitate to put your spin on it. Whether you’re celebrating a special occasion or simply indulging in a sweet craving, Baked Alaska is sure to impress. Enjoy the process and the delightful results!
Baked Alaska
Ingredients
Equipment
Method
- Step 1: Prepare the Cake Layer - Bake your chosen cake round according to the recipe or package instructions. Let it cool completely on a wire rack before proceeding.
- Step 2: Scoop the Ice Cream - While the cake cools, scoop the ice cream into a bowl and mix it slightly to soften it.
- Step 3: Assemble the Layers - Place the cooled cake round on a serving platter. Spread a thick layer of softened ice cream over the top of the cake. Freeze for at least 1 hour to firm it up.
- Step 4: Make the Meringue - In a clean mixing bowl, add the egg whites and cream of tartar. Beat until soft peaks form. Gradually add sugar until stiff, glossy peaks are achieved.
- Step 5: Cover the Ice Cream with Meringue - Once the ice cream is firm, spread the meringue over the ice cream and cake, ensuring it’s completely covered.
- Step 6: Toast the Meringue - Preheat the oven to broil. Place the Baked Alaska in the oven for about 3-5 minutes, until the meringue turns golden brown.
- Step 7: Serve and Enjoy! - Once toasted, let it sit for a few minutes before slicing. Serve immediately.
Notes
- For gluten-free, use a gluten-free cake mix.
- Dairy-free options can be used for both cake and ice cream.
- Store leftovers tightly wrapped in the freezer for 2-3 days.