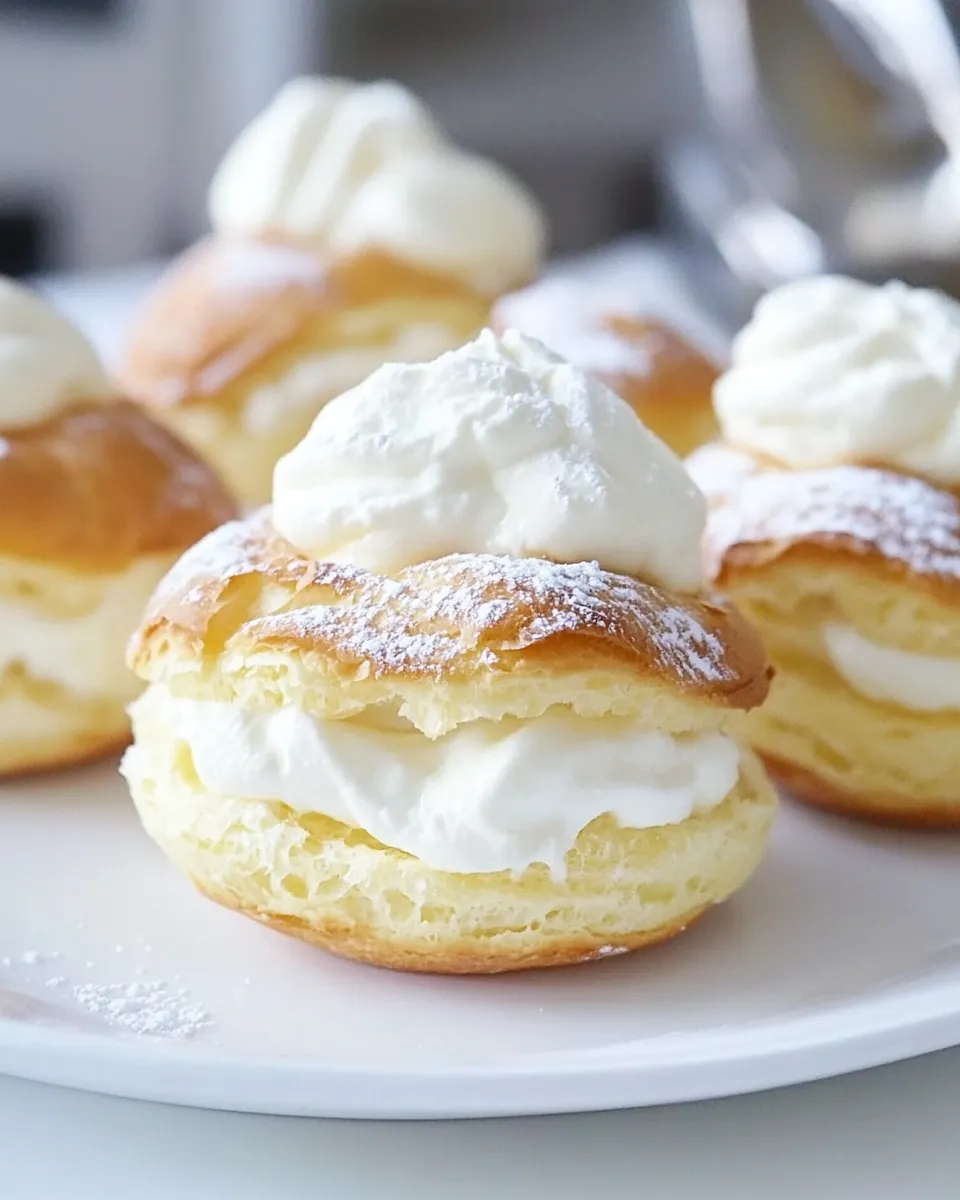
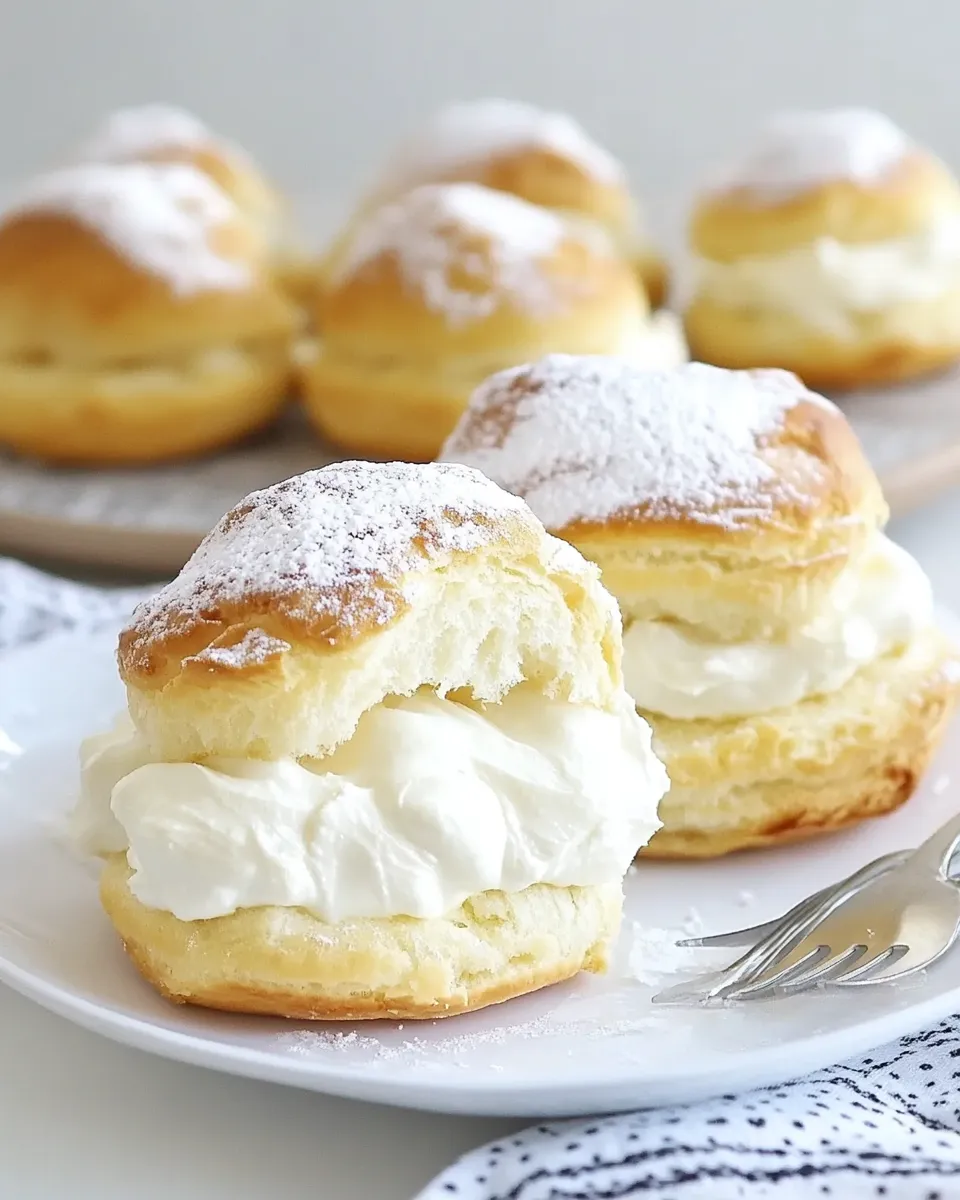
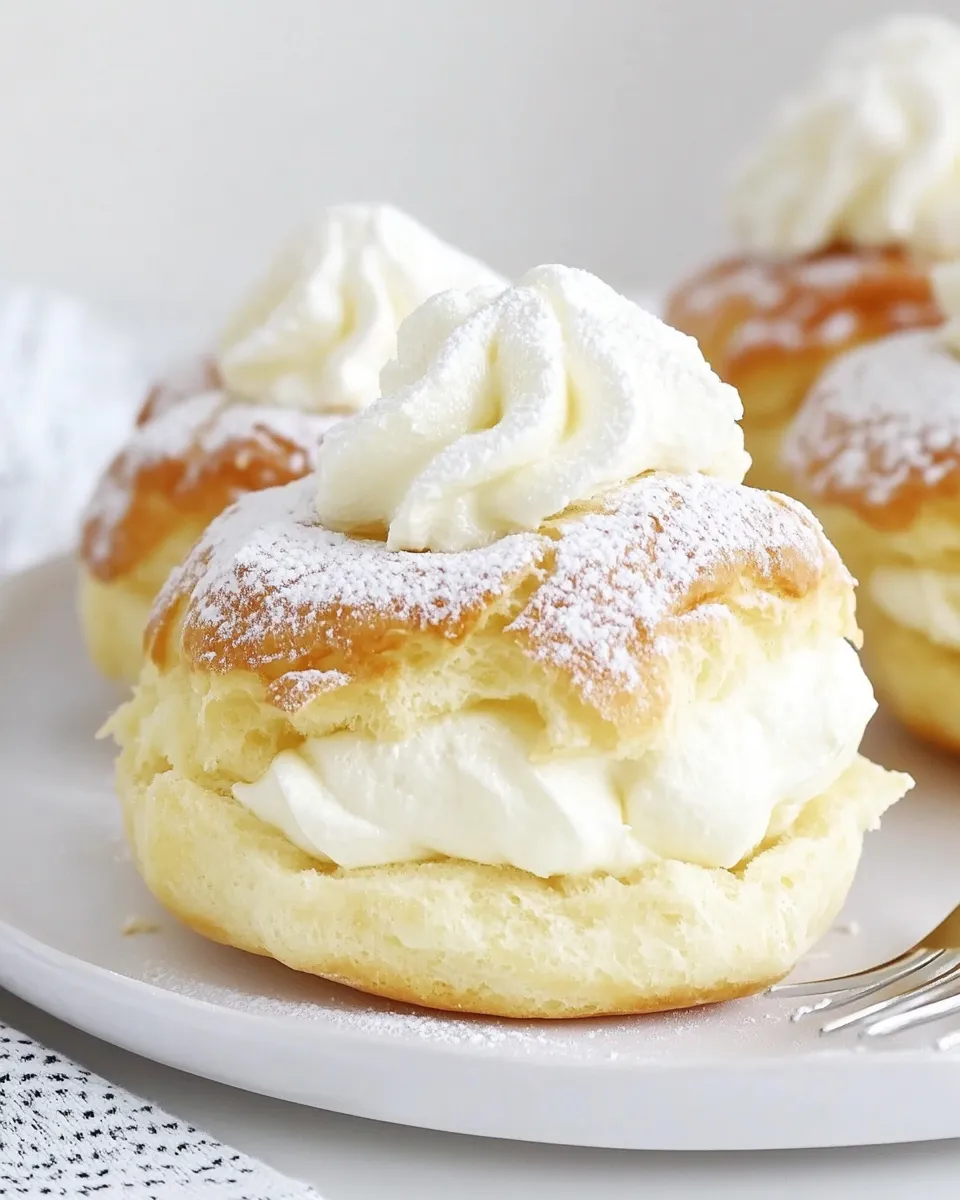
Cream Puff Recipe
If you’re looking for a delightful treat that combines a light, airy pastry with a rich filling, look no further than this Cream Puff Recipe. With its origins rooted in French culinary tradition, these delicate puffs are perfect for any occasion—from elegant gatherings to casual family desserts. They’re surprisingly simple to make and can be filled with a variety of delicious fillings, making them versatile and fun!
Top Reasons to Make Cream Puff Recipe

- Light and Airy: The choux pastry is uniquely light, creating an irresistible texture that melts in your mouth.
- Customizable: Fill them with whipped cream, custard, or even ice cream—there’s no limit to your creativity!
- Impressive Presentation: These puffs look stunning on any dessert table, sure to wow your guests.
- Simple Ingredients: With just a few pantry staples, you can whip up these delightful treats with ease.
- Perfect for Any Occasion: Whether it’s a birthday, holiday, or just a cozy night in, cream puffs are always a hit.
What You’ll Gather
- 1 cup water
- 5 tablespoons + 1 teaspoon unsalted butter
- 1 tablespoon granulated sugar
- 1 teaspoon salt
- 1 cup all-purpose flour
- 4 eggs
- 1 cup heavy cream
- 1 cup powdered sugar, or more or less to taste
Equipment & Tools
- Medium Saucepan: For boiling the water and butter.
- Mixing Bowl: To combine the cream filling ingredients.
- Whisk: For mixing and whipping the cream.
- Piping Bag: To fill your cream puffs with ease.
- Baking Sheet: To bake the puffs evenly.
- Parchment Paper: To prevent sticking on the baking sheet.
Make Cream Puff Recipe: A Simple Method
Step 1: Prepare the Choux Pastry
In a medium saucepan, combine the water, butter, sugar, and salt. Bring this mixture to a boil over medium heat, stirring occasionally until the butter is completely melted.
Step 2: Add the Flour
Once boiling, remove the saucepan from the heat and quickly stir in the all-purpose flour. Use a wooden spoon to mix until the dough comes together and forms a ball, pulling away from the sides of the pan.
Step 3: Add the Eggs
Allow the dough to cool for about 5 minutes. Then, one at a time, add the eggs, mixing well after each addition until the dough is smooth and glossy.
Step 4: Pipe the Puffs
Preheat your oven to 400°F (200°C). Line a baking sheet with parchment paper. Transfer the choux pastry dough into a piping bag fitted with a large round tip. Pipe small mounds (about 1.5 inches in diameter) onto the prepared baking sheet, spacing them about 2 inches apart.
Step 5: Bake the Cream Puffs
Bake in the preheated oven for 20-25 minutes, or until the puffs are golden brown and have risen. Avoid opening the oven door during baking, as this may cause them to deflate.
Step 6: Prepare the Cream Filling
While the puffs cool, whip the heavy cream in a mixing bowl until soft peaks form. Gradually add the powdered sugar until well combined and the cream is fluffy.
Step 7: Fill the Cream Puffs
Once the cream puffs have cooled completely, use a sharp knife to make a small slit in each puff. Pipe or spoon the whipped cream into each puff until they are generously filled.
Swap Guide
- Butter: Can be substituted with margarine or a plant-based butter for a dairy-free option.
- Heavy Cream: Use coconut cream for a dairy-free alternative.
- Powdered Sugar: Substitute with agave syrup or honey for a natural sweetener, adjusting to taste.
- All-Purpose Flour: Use gluten-free flour for a gluten-free version.
Behind-the-Scenes Notes
- Ensure your eggs are at room temperature for better incorporation into the dough.
- Don’t skip the cooling time after cooking the dough; it helps the eggs mix in smoothly.
- For extra flavor, consider adding vanilla extract to the whipped cream filling.
- Experiment with additional fillings, such as chocolate mousse or pastry cream, to switch things up.
Best Ways to Store
Store your filled cream puffs in an airtight container in the refrigerator for up to 2 days. For unfilled puffs, they can be kept in a cool, dry place for up to 3 days. If you want to prepare them ahead of time, consider freezing the unfilled puffs for up to a month. When ready to serve, simply thaw and fill with whipped cream.
Helpful Q&A
Can I make the cream puffs ahead of time?
Absolutely! You can prepare the unfilled cream puffs a day or two in advance and store them in an airtight container. Fill them just before serving for the best texture.
Why did my cream puffs deflate?
Deflation can occur if the oven door is opened too early, or if the puffs are removed from the oven before they are fully cooked. Make sure to bake them until they are golden brown and firm to the touch.
Can I use different fillings for the cream puffs?
Yes! The beauty of cream puffs is their versatility. You can fill them with pastry cream, chocolate mousse, or even savory fillings like cheese and herbs for a unique twist.
What if my choux pastry is too thick?
If your dough is too thick to pipe, you can add a little water, one tablespoon at a time, and mix until you reach the desired consistency. It should be thick but still pipeable.
Try These Next
Wrap-Up
Cream puffs are a timeless treat that never fails to delight. With their delicate texture and endless filling possibilities, they bring a touch of elegance to any dessert spread. Whether you’re a seasoned baker or a novice in the kitchen, this Cream Puff Recipe is sure to impress. Don’t hesitate to experiment with flavors and fillings to make these puffs truly your own. Enjoy the process, and most importantly, enjoy every bite!
Cream Puff Recipe
Ingredients
Equipment
Method
- In a medium saucepan, combine the water, butter, sugar, and salt. Bring this mixture to a boil over medium heat, stirring occasionally until the butter is completely melted.
- Once boiling, remove the saucepan from the heat and quickly stir in the all-purpose flour. Use a wooden spoon to mix until the dough comes together and forms a ball, pulling away from the sides of the pan.
- Allow the dough to cool for about 5 minutes. Then, one at a time, add the eggs, mixing well after each addition until the dough is smooth and glossy.
- Preheat your oven to 400°F (200°C). Line a baking sheet with parchment paper. Transfer the choux pastry dough into a piping bag fitted with a large round tip. Pipe small mounds (about 1.5 inches in diameter) onto the prepared baking sheet, spacing them about 2 inches apart.
- Bake in the preheated oven for 20-25 minutes, or until the puffs are golden brown and have risen. Avoid opening the oven door during baking, as this may cause them to deflate.
- While the puffs cool, whip the heavy cream in a mixing bowl until soft peaks form. Gradually add the powdered sugar until well combined and the cream is fluffy.
- Once the cream puffs have cooled completely, use a sharp knife to make a small slit in each puff. Pipe or spoon the whipped cream into each puff until they are generously filled.
Notes
- Ensure your eggs are at room temperature for better incorporation into the dough.
- Don’t skip the cooling time after cooking the dough; it helps the eggs mix in smoothly.
- For extra flavor, consider adding vanilla extract to the whipped cream filling.