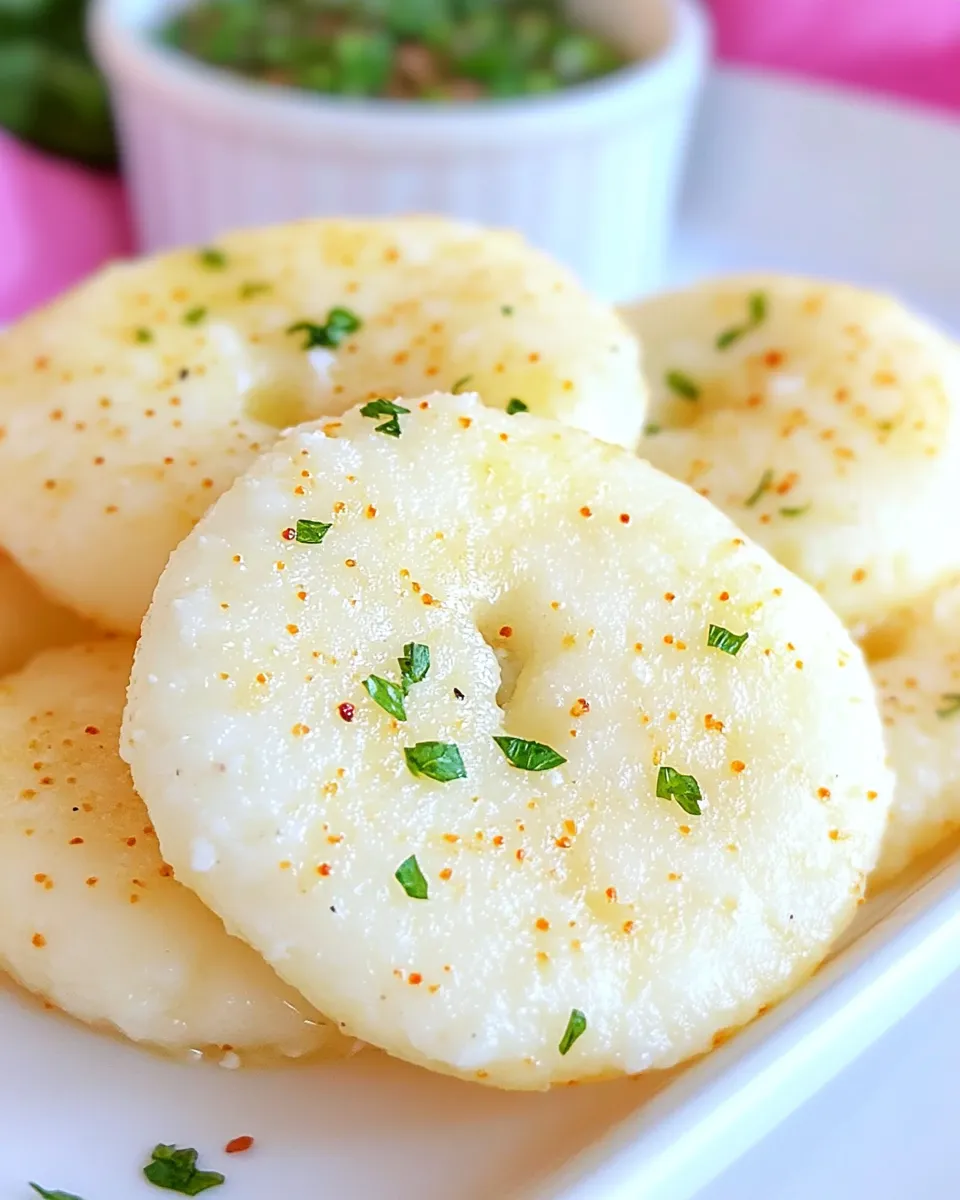
Garlic Cream Cheese Disks
There’s something undeniably comforting about the rich, creamy combination of garlic and cream cheese. When paired with soft white bread, the result is a delightful appetizer or snack that pleases any crowd. Whether you’re serving these Garlic Cream Cheese Disks at a party, a family gathering, or simply enjoying them on a cozy night in, they’re bound to become a new favorite.
Imagine biting into a disk of toasty goodness, the creamy filling melting in your mouth, with just the right amount of garlicky goodness dancing on your taste buds. Let’s dive into the details on how to create these delicious disks that are sure to impress everyone who tries them.
Why You’ll Keep Making It
Garlic Cream Cheese Disks are not just delicious; they are incredibly versatile and easy to make. Here are a few reasons why you’ll find yourself returning to this recipe time and again:
- Quick Preparation: In less than an hour, you can whip up a batch of these delightful disks.
- Customizable: Feel free to add your favorite herbs or spices to elevate the flavor.
- Perfect for Any Occasion: These disks work as appetizers for parties, snacks for movie nights, or even as a side dish for dinner.
- Kid-Friendly: With their creamy filling and familiar taste, they are a hit with kids and adults alike.
Ingredient Breakdown
To create these scrumptious Garlic Cream Cheese Disks, gather the following ingredients:
- 1 loaf sliced white bread: The foundation for our disks, offering a soft texture that complements the creamy filling.
- 16 oz cream cheese, softened: The star ingredient that brings a rich and tangy flavor.
- 1/2 cup unsalted butter, cubed: Adds richness and helps with the creamy texture.
- 8 garlic cloves, minced: Infuses the disks with a robust garlic flavor.
- 2 tablespoons chopped fresh parsley: A fresh touch that adds color and a hint of earthiness.
- Pinch of salt: Enhances the flavors of the other ingredients.
- 1/2 cup milk: Helps to achieve the right consistency for the cream cheese filling.
- 1 large egg: Binds the ingredients and adds a golden hue to the final product.
Tools & Equipment Needed
Before you start cooking, make sure you have the following tools on hand:
- Mixing Bowl: For combining the cream cheese and other ingredients.
- Whisk or Electric Mixer: To ensure a smooth and creamy filling.
- Cookie Sheet: For baking the disks in the oven.
- Pastry Brush: For applying butter to the bread.
- Knife: For spreading the cream cheese mixture and cutting the bread.
- Measuring Cups and Spoons: For accurate ingredient measurements.
Stepwise Method: Garlic Cream Cheese Disks

Ready to make your Garlic Cream Cheese Disks? Follow these simple steps:
Step 1: Prepare the Filling
In a mixing bowl, combine the softened cream cheese, minced garlic, chopped parsley, and a pinch of salt. Use a whisk or electric mixer to blend until the mixture is smooth and creamy.
Step 2: Add Milk and Butter
Stir in the cubed unsalted butter and milk into the cream cheese mixture. Mix until well combined, ensuring the butter is fully incorporated.
Step 3: Preheat the Oven
Preheat your oven to 375°F (190°C) to prepare for baking.
Step 4: Prepare the Bread
Take the sliced white bread and trim the crusts if desired. Using a rolling pin, flatten each slice slightly for easier assembly.
Step 5: Spread the Cream Cheese Mixture
Generously spread the garlic cream cheese filling onto one side of each slice of bread. Be sure to cover the entire surface for maximum flavor.
Step 6: Roll and Cut
Roll each slice of bread tightly, starting from one end. Once rolled, cut each roll into 1-inch thick disks.
Step 7: Prepare for Baking
Place the disks cut-side down on a greased cookie sheet. Brush the tops lightly with melted butter for an added richness.
Step 8: Beat the Egg
In a small bowl, whisk the large egg until well beaten. Brush the egg wash over the tops of each disk to give them a lovely golden color when baked.
Step 9: Bake
Bake in the preheated oven for 15-20 minutes or until the disks turn golden brown and are crispy on the edges.
Step 10: Serve and Enjoy
Remove from the oven and let cool for a few minutes. Serve warm and enjoy the delightful flavors of your Garlic Cream Cheese Disks!
Vegan & Vegetarian Swaps

If you’re looking to make these disks vegan or vegetarian-friendly, here are some substitutions you can use:
- Vegan Cream Cheese: Substitute the regular cream cheese with a plant-based alternative.
- Vegan Butter: Use a vegan butter substitute instead of unsalted butter.
- Plant-Based Milk: Replace regular milk with almond, soy, or oat milk.
- Flax Egg: Use a flax egg (1 tablespoon ground flaxseed mixed with 3 tablespoons water) in place of the large egg.
What Not to Do
To ensure your Garlic Cream Cheese Disks turn out perfectly, keep these tips in mind:
- Don’t skip softening the cream cheese; it needs to be at room temperature for easy mixing.
- Avoid overmixing the filling, as it can become too runny and hard to spread.
- Don’t crowd the disks on the baking sheet; give them space to crisp up nicely.
- Do not leave the disks in the oven too long, as they can become overly crunchy instead of perfectly golden.
Keep It Fresh: Storage Guide
If you have leftover Garlic Cream Cheese Disks, follow these storage tips:
Store cooled disks in an airtight container in the refrigerator for up to 3 days. Reheat in the oven at 350°F (175°C) for about 5-10 minutes to restore their crispiness. Alternatively, you can freeze the unbaked rolled disks for up to a month. Just bake them directly from the freezer, adding a few extra minutes to the baking time.
Garlic Cream Cheese Disks FAQs
Can I make the filling ahead of time?
Absolutely! You can prepare the cream cheese filling a day in advance. Just store it in the refrigerator and assemble the disks when you’re ready to bake.
Can I use other types of bread?
Yes, feel free to experiment with different types of bread, such as whole wheat, sourdough, or even baguette for a different texture and flavor.
How can I spice up the flavor?
Add ingredients like red pepper flakes, chopped sun-dried tomatoes, or different herbs such as dill or basil for a unique twist on the classic recipe.
What should I serve with these disks?
These Garlic Cream Cheese Disks pair wonderfully with marinara sauce, a tangy dipping sauce, or even a fresh salad for a well-rounded meal.
Keep Cooking
If you loved making Garlic Cream Cheese Disks, here are some additional recipes to try:
- Sally’s Baking Addiction for delightful dessert ideas.
- Pinch of Yum for more savory snacks and meals.
- Minimalist Baker for simple and delicious plant-based recipes.
The Takeaway
Garlic Cream Cheese Disks are a delightful addition to any meal or gathering. With their creamy filling, aromatic garlic, and crunchy exterior, they are sure to be a hit. Plus, their simplicity in preparation makes them accessible for cooks of all levels. Enjoy making these delicious disks, and don’t forget to experiment with flavors and ingredients to make them your own!

Garlic Cream Cheese Disks
Ingredients
Equipment
Method
- In a mixing bowl, combine the softened cream cheese, minced garlic, chopped parsley, and a pinch of salt. Use a whisk or electric mixer to blend until the mixture is smooth and creamy.
- Stir in the cubed unsalted butter and milk into the cream cheese mixture. Mix until well combined, ensuring the butter is fully incorporated.
- Preheat your oven to 375°F (190°C) to prepare for baking.
- Take the sliced white bread and trim the crusts if desired. Using a rolling pin, flatten each slice slightly for easier assembly.
- Generously spread the garlic cream cheese filling onto one side of each slice of bread. Be sure to cover the entire surface for maximum flavor.
- Roll each slice of bread tightly, starting from one end. Once rolled, cut each roll into 1-inch thick disks.
- Place the disks cut-side down on a greased cookie sheet. Brush the tops lightly with melted butter for an added richness.
- In a small bowl, whisk the large egg until well beaten. Brush the egg wash over the tops of each disk to give them a lovely golden color when baked.
- Bake in the preheated oven for 15-20 minutes or until the disks turn golden brown and are crispy on the edges.
- Remove from the oven and let cool for a few minutes. Serve warm and enjoy the delightful flavors of your Garlic Cream Cheese Disks!
Notes
- Store leftovers in an airtight container in the fridge for up to 3 days.
- Reheat in the oven at 350°F (175°C) for 5-10 minutes to restore crispiness.
- Freeze unbaked rolled disks for up to a month, baking directly from the freezer.