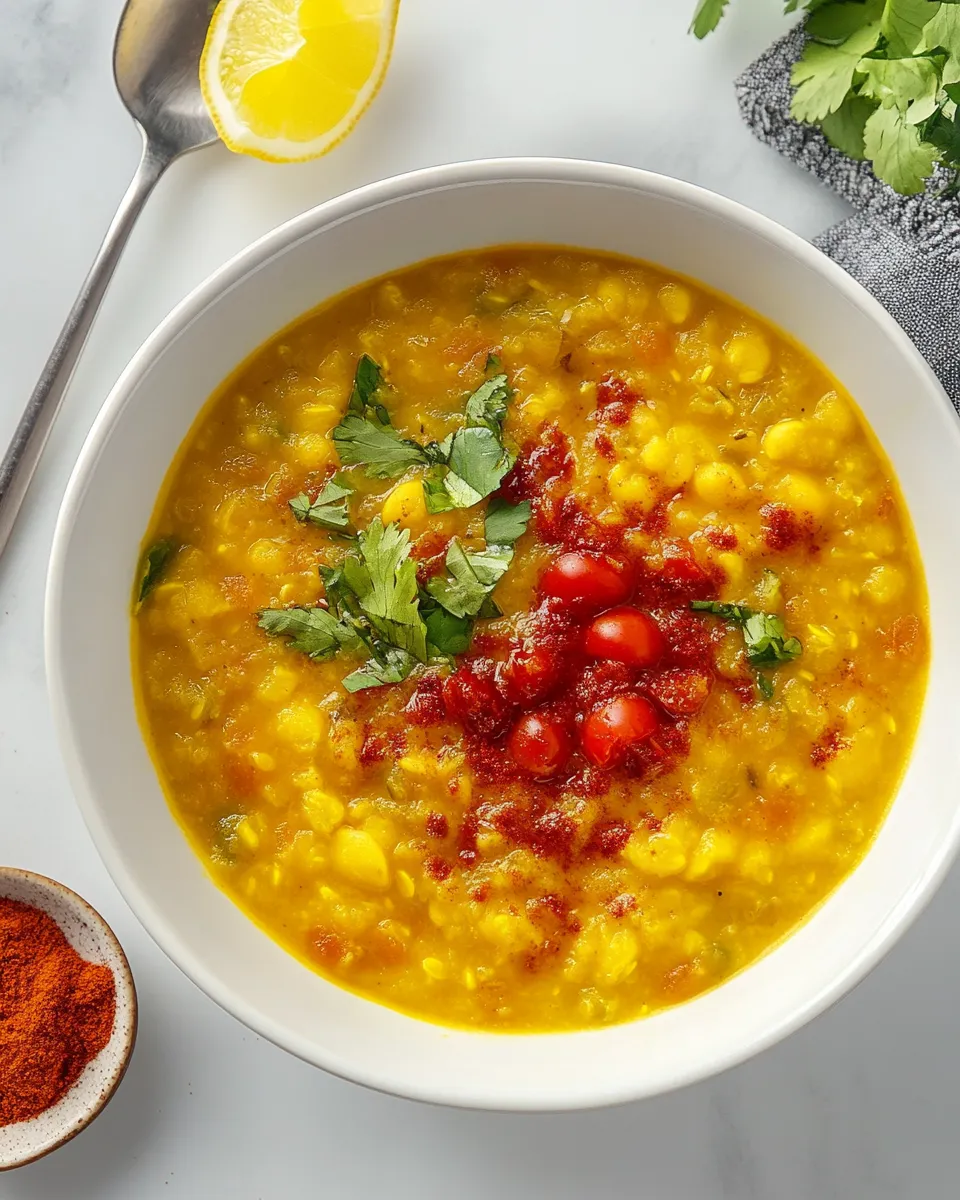
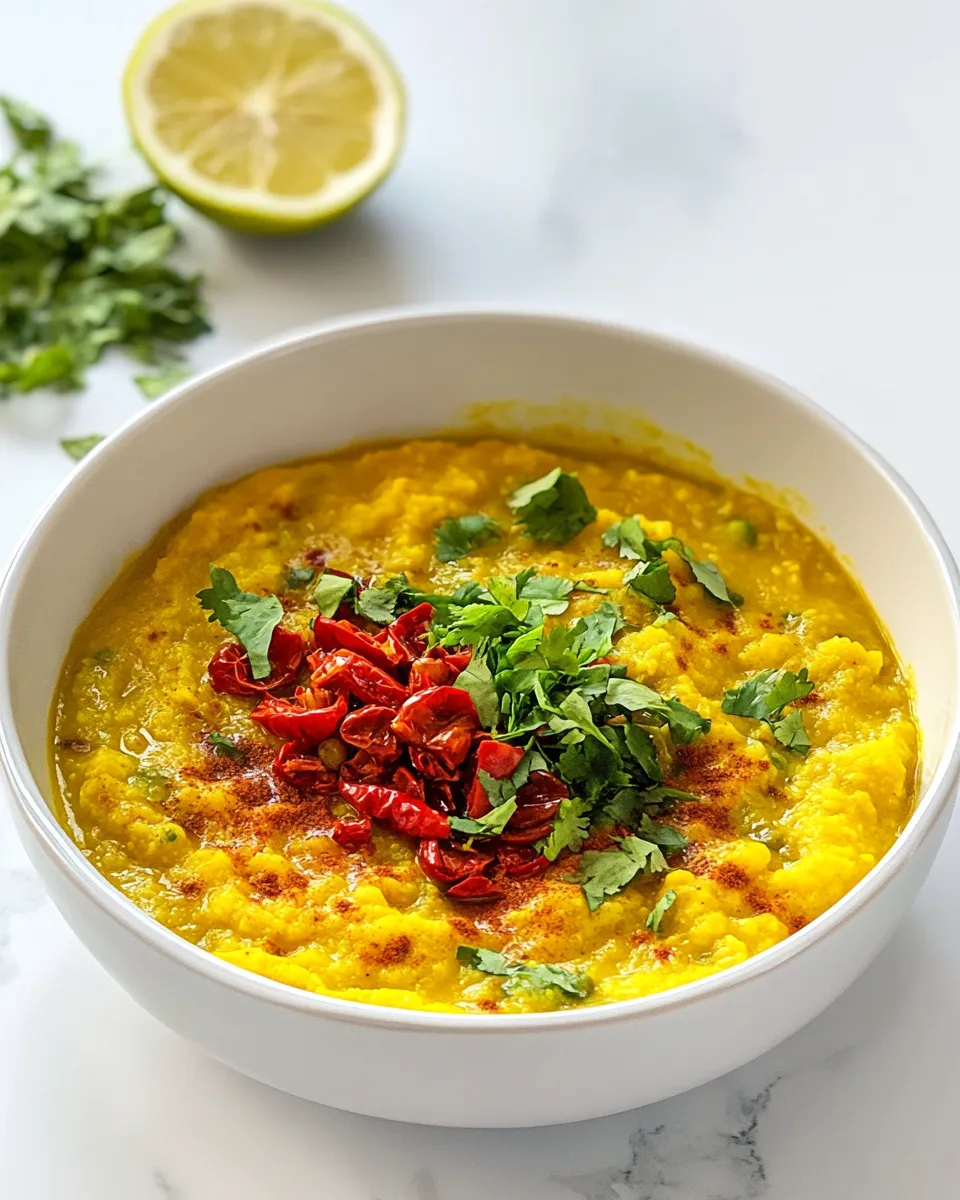
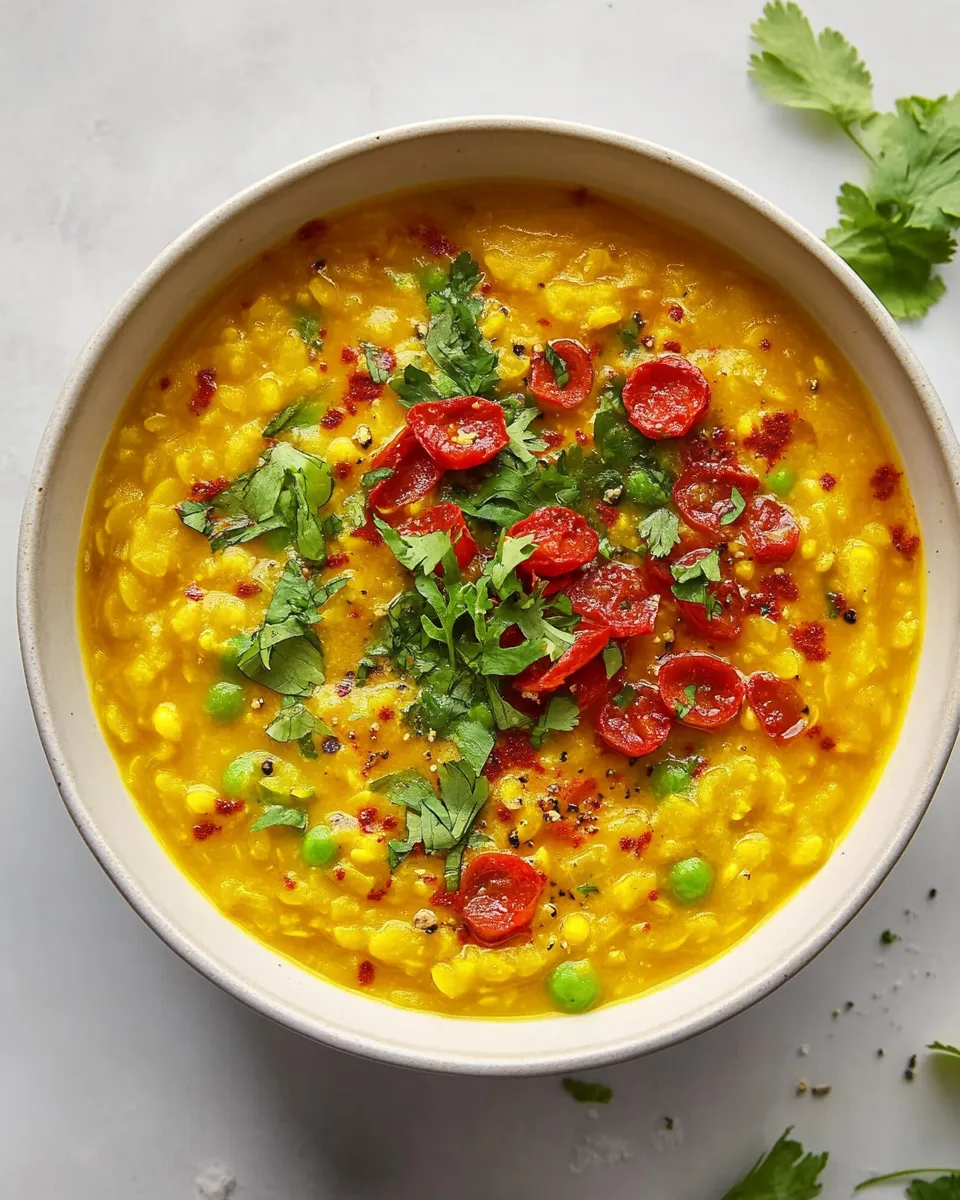
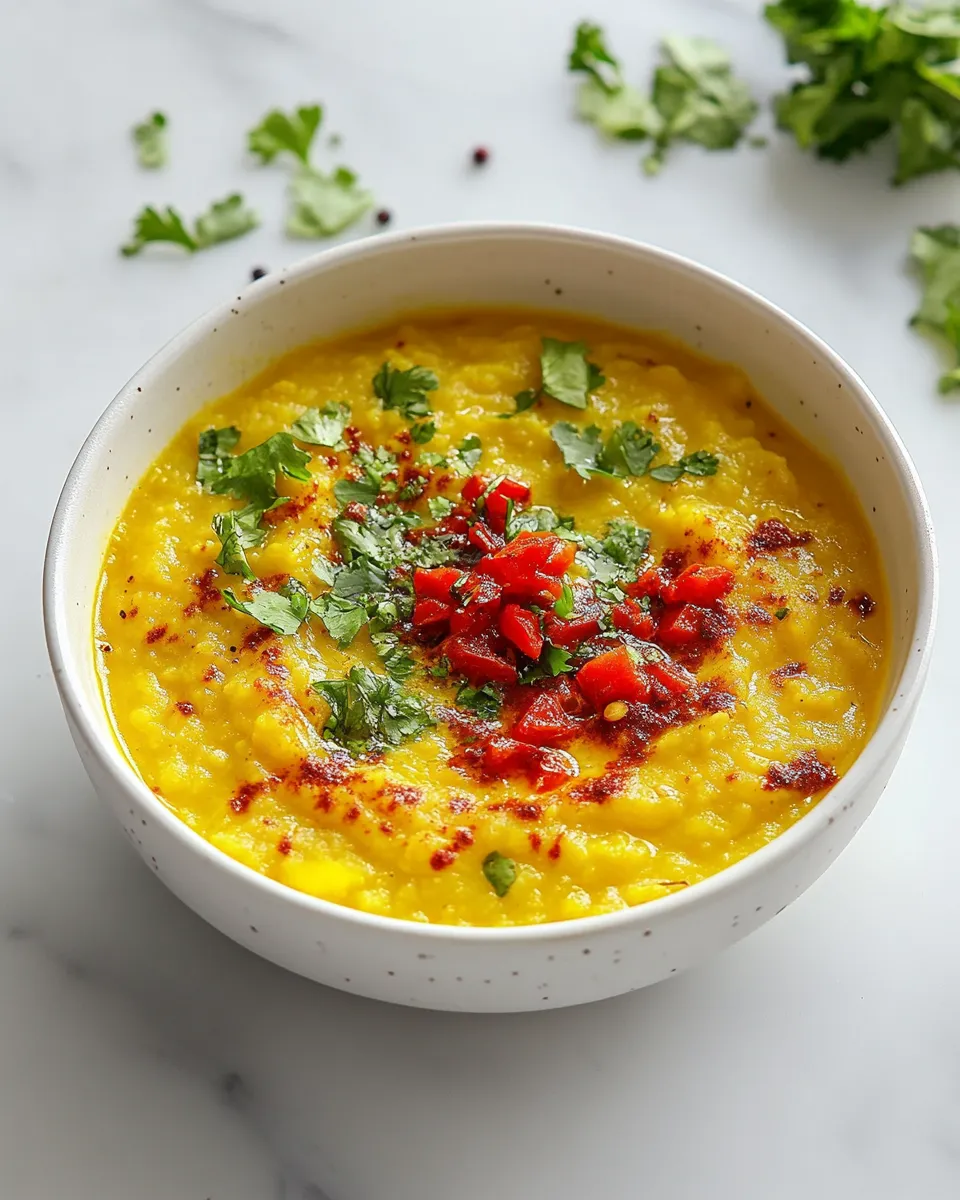
Dal Tadka Recipe
If you’re looking for a comforting, nutritious dish that warms the soul and fills the belly, look no further than this Dal Tadka recipe! This Indian classic features split pigeon peas, known as toor dal, which are cooked to creamy perfection and then tempered with a fragrant blend of spices. It’s simple to make, and the result is a hearty, flavorful dish that pairs beautifully with rice or naan. Let’s dive into the magic of this delightful recipe that’s bound to become a staple in your kitchen.
What Makes This Recipe Special
There’s something truly special about Dal Tadka. It’s not just a dish; it’s a warm hug in a bowl. The rich flavors of the spices combined with the creamy texture of the dal create a culinary experience that is both comforting and satisfying. What sets this recipe apart is the technique of tempering the spices in oil, which enhances their flavors and aromas. Each spoonful of this dal is infused with a symphony of taste, making it a favorite among family and friends.
What’s in the Bowl
In order to prepare this delicious Dal Tadka, you’ll need the following ingredients:
- 1 cup toor dal (split pigeon peas) – The star of the dish, providing protein and a creamy texture.
- 3 cups water for cooking dal, plus more if needed – Essential for cooking the dal to the right consistency.
- 1/2 teaspoon turmeric powder – Adds color and a hint of earthy flavor.
- 1 teaspoon salt (adjust to taste) – Enhances the overall flavor.
- 2 tablespoons neutral oil – Used for tempering the spices.
- 3/4 teaspoon cumin seeds – Provides a warm, nutty flavor.
- 3 garlic cloves, minced – Adds a pungent, aromatic quality.
- 2 1/2 teaspoons minced ginger – Brings warmth and spice.
- 1 green chili, chopped – For a touch of heat.
- 2 medium tomatoes, chopped – Adds acidity and freshness.
- 1/2 teaspoon garam masala – A complex spice blend that elevates the dish.
- 1/2 teaspoon red chili powder – For an extra kick.
- Chopped cilantro for garnish – Adds a fresh touch.
- Juice of 1 lemon – Brightens the dish with its acidity.
Tools & Equipment Needed
To make this Dal Tadka, you’ll need a few essential tools:
- Medium saucepan – For cooking the dal.
- Frying pan – For tempering the spices.
- Spatula – For stirring and mixing.
- Measuring cups and spoons – To ensure accuracy in your ingredients.
- Knife and chopping board – For preparing the vegetables.
- Serving bowl – To present your delicious Dal Tadka.
From Start to Finish: Dal Tadka Recipe
Let’s get cooking! Follow these step-by-step instructions to create your perfect Dal Tadka.
Step 1: Rinse the Dal
Start by rinsing the toor dal under cold running water until the water runs clear. This helps to remove any impurities and excess starch.
Step 2: Cook the Dal
In a medium saucepan, combine the rinsed dal with 3 cups of water and add the turmeric powder and salt. Bring to a boil over high heat, then reduce the heat to low and cover. Let it simmer for about 20-30 minutes, or until the dal is tender and creamy. If the dal thickens too much, you can add more water to reach your desired consistency.
Step 3: Prepare the Tempering
While the dal is cooking, heat the neutral oil in a frying pan over medium heat. Once hot, add the cumin seeds and let them sizzle for about 30 seconds until fragrant.
Step 4: Add Aromatics
Next, add the minced garlic, ginger, and chopped green chili to the pan. Sauté for 1-2 minutes until the garlic is golden and fragrant.
Step 5: Incorporate Tomatoes
Add the chopped tomatoes to the pan and cook for about 5-7 minutes, or until they soften and break down. Stir in the garam masala and red chili powder, cooking for an additional minute to meld the flavors.
Step 6: Combine Dal and Tempering
Once the dal is cooked, pour the tempered mixture from the frying pan into the saucepan with the dal. Stir well to combine and let it simmer for a few more minutes to allow the flavors to meld.
Step 7: Final Touches
Remove the dal from the heat and squeeze in the juice of one lemon. Garnish with chopped cilantro before serving.
Make It Your Way
Feel free to customize this Dal Tadka recipe to suit your taste preferences:
- Add a tablespoon of coconut cream for extra richness.
- Swap in different lentils, like red lentils or moong dal.
- Include vegetables, such as spinach or kale, for added nutrition.
- Adjust the heat by adding more or less green chili or red chili powder.
Testing Timeline
To get the best results, keep the following timeline in mind while preparing your Dal Tadka:
- Rinsing and soaking dal: 5 minutes
- Cooking dal: 20-30 minutes
- Preparing tempering: 10 minutes
- Combining everything: 5 minutes
- Total time: Approximately 45-55 minutes
Keep It Fresh: Storage Guide
If you have leftovers (which is rare because it’s so delicious!), here’s how to store them:
Allow the Dal Tadka to cool completely before transferring it to an airtight container. It can be stored in the refrigerator for up to 3 days. To reheat, simply warm it on the stovetop or in the microwave, adding a splash of water if it has thickened. For longer storage, you can freeze the Dal Tadka for up to 2 months. Thaw in the refrigerator overnight before reheating.
Quick Q&A
Can I use other types of lentils?
Yes! While this recipe uses toor dal, you can substitute with red lentils or moong dal. Just adjust the cooking time as needed, since different lentils have different cooking times.
Is Dal Tadka spicy?
The spice level can be adjusted based on your preference. Feel free to reduce the amount of green chili and red chili powder or omit them altogether for a milder flavor.
Can I make Dal Tadka ahead of time?
Absolutely! Dal Tadka tastes even better the next day as the flavors deepen. Just store it in the refrigerator and reheat when ready to serve.
What can I serve with Dal Tadka?
Dal Tadka pairs beautifully with steamed basmati rice, jeera rice, or warm naan and roti. You can also serve it alongside a fresh salad or raita for a complete meal.
Next Up in Your Queue
If you enjoyed this Dal Tadka recipe, you might also like these delicious recipes:
- Chana Masala – A hearty chickpea curry bursting with flavor.
- Palak Paneer – Creamy spinach and cheese dish that’s a classic Indian favorite.
- Vegetable Biryani – A fragrant rice dish loaded with spices and vegetables.
- Aloo Gobi – A comforting potato and cauliflower curry that’s quick to make.
Make It Tonight
Now that you have the full Dal Tadka recipe at your fingertips, it’s time to make it tonight! Gather your ingredients, follow the simple steps, and enjoy a bowl of warmth and flavor that’s sure to impress. Whether you’re cooking for yourself, your family, or friends, this Dal Tadka recipe is an easy and delicious way to bring a taste of India to your table. Happy cooking!
Dal Tadka Recipe
Ingredients
Equipment
Method
- Start by rinsing the toor dal under cold running water until the water runs clear.
- In a medium saucepan, combine the rinsed dal with 3 cups of water and add the turmeric powder and salt. Bring to a boil over high heat, then reduce the heat to low and cover. Let it simmer for about 20-30 minutes, or until the dal is tender and creamy.
- While the dal is cooking, heat the neutral oil in a frying pan over medium heat. Once hot, add the cumin seeds and let them sizzle for about 30 seconds until fragrant.
- Next, add the minced garlic, ginger, and chopped green chili to the pan. Sauté for 1-2 minutes until the garlic is golden and fragrant.
- Add the chopped tomatoes to the pan and cook for about 5-7 minutes, or until they soften and break down. Stir in the garam masala and red chili powder, cooking for an additional minute to meld the flavors.
- Once the dal is cooked, pour the tempered mixture from the frying pan into the saucepan with the dal. Stir well to combine and let it simmer for a few more minutes.
- Remove the dal from the heat and squeeze in the juice of one lemon. Garnish with chopped cilantro before serving.
Notes
- Allow the Dal Tadka to cool completely before transferring to an airtight container for storage.
- It can be stored in the refrigerator for up to 3 days.
- For longer storage, freeze the Dal Tadka for up to 2 months.