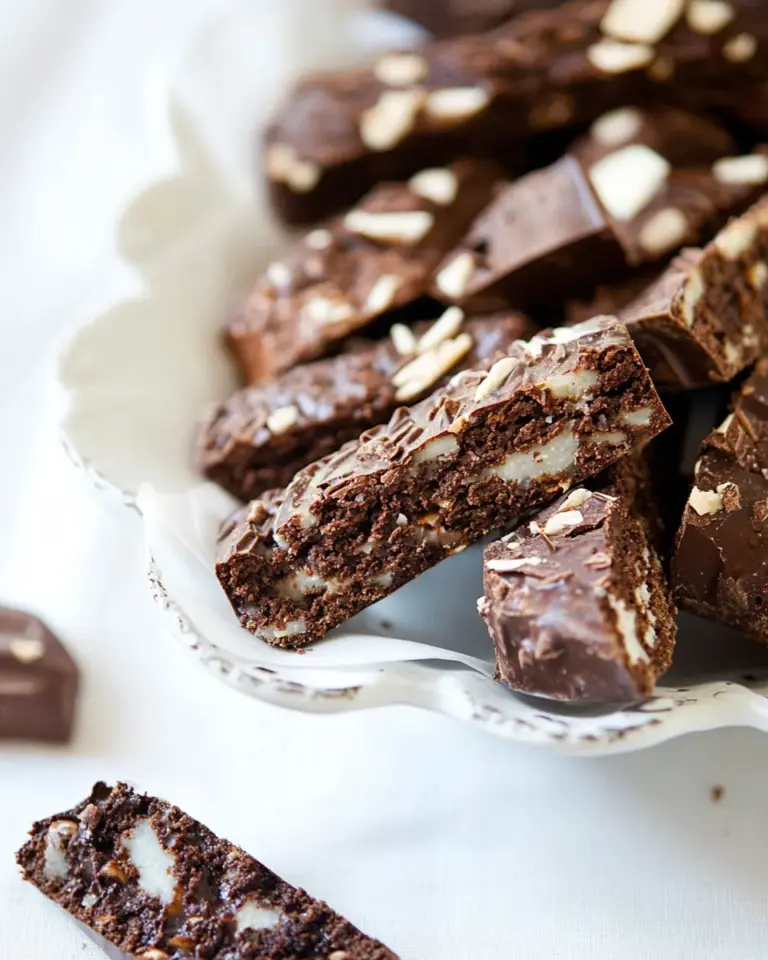
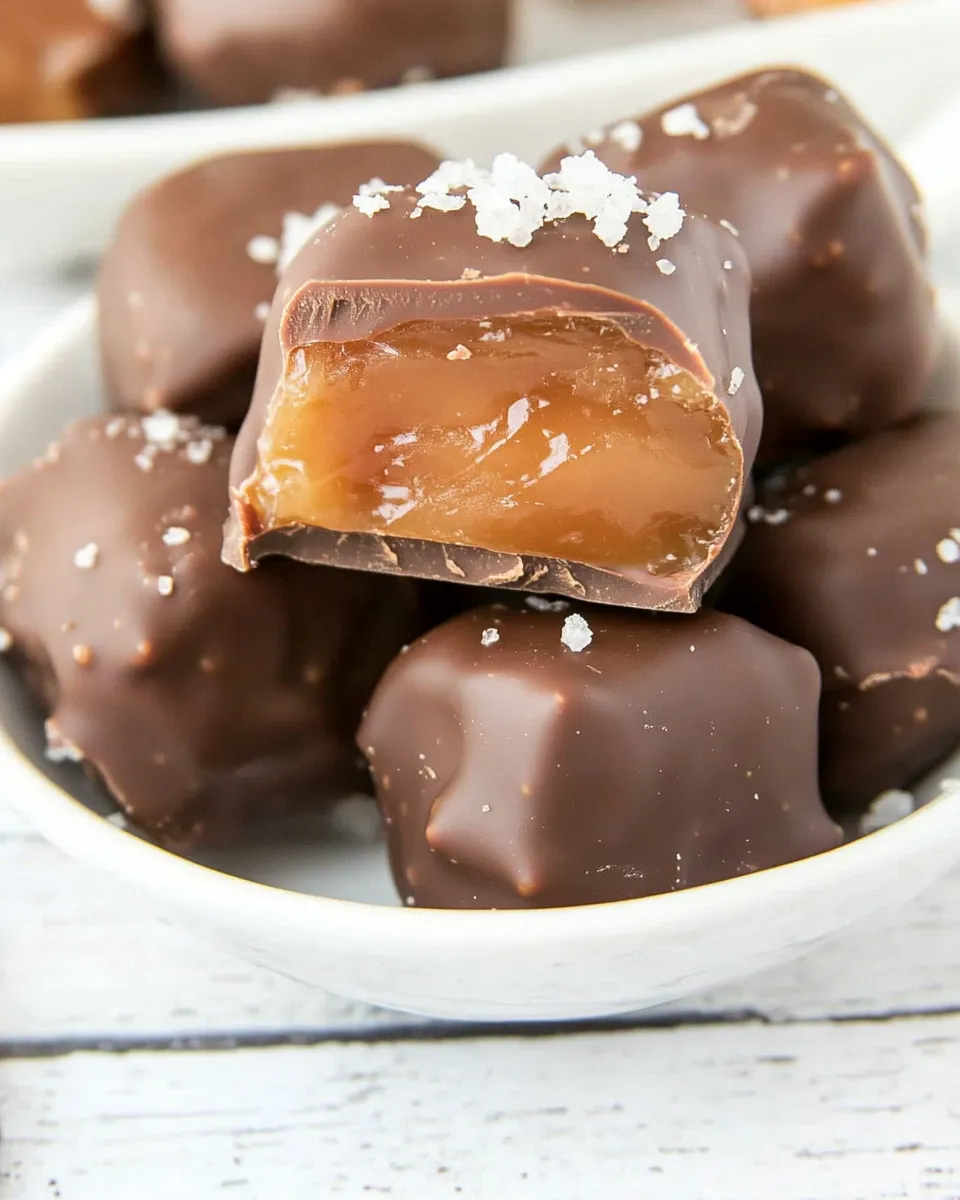
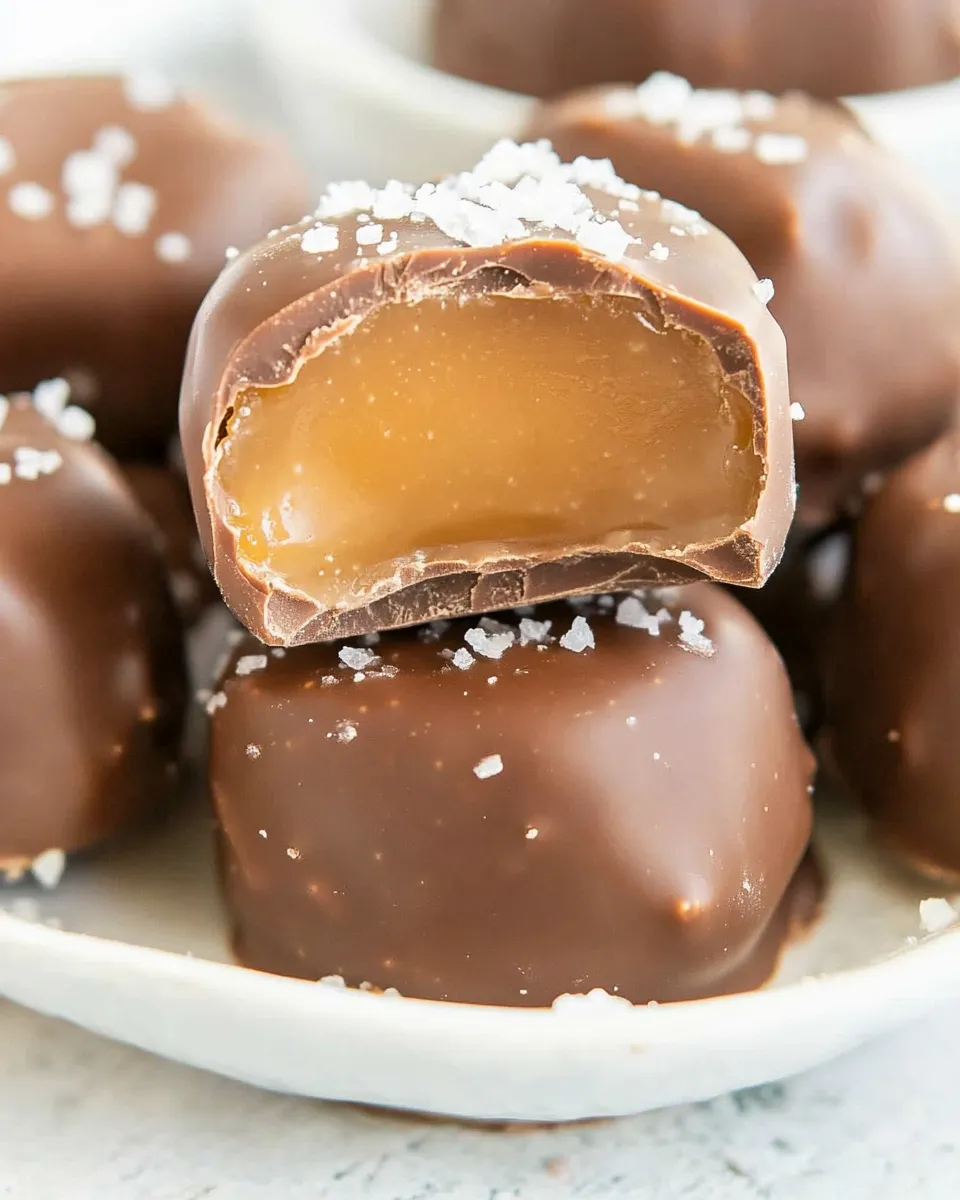
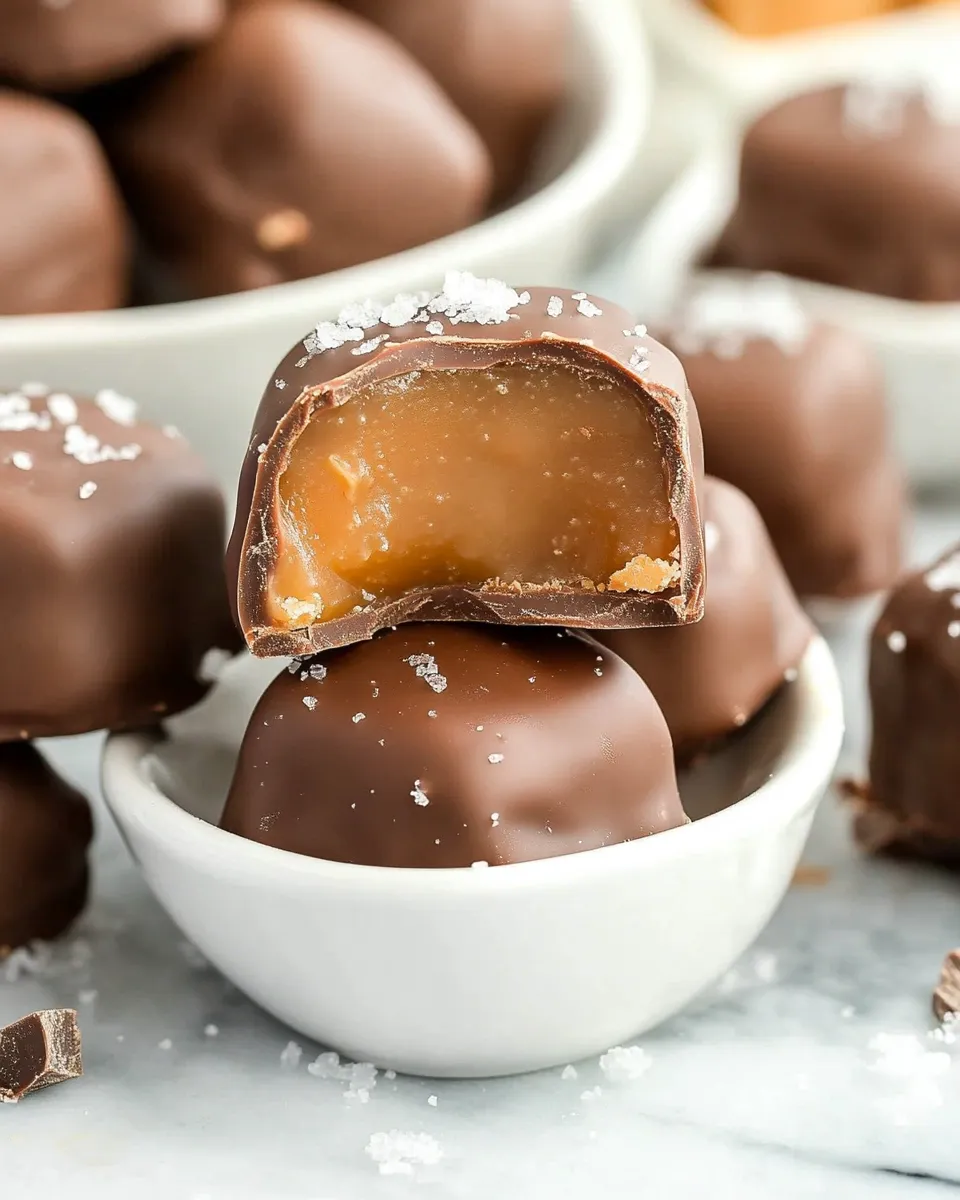
Salted Chocolate Covered Caramels
If you’re looking for a sweet treat that perfectly balances rich chocolate and buttery caramel, then you’ve stumbled upon the right recipe. These Salted Chocolate Covered Caramels are not only delightful to the taste buds but are also a feast for the eyes. Each bite is a combination of smooth, soft caramel enveloped in a luscious chocolate coating, topped with a sprinkle of sea salt to enhance the flavors. Perfect for gifting or enjoying at home, this recipe will surely become a staple in your dessert repertoire.
Why This Recipe is a Keeper

There are countless reasons to love these salted chocolate covered caramels. Firstly, they are incredibly easy to make—no fancy equipment required. Secondly, they are a crowd-pleaser, making them ideal for parties, holidays, or just a sweet indulgence after a long day. The best part? You can customize them to suit your taste or the season. With just a handful of ingredients, you’ll have a delightful batch of homemade treats that will impress anyone who tries them.
What Goes In
To make your own batch of Salted Chocolate Covered Caramels, you will need the following ingredients:
- 1 batch homemade soft caramels (approximately 80 bite-size caramels)
- 67 ounces Hershey’s chocolate bars (or other high-quality chocolate bars for melting)
- Sea salt for topping
These simple ingredients come together to create something truly special, so let’s dive in!
What You’ll Need (Gear)
Before you start, gather the following equipment to streamline your caramel-making process:
- Large saucepan – for melting the caramels
- Double boiler – for melting the chocolate
- Baking sheet – lined with parchment paper
- Fork or dipping tool – for dipping the caramels into chocolate
- Thermometer – to ensure the caramel is cooked to the right temperature (if making from scratch)
Having everything ready will make your cooking experience much smoother.
Step-by-Step: Salted Chocolate Covered Caramels
Step 1: Prepare the Caramels
If you’re making your own caramels, start by preparing your batch of homemade soft caramels. Follow your favorite recipe, ensuring you reach the right consistency. If you’re using store-bought, simply unwrap them and set them aside.
Step 2: Melt the Chocolate
In a double boiler, melt the Hershey’s chocolate bars until smooth and completely melted. Stir occasionally to ensure even melting. If you’re looking for the best melting chocolate, opt for high-quality brands, as they yield a creamier texture which is perfect for coating.
Step 3: Dip the Caramels
Once the chocolate is ready, use a fork or dipping tool to dip each caramel into the melted chocolate, ensuring they are fully coated. Tap off any excess chocolate before placing them on the prepared baking sheet lined with parchment paper.
Step 4: Add Sea Salt
While the chocolate is still wet, sprinkle a pinch of sea salt on top of each caramel. This is where the magic happens—the salt enhances the richness of the chocolate and the sweetness of the caramel.
Step 5: Let Them Set
Allow the chocolate-covered caramels to set at room temperature or place them in the refrigerator for quicker results. Once the chocolate has hardened, they are ready to be enjoyed!
Seasonal Flavor Boosts
These salted chocolate covered caramels can be easily customized for different seasons or occasions. Here are some fun ideas:
- Pumpkin Spice: Add a dash of pumpkin spice to the caramel mixture for a fall-inspired treat.
- Mint Chocolate: Mix in a few drops of peppermint extract with the chocolate for a refreshing mint flavor.
- Nutty Delight: Roll the caramels in crushed nuts before dipping in chocolate for added texture.
- Coconut Bliss: Sprinkle toasted coconut on top of the chocolate coating for a tropical twist.
These variations will keep your Salted Chocolate Covered Caramels exciting and new!
What Could Go Wrong
While making salted chocolate covered caramels is generally straightforward, a few hiccups could occur. Here’s what to watch out for:
- Chocolate Seizing: If water gets into the chocolate while melting, it may seize and become grainy. Make sure all your tools are dry.
- Caramel Hardening: If the caramel cooks for too long, it can become too hard. Keep an eye on the temperature.
- Uneven Coating: If the chocolate is too thick, it may not coat evenly. You can thin it out with a little coconut oil.
By keeping these tips in mind, you can avoid common pitfalls and enjoy your homemade treats!
Storage Pro Tips
To keep your Salted Chocolate Covered Caramels fresh and delicious, consider the following storage tips:
- Airtight Container: Store the caramels in an airtight container to prevent them from drying out.
- Cool, Dry Place: Keep them in a cool, dry area, away from direct sunlight to maintain their texture and flavor.
- Refrigeration: If you live in a warm climate, consider refrigerating them to prevent melting, but allow them to come to room temperature before serving for the best texture.
Following these tips will ensure your caramels remain delectable for days to come.
Frequently Asked Questions
Can I use dark chocolate instead of milk chocolate?
Absolutely! Dark chocolate adds a deeper flavor and pairs wonderfully with the sweetness of the caramel. Feel free to choose your favorite type of chocolate for coating.
How do I know when the caramel is done?
The caramel should reach a temperature of around 245°F to 250°F for a soft and chewy texture. A candy thermometer is the best way to ensure accuracy.
Can I freeze these caramels?
Yes, you can freeze salted chocolate covered caramels. Just make sure they are well-wrapped in plastic wrap and then placed in an airtight container. They can last up to three months in the freezer.
What is the best way to melt chocolate?
The best way to melt chocolate is using a double boiler method, which allows for gentle and even melting. If you don’t have a double boiler, you can use a microwave in short bursts, stirring in between, until fully melted.
Cook This Next
If you’re inspired to keep the sweet creations coming, here are some recipes you might enjoy:
- Butter Cake With Salted Caramel Buttercream Frosting Recipe
- Dulce De Leche Brown Butter Chocolate Chip Cookie Bars
These recipes are perfect complements to your salted chocolate covered caramels!
Bring It to the Table
Now that you have mastered the art of making Salted Chocolate Covered Caramels, it’s time to bring them to your next gathering or simply enjoy them at home with your loved ones. Their irresistible combination of flavors and textures is sure to bring smiles and satisfaction. Whether you’re serving them alongside a cup of coffee or wrapping them up as gifts, these caramels will undoubtedly be a hit. Happy indulging!
Salted Chocolate Covered Caramels
Ingredients
Equipment
Method
- Step 1: Prepare the Caramels - If you’re making your own caramels, start by preparing your batch of homemade soft caramels. Follow your favorite recipe, ensuring you reach the right consistency. If you’re using store-bought, simply unwrap them and set them aside.
- Step 2: Melt the Chocolate - In a double boiler, melt the Hershey's chocolate bars until smooth and completely melted. Stir occasionally to ensure even melting.
- Step 3: Dip the Caramels - Once the chocolate is ready, use a fork or dipping tool to dip each caramel into the melted chocolate, ensuring they are fully coated. Tap off any excess chocolate before placing them on the prepared baking sheet lined with parchment paper.
- Step 4: Add Sea Salt - While the chocolate is still wet, sprinkle a pinch of sea salt on top of each caramel. This enhances the richness of the chocolate and the sweetness of the caramel.
- Step 5: Let Them Set - Allow the chocolate-covered caramels to set at room temperature or place them in the refrigerator for quicker results. Once the chocolate has hardened, they are ready to be enjoyed!
Notes
- Store in an airtight container to keep them fresh.
- Keep in a cool, dry place away from sunlight.
- Consider refrigerating in warm climates for optimal texture.